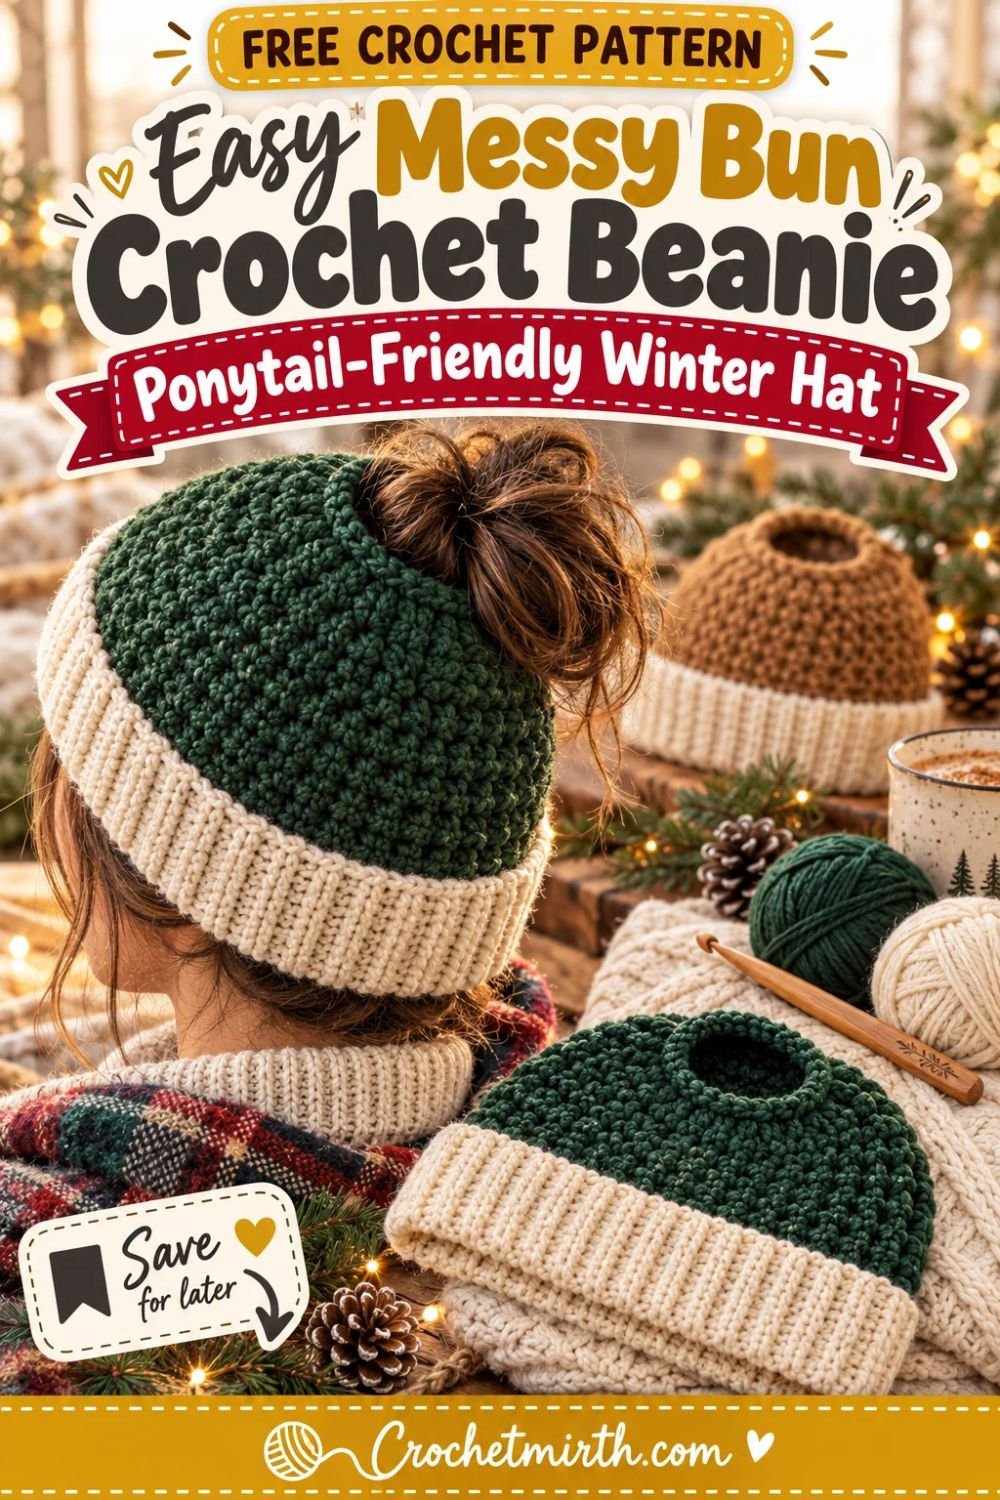
Crochet Messy Bun Beanie Pattern – Easy Ponytail Winter Hat
A warm winter hat is great—until you’re wearing a high ponytail or messy bun.
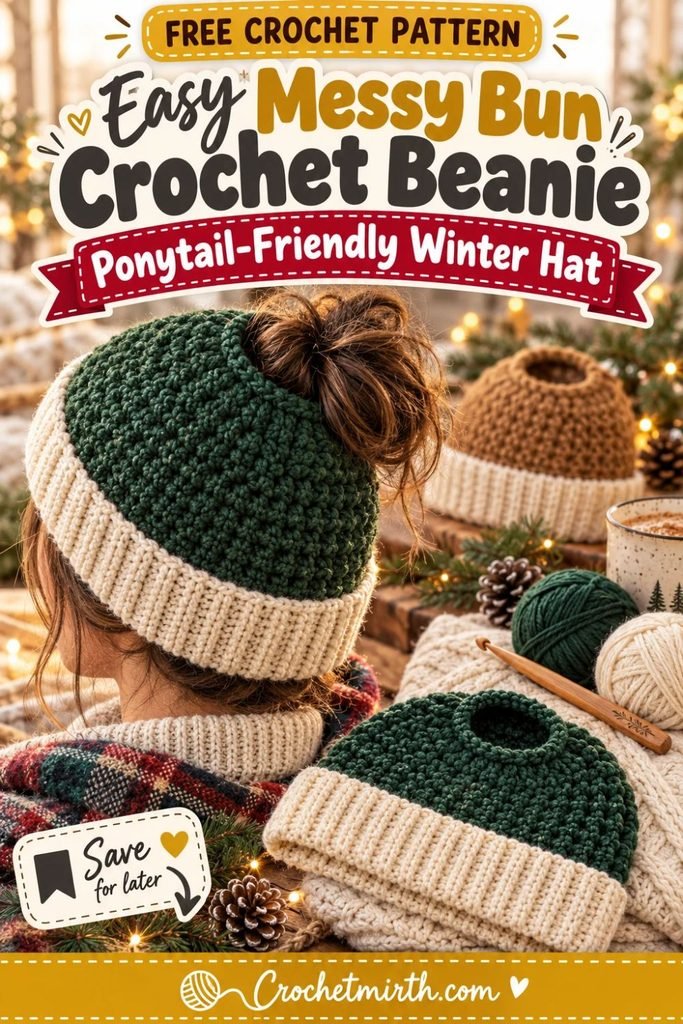
This crochet messy bun beanie pattern solves that problem with a comfortable opening built directly into the crown.
Instead of squeezing your hair under the hat, simply pull your ponytail or bun through the opening and keep the rest of your head and ears covered.
The design combines a wide fold-over ribbed cuff with a softly textured body worked in an easy alternating single-crochet and double-crochet stitch.
The hat is worked bottom up, beginning with the brim and gradually decreasing toward the crown opening.
No separate hair elastic is required.
The finished opening is reinforced with crochet stitches so it stays neat and flexible.
Why You’ll Love This Messy Bun Beanie
This pattern features:
- Built-in ponytail opening
- No elastic required
- Wide fold-over ribbed brim
- Warm worsted-weight yarn
- Easy textured body
- Bottom-up construction
- Simple crown decreases
- Adult 21–23 inch fit
- No pom-pom needed
- Practical everyday winter style
The texture is intentionally different from both a classic ribbed beanie and a waffle-stitch hat.
Skill Level
Advanced Beginner
You’ll need to know:
- Chain
- Single crochet
- Single crochet back loop only
- Double crochet
- Half double crochet
- Half double crochet two together
- Slip stitch
- Working in joined rounds
- Working flat in rows
- Simple seaming
Materials
Use approximately:
200–240 yards Category 4 worsted-weight yarn
For the sample:
Main Color: deep forest green
Cuff: warm cream
Approximate yarn amounts:
140–170 yards forest green
60–70 yards cream
You’ll also need:
- 5.0 mm crochet hook
- 4.5 mm crochet hook
- Yarn needle
- Scissors
- Measuring tape
- Stitch markers
Finished Size
Designed for an average adult head:
21–23 inches circumference
Finished brim circumference before stretching:
18½–19½ inches
Finished height from lower folded brim to crown opening:
approximately 8½ inches
Crown opening:
approximately 2½–3 inches across
The hat uses negative ease so it stretches comfortably around the head.
Gauge
Using the 5 mm hook in the textured body stitch:
Approximately:
14 stitches = 4 inches
Check your gauge before starting the body.
The brim itself should be sized by measurement rather than row count.
Crochet Abbreviations
This pattern uses US terminology.
ch – chain
sc – single crochet
dc – double crochet
hdc – half double crochet
hdc2tog – half double crochet two together
sc BLO – single crochet in back loop only
sl st – slip stitch
st / sts – stitch / stitches
rnd – round
Textured Body Stitch
The main hat uses a simple alternating stitch:
sc in next stitch, dc in next stitch
across.
On the following round, the same alternating sequence is worked again after turning.
This creates a softly pebbled texture because the shorter and taller stitches alternate across the fabric.
It is sometimes called a lemon-peel-style texture.
Construction Overview
The beanie has four sections:
- Ribbed fold-over brim
- Straight textured body
- Crown decrease section
- Reinforced ponytail opening
You’ll start with the cream ribbing.
Then you’ll attach the forest-green body directly around the folded cuff.
PART 1: Crochet the Ribbed Cuff
Using warm-cream yarn and the:
4.5 mm hook
Ch:
21
Row 1
Sc in the second chain from the hook and across.
20 sts
Ch 1 and turn.
Row 2
Working in the:
back loop only
Sc across.
20 sts
Ch 1 and turn.
Continue
Repeat Row 2 until the strip measures approximately:
18½–19 inches long
when relaxed.
Depending on your tension, this may be around:
72–78 rows.
Measure rather than relying only on row count.
Test the Brim
Wrap the strip around your head.
It should feel snug but comfortable.
It must stretch enough to fit a:
21–23 inch head
without feeling loose.
Join the Brim
Bring the two short ends together.
Make sure the strip isn’t twisted.
Slip stitch the ends together or sew them with a yarn needle.
You now have one tall ribbed ring.
Fold the Cuff
Fold the ring in half so the two long edges meet.
The folded cuff should be approximately:
2½ inches deep.
Place stitch markers at four equally spaced points.
PART 2: Add the Main Body
Switch to:
forest-green yarn
and the:
5.0 mm hook.
Join through both layers of the folded cuff.
Setup Round
Ch 1.
Work:
66 sc evenly around
through both long edges of the folded cuff.
Join with a sl st.
66 sts
The setup round permanently holds the cuff folded.
Check the Stretch
Before continuing, stretch the cuff gently.
The green setup round should not prevent it from expanding.
If it feels too tight, undo it and work the stitches more loosely.
PART 3: Begin the Textured Body
Because the stitch repeat uses two stitches, 66 works perfectly.
Round 1
Ch 1 and turn.
Repeat:
sc in next st, dc in next st
around.
Join.
66 sts
Round 2
Ch 1 and turn.
Repeat:
sc in next st, dc in next st
around.
Join.
66 sts
Rounds 3–12
Repeat Round 2.
Maintain:
66 sts
throughout.
The textured section should measure approximately:
4½–5 inches above the folded brim.
Check the Hat Height
From the lower edge of the folded cuff to the top of Round 12, the hat should measure around:
7–7½ inches.
Now we’ll begin shaping the crown.
PART 4: Crown Setup
Switch from the textured stitch to half double crochet for the decrease section.
This gives cleaner, more predictable shaping.
Crown Round 1
Ch 1 and turn.
Hdc in every stitch around.
Join.
66 sts
PART 5: Decrease Toward the Ponytail Opening
Unlike a normal beanie, we are not closing the crown completely.
We’ll stop with approximately:
30 stitches
remaining.
Decrease Round 1
Repeat:
hdc in next 9 sts, hdc2tog
around.
Repeat 6 times.
60 sts
Decrease Round 2
Repeat:
hdc in next 8 sts, hdc2tog
around.
54 sts
Decrease Round 3
Repeat:
hdc in next 7 sts, hdc2tog
around.
48 sts
Decrease Round 4
Repeat:
hdc in next 6 sts, hdc2tog
around.
42 sts
Decrease Round 5
Repeat:
hdc in next 5 sts, hdc2tog
around.
36 sts
Decrease Round 6
Repeat:
hdc in next 4 sts, hdc2tog
around.
30 sts
Stop decreasing here.
Do not close the crown.
Check the Ponytail Opening
Lay the hat flat.
The opening should measure approximately:
2½–3 inches across
depending on gauge.
This is large enough for many high ponytails or loose messy buns while remaining small enough to keep the crown stable.
PART 6: Reinforce the Opening
Switch to the:
4.5 mm hook.
Opening Round 1
Ch 1.
Sc in each stitch around.
Join.
30 sts
Opening Round 2
Working in the:
back loop only
Sc in every stitch around.
Join.
30 sts
Fasten off.
Weave in the yarn end securely.
The smaller hook and two sc rounds help the opening maintain its shape.
Your Messy Bun Beanie Is Finished
Try the hat on.
Pull your ponytail or bun gently through the opening.
Fold the cream cuff evenly around the head.
The crown opening should sit around the base of the ponytail rather than floating above it.
How to Wear the Hat
Create your ponytail or messy bun first.
Hold the beanie with the crown opening facing upward.
Pull the ponytail through the opening.
Then pull the rest of the beanie down around your ears.
Adjust the cuff.
This is usually easier than putting the hat on first and trying to create the hairstyle afterward.
Forest Green + Cream Version
The Crochetmirth sample uses:
Deep forest-green body
with:
warm-cream folded cuff
This gives strong contrast while keeping the hat easy to style with winter coats.
Cranberry Version
Use:
deep cranberry body
with:
cream cuff.
This works beautifully from Christmas through the rest of winter.
Warm Camel Version
Crochet the body in warm camel brown.
Use:
cream or oatmeal ribbing.
This creates a neutral everyday hat.
Charcoal Version
Use charcoal gray for the body.
Pair it with:
- Cream
- Camel
- Light gray
for the brim.
This version has a particularly classic winter look.
Sage Green Version
Muted sage gives the beanie a softer casual appearance.
Use a warm cream cuff.
All-One-Color Beanie
Make the brim and body in the same yarn.
Even without contrast, the difference between:
vertical cuff ribbing
and:
pebbled body texture
keeps the design visually interesting.
Make It Without a Folded Brim
For a lighter hat:
Start with:
Ch 11
instead of Ch 21.
Work:
10 sc BLO
per row.
Join the strip when it reaches the same circumference.
Don’t fold it.
Attach the body directly to the single ribbed edge.
Make the Brim Deeper
For extra ear coverage:
Start with:
Ch 25
instead of Ch 21.
This creates a folded cuff approximately:
3 inches deep.
Opening Size Options
Hair thickness varies, so the crown opening can be adjusted.
Smaller Ponytail Opening
Continue one additional decrease round from 30 stitches.
Decrease evenly to:
24 sts.
Finish with the two sc reinforcement rounds.
This works better for thinner ponytails.
Standard Opening
Stop at:
30 sts.
This is the written sample.
Larger Messy Bun Opening
Stop decreasing at:
36 sts.
Then work the reinforcement rounds.
This gives more space for thick curly hair or a fuller bun.
Why No Hair Elastic?
Many messy bun beanies are crocheted directly around a ponytail elastic.
That approach works, and both older and current patterns still use it.
For this Crochetmirth design, the opening is entirely crocheted instead.
That means:
- No elastic to stretch out
- No special supply to replace
- Easier washing
- Easier opening-size adjustment
Optional Elastic Version
If you prefer a more gripping opening, you can attach a fabric-covered ponytail elastic around the final crochet edge.
Use matching yarn and small whip stitches.
Do not use bare rubber bands.
Turn It Into a Regular Beanie
Want a closed hat instead?
Continue decreasing after the 30-stitch round.
Reduce to:
24 → 18 → 12 → 6
and gather the final stitches closed.
This lets the same general pattern become a standard winter beanie.
Ponytail Height
This design works best for:
- High ponytails
- Mid-high ponytails
- Messy buns
It isn’t intended for a very low ponytail at the nape of the neck.
A low-ponytail hat requires the opening to be placed farther down the back rather than at the crown.
Make It Slightly Slouchy
Add:
2–4 additional textured rounds
before beginning crown shaping.
This gives the hat more fabric around the upper head.
Don’t add too much length or the ponytail opening may sit too high.
Adult Small Size
For a:
20–21 inch head
make the brim approximately:
17½–18 inches
before joining.
Work:
60 stitches
evenly around the cuff.
The textured pattern remains divisible by two.
Decrease the crown evenly until approximately:
28–30 stitches
remain.
Adult Medium
The written pattern uses:
66 body stitches
and fits approximately:
21–23 inches.
Adult Large
For approximately:
23–24 inch head circumference
make the relaxed brim approximately:
20–20½ inches.
Work:
72 stitches
around.
Decrease evenly until around:
32–36 stitches
remain, depending on desired opening size.
Thick or Curly Hair
If your bun is particularly full, don’t automatically make the entire hat larger.
Keep the brim sized to your head.
Instead, make only the:
crown opening larger.
This preserves the correct fit around the ears.
Why Worsted Yarn?
Worsted-weight yarn gives enough warmth for winter without creating an excessively bulky crown around the ponytail.
It’s also widely used in messy-bun designs; current examples include worsted versions using approximately 4–5.5 mm hooks.
Best Yarn Types
Acrylic
Acrylic is:
- Affordable
- Warm
- Easy to wash
- Available in many colors
Wool Blend
A wool/acrylic blend adds warmth while remaining easier to care for than many pure-wool yarns.
Merino Blend
A smooth merino blend can create a softer premium hat.
Avoid Stiff Cotton
Cotton can work, but a dense cotton beanie may feel heavier and less elastic than wool or acrylic.
Matching Winter Set
Pair the messy bun beanie with:
- Fingerless gloves
- Texting gloves
- Ear warmer
- Chunky scarf
- Keyhole scarf
Using the same forest-green yarn creates a coordinated winter gift set.
Messy Bun Beanie as a Gift
This hat makes a particularly useful handmade gift for someone who often wears their hair up.
Before making it, it’s helpful to know whether they usually wear:
- Thin ponytail
- Thick ponytail
- Large messy bun
That tells you which crown-opening size is most practical.
Common Beginner Problems
Opening Is Too Small
Undo the final decrease round or make the reinforcement rounds with a slightly larger hook.
Opening Is Too Large
Add one additional decrease round before reinforcing it.
Hat Is Too Loose Around the Head
The ribbed strip was probably too long.
Hat brims need negative ease.
Body Looks Lopsided
Turn after each joined round as written.
This helps prevent the seam from shifting strongly in one direction.
Texture Is Hard to See
Use a smooth medium-tone yarn.
Very dark fuzzy yarn can hide stitch definition.
Crown Decreases Create Gaps
Keep your hdc2tog stitches firm but not tight.
A smaller hook can be used for the crown if necessary.
Ponytail Opening Stretches Over Time
The final two single-crochet rounds can be worked with a smaller hook to add structure.
Blocking
Heavy blocking isn’t necessary.
Lightly dampen the hat if needed.
Shape the brim.
Round the crown with your hands.
Make sure the opening stays circular.
Do not stretch the opening larger while drying.
Washing
Follow your yarn manufacturer’s instructions.
If the hat contains no elastic or pom-pom, washing is especially simple.
Reshape the crown opening while damp.
Lay flat to dry when appropriate for your yarn.
Frequently Asked Questions
What yarn weight is used?
Category 4 worsted-weight yarn.
What hook size is used?
5 mm for the body and 4.5 mm for the cuff and opening.
What head size does it fit?
Approximately 21–23 inches.
How large is the ponytail opening?
Approximately 2½–3 inches across.
Does the pattern use a hair elastic?
No.
Can I add one?
Yes, optionally.
Can I make the opening larger?
Yes. Stop the crown decreases earlier.
Can I make this into a regular closed beanie?
Yes. Continue decreasing and gather the crown closed.
Is this the same texture as the waffle beanie?
No. This design uses alternating sc and dc for a softer pebbled texture.
Can beginners make it?
Yes. A confident beginner comfortable decreasing in rounds should be able to make it.
Final Thoughts
A messy bun beanie is one of those crochet projects where a small design change makes the finished hat much more practical.
This crochet messy bun beanie pattern keeps the ears and head warm while leaving a comfortable opening for a high ponytail or bun.
The wide cream cuff provides a snug fit.
The forest-green textured body adds visual interest without complicated stitches.
And the fully crocheted crown opening means there is no elastic to replace later.
Make one for yourself, use cranberry for a Christmas gift, or crochet neutral camel and charcoal versions for everyday winter wear.
Save this easy ponytail crochet beanie pattern for your winter project list!