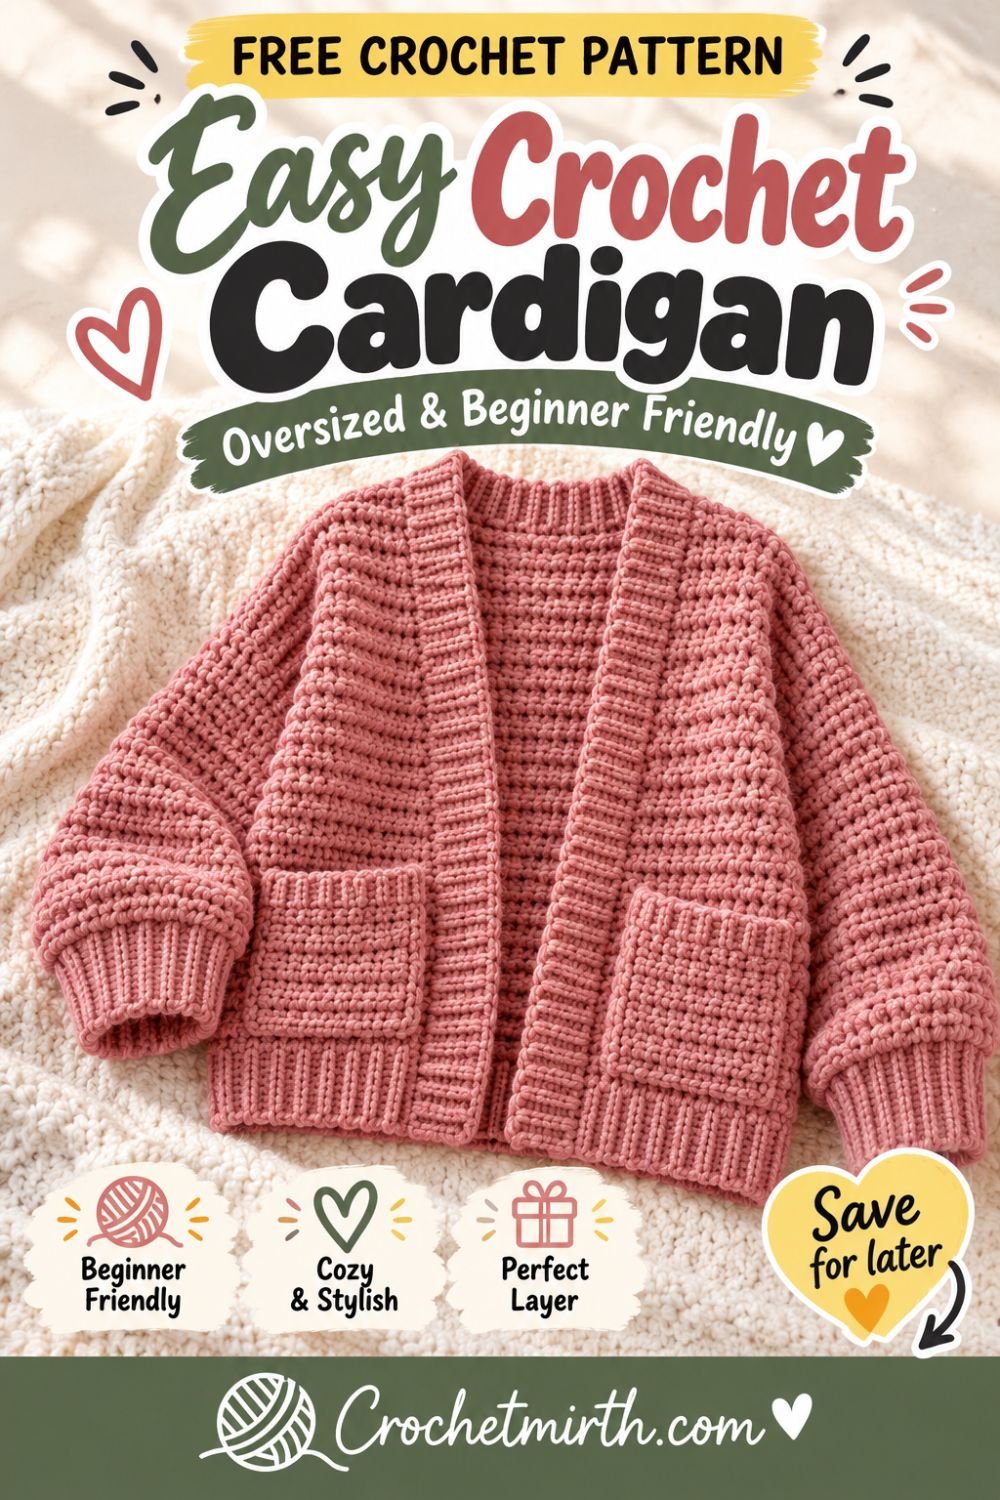
Easy Crochet Cardigan Pattern – Oversized Cozy Cardigan for Beginners
If you’ve already crocheted scarves, hats, or blankets and you’re ready to make your first garment, this easy crochet cardigan pattern is a great next step.
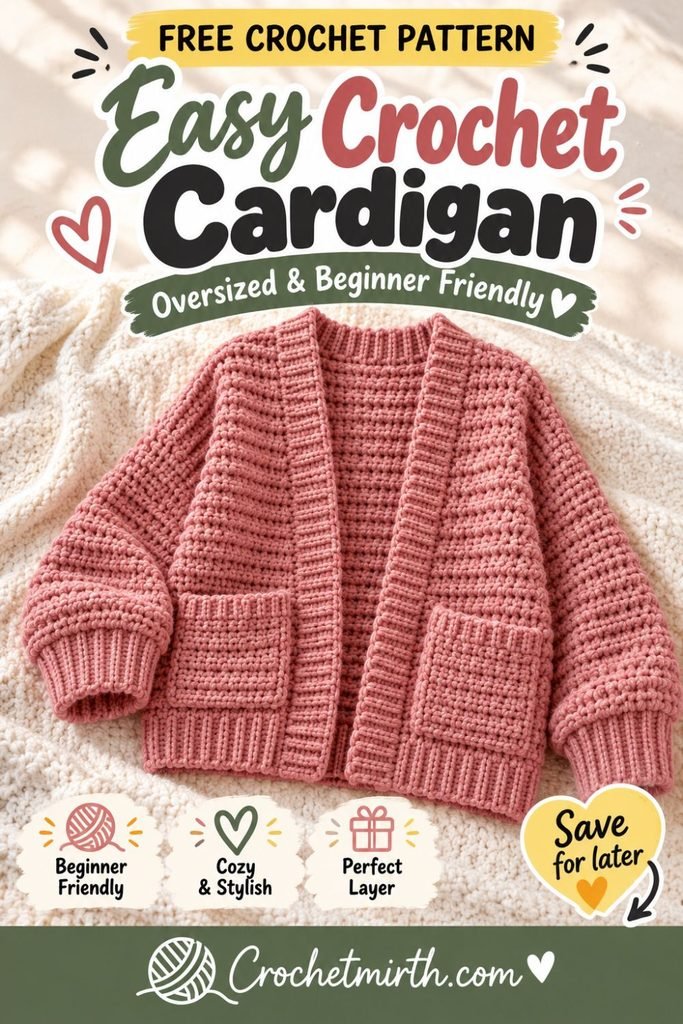
The construction is intentionally simple.
Instead of complicated shaping, you’ll crochet:
- One rectangular back panel
- Two rectangular front panels
- Two simple sleeve panels
- Two stretchy ribbed cuffs
- Two optional patch pockets
Then you’ll join the pieces together and add an easy border around the open front.
The relaxed drop-shoulder construction means there are no shaped sleeve caps or difficult armhole decreases.
The finished cardigan has a cozy oversized silhouette that’s easy to layer over T-shirts, dresses, turtlenecks, or long-sleeve tops from fall through winter.
Why You’ll Love This Crochet Cardigan
This cardigan is:
- Beginner-friendly
- Made mostly from rectangles
- Worked flat
- Oversized and comfortable
- Designed with drop shoulders
- Easy to resize
- Made with simple repetitive stitches
- Finished with cozy ribbed cuffs
- Perfect for fall and winter
- Easy to customize with pockets or buttons
It’s an excellent first cardigan if traditional sweater construction feels intimidating.
Skill Level
Beginner / Advanced Beginner
You should know how to:
- Make a slip knot
- Chain
- Half double crochet
- Work in the back loop only
- Single crochet
- Turn your work
- Slip stitch
- Sew simple seams
- Work evenly along an edge
- Fasten off
- Weave in ends
Materials
Yarn
Approximately 1,600–1,900 yards of Category 4 Aran or worsted-weight yarn for the Adult Medium/Large sample.
Larger sizes and longer cardigans will require additional yarn.
Choose yarn with good softness and drape.
Good options include:
- Soft acrylic
- Wool
- Wool/acrylic blends
- Washable merino blends
- Acrylic/alpaca blends
Crochet Hooks
5.5 mm crochet hook for the main cardigan.
Optional:
5.0 mm hook for slightly firmer cuffs and edging.
Other Supplies
- Yarn needle
- Scissors
- Measuring tape
- Stitch markers
- Blocking mats and pins, optional
Crochet Abbreviations
This pattern uses US terminology.
ch – chain
hdc – half double crochet
sc – single crochet
sl st – slip stitch
st – stitch
sts – stitches
BLO – back loop only
Finished Size
The written sample produces an oversized Adult Medium/Large cardigan.
Approximate finished measurements:
Finished bust: 48 inches
Back width: 24 inches
Each front panel: 12 inches
Body length: 27 inches
Upper sleeve width: approximately 18 inches
Sleeve length before cuff: approximately 19 inches
Cuff depth: approximately 3 inches
The cardigan is intended to have generous positive ease.
Gauge
Approximately:
12 hdc = 4 inches
9 rows = 4 inches
Make a gauge swatch before beginning.
For garments, even a small gauge difference can significantly change the final fit.
Choosing Your Cardigan Size
An oversized cardigan usually looks best with approximately:
6–10 inches of positive ease
Positive ease means the finished garment is larger than your actual bust measurement.
For example:
Actual bust:
38 inches
Add:
8 inches
Desired finished bust:
46 inches
You could round that to:
46–48 inches
for a relaxed fit.
Simple Finished Bust Guide
| Body Bust | Suggested Finished Cardigan |
|---|---|
| 30–32 in | 38–40 in |
| 34–36 in | 42–44 in |
| 38–40 in | 46–48 in |
| 42–44 in | 50–52 in |
| 46–48 in | 54–56 in |
| 50–52 in | 58–60 in |
These are only starting points.
Choose more or less ease depending on how oversized you want the cardigan.
Made-to-Measure Formula
A simple way to customize this cardigan is:
Desired finished bust ÷ 2 = back panel width
Then:
Back width ÷ 2 = width of each front panel
For example:
Finished bust:
48 inches
Back:
24 inches
Each front:
12 inches
This keeps the basic proportions simple.
Main Stitch Pattern
The body uses half double crochet worked in the back loop only.
This creates soft raised lines while keeping the pattern extremely repetitive.
How to Work HDC BLO
Look at the top of your previous stitch.
You’ll see a V.
Instead of inserting your hook through both loops, insert it only through the loop farthest away from you.
Then complete a normal half double crochet.
This creates a raised ridge across the fabric.
BACK PANEL
Ch 73.
Row 1
Hdc in the second chain from the hook.
Hdc across.
72 sts
Ch 1 and turn.
Row 2
Working in the back loop only, hdc across.
72 sts
Ch 1 and turn.
Row 3 and Beyond
Repeat Row 2 until the panel measures approximately:
27 inches long
At the sample gauge, this will be around:
60–61 rows
Fasten off.
Check the Back Panel
The finished back should measure approximately:
24 inches wide × 27 inches long
Measurements are more important than exact row counts.
FIRST FRONT PANEL
Ch 37.
Row 1
Hdc in second chain from hook.
Hdc across.
36 sts
Ch 1 and turn.
Row 2
Hdc BLO across.
36 sts
Ch 1 and turn.
Continue
Repeat Row 2 until the panel measures:
27 inches long
Fasten off.
SECOND FRONT PANEL
Make another panel exactly the same.
You now have:
- 1 back panel
- 2 front panels
Compare Your Panels
Lay the two front pieces together.
They should be identical.
Then place them beside the back.
Two front panels placed side by side should approximately equal the width of the back panel.
Block the Body Panels
Blocking can help make assembly easier.
Gently shape the pieces to:
Back: 24 × 27 inches
Fronts: 12 × 27 inches each
Allow them to dry completely before sewing.
JOIN THE SHOULDERS
Lay the back panel flat.
Place the two front panels on top.
Align:
- Outer edges
- Bottom hems
- Top edges
The inner edges of the front panels should face the center.
Mark the Neck Opening
Leave approximately:
8 inches
open across the center back neckline.
That leaves about:
8 inches
of shoulder seam on each side.
Pin with stitch markers.
Seam the Shoulders
Using matching yarn and a yarn needle, seam each shoulder.
You can use:
- Mattress stitch
- Whip stitch
- Slip stitch seam
Keep the seam relaxed.
Check the Neckline
Before securing all yarn ends, try the body over your shoulders.
The neckline should feel comfortable.
If it’s too small:
Undo a little of each shoulder seam.
If it’s too large:
Extend the shoulder seams slightly.
CROCHET THE SLEEVES
Make 2.
Ch 55.
Sleeve Row 1
Hdc in second chain from hook.
Hdc across.
54 sts
Ch 1 and turn.
Sleeve Row 2
Hdc BLO across.
54 sts
Ch 1 and turn.
Continue
Repeat Row 2 until the sleeve measures approximately:
19 inches long
At the sample gauge, this will be about:
42–43 rows
Fasten off.
Make another identical sleeve.
Finished Sleeve Measurements
Each rectangle should measure approximately:
18 inches wide
and
19 inches long
The 18-inch edge attaches to the cardigan body.
The 19-inch measurement runs from shoulder toward wrist.
Why Straight Sleeves Work
The cardigan uses relaxed drop shoulders.
That means we don’t need to shape a traditional sleeve cap.
The wide rectangular sleeve attaches directly to the body.
The ribbed cuff later gathers the wrist end slightly.
ATTACH THE SLEEVES
Lay the cardigan body completely open.
Find the center of one 18-inch sleeve edge.
Place a stitch marker there.
Match that marker to the shoulder seam.
Pin the Sleeve
Pin approximately:
9 inches
of sleeve edge along the front panel.
Then pin the remaining:
9 inches
along the back panel.
Sew the sleeve securely in place.
Repeat on the second side.
SEAM THE CARDIGAN
Fold the cardigan so the front panels lie over the back.
Match the sleeve edges.
Beginning at one wrist:
Sew along the sleeve underside.
Continue through the underarm.
Then continue down the cardigan side to the lower hem.
Repeat on the opposite side.
Turn the cardigan right side out.
Try It On
Before adding the cuffs and borders, check:
- Body width
- Overall length
- Armhole comfort
- Sleeve length
- Shoulder placement
This is the easiest stage for making small adjustments.
RIBBED CUFFS
Make 2.
Using your 5 mm hook if desired:
Ch 10.
Cuff Row 1
Sc in second chain from hook.
Sc across.
9 sts
Ch 1 and turn.
Cuff Row 2
Sc BLO across.
9 sts
Ch 1 and turn.
Continue
Repeat Row 2 until the strip stretches comfortably around your wrist.
Do not make it loose.
The finished cuff should measure approximately:
3 inches deep
Join the Cuff
Bring the first and final rows together.
Slip stitch or sew them together.
You now have a ribbed ring.
Repeat for the second cuff.
Attach the Cuffs
Place the cuff around the sleeve opening.
Match:
Cuff seam → Sleeve seam
The sleeve opening will be wider than the cuff.
Stretch the ribbing gently while sewing it around the sleeve.
Distribute the extra sleeve fabric evenly.
Repeat for the second sleeve.
FRONT BORDER AND COLLAR
The border runs:
Up the first front edge.
Around the back neckline.
Down the second front edge.
Border Row 1
Join yarn at the lower corner of one front panel.
Ch 1.
Work sc evenly up the front.
Continue around the back neckline.
Then work down the opposite front edge.
Fasten off.
Border Row 2
Rejoin at the same lower corner.
Work sc BLO across the entire border.
Fasten off.
Continue the Border
Repeat the BLO row until the border measures approximately:
2–2½ inches wide
This creates a polished ribbed opening.
Make a Wider Shawl Collar
For a cozier look, continue until the border reaches:
4–5 inches
around the neckline.
A wider border creates more warmth and gives the cardigan a relaxed shawl-collar appearance.
OPTIONAL POCKETS
Make 2.
Ch 25.
Pocket Row 1
Hdc in second chain from hook.
Hdc across.
24 sts
Ch 1 and turn.
Pocket Rows
Continue with hdc BLO until the pocket measures approximately:
8 inches tall
Fasten off.
Pocket Measurements
Aim for approximately:
8 × 8 inches
You can make them smaller if you prefer.
Add a Ribbed Pocket Top
Join yarn across the top edge.
Work:
2–3 rows of sc BLO
for a decorative ribbed finish.
Position the Pockets
Put the cardigan on.
Place your hands where they naturally rest.
Mark that position.
Pin both pockets evenly to the front panels.
Sew the Pockets
Sew around:
- Left side
- Bottom
- Right side
Leave the top open.
Repeat for the second pocket.
Make the Cardigan Longer
Simply add more body rows.
For a long cardigan:
30–32 inches
works well.
For a duster-style cardigan:
Try:
34–38 inches
You will need more yarn.
Make a Cropped Cardigan
Stop each body panel at approximately:
18–21 inches
for a cropped silhouette.
Keep all three panels the same length.
Make It More Oversized
Increase the width of:
- Back panel
- Both front panels
Remember:
Back = approximately half the desired finished circumference.
Each front = approximately one quarter.
Make It Less Oversized
Reduce the positive ease.
Instead of adding 8–10 inches to your bust, add:
3–5 inches
for a more standard relaxed fit.
Adjusting the Armholes
The sample uses approximately:
9 inches
of armhole depth on the front and back.
If you have fuller upper arms or want more room, increase this measurement.
Try:
9½–10 inches
Adjusting Sleeve Width
Measure around the fullest part of your upper arm.
Add approximately:
3–5 inches
of ease.
That’s a useful target for the sleeve width.
Adjusting Sleeve Length
Because this is a drop-shoulder cardigan, the sleeve begins farther down the arm than a fitted sweater sleeve.
Before finalizing the sleeve length:
Pin the sleeve to the body.
Try it on.
Then adjust if necessary.
Balloon Sleeve Option
For extra-cozy balloon sleeves:
Make the sleeve rectangle wider.
Keep the ribbed cuff fitted.
The extra fabric will gather beautifully at the wrist.
Straight Sleeve Option
For a cleaner silhouette:
Make the sleeve width closer to the actual upper-arm measurement plus:
2–3 inches
of ease.
Add Buttons
The basic cardigan is designed to remain open.
But you can add buttons if you prefer.
Use:
- 2–4 large wooden buttons
- Matching yarn to secure them
Create simple chain-loop buttonholes on the opposite border.
Add a Belt
Crochet a simple belt for another styling option.
Ch until the belt measures approximately:
65–75 inches
Work several rows of sc or hdc.
Fasten off.
Wear it loosely around your waist.
Add Side Slits
For a long cardigan, stop each side seam approximately:
3–5 inches
above the bottom.
This creates small side slits that improve movement and drape.
Make a High-Low Hem
Make the back panel approximately:
2–3 inches longer
than the two front panels.
This gives the cardigan extra coverage at the back.
Best Yarn for an Oversized Cardigan
The yarn should create fabric that is warm but still moves comfortably.
Aran Yarn
Aran is an excellent choice because it offers:
- Warmth
- Good stitch definition
- Reasonable project speed
- Enough drape for an oversized cardigan
Acrylic
Soft acrylic is:
- Affordable
- Washable
- Easy to find
- Available in many colors
It’s a practical choice for your first cardigan.
Wool Blends
Wool blends provide:
- Warmth
- Stretch
- Softness
- Beautiful stitch definition
They work especially well for fall and winter.
Cozy Cardigan Colors
Try:
- Forest green
- Cream
- Charcoal
- Camel
- Burgundy
- Chocolate brown
- Navy
- Rust
- Mustard
- Sage
Two-Tone Cardigan
Use one main color for the body.
Add a second color for:
- Cuffs
- Front border
- Pockets
Ideas:
Forest green + cream
Charcoal + mustard
Camel + cream
Burgundy + warm gray
Color-Block Cardigan
Try:
Forest-green back and fronts.
Cream sleeves.
Forest-green cuffs and border.
Or reverse the colors for a more dramatic look.
Striped Cardigan
Change yarn every:
6–10 rows
on all three body panels.
Keep the stripe sequence identical so the pieces align during assembly.
Why Drop Shoulders Are Great for Beginners
Traditional fitted cardigans can require:
- Curved armholes
- Sleeve caps
- Shoulder shaping
- Complicated increases
- Complicated decreases
Drop shoulders avoid most of this.
The panels remain rectangular.
That makes construction much easier to understand.
Why This Is a Good First Cardigan
The main skill isn’t complicated crochet.
It’s learning how simple pieces become a garment.
You’ll practice:
- Making matching panels
- Measuring accurately
- Seaming shoulders
- Attaching sleeves
- Adding cuffs
- Finishing front edges
Those skills transfer directly to many other crochet sweaters.
Common Beginner Mistakes
Skipping the Gauge Swatch
A small difference becomes much larger across a cardigan.
Check your gauge before starting.
Making the Front Panels Different Sizes
Count rows or measure frequently.
The two front pieces must match.
Stretching the Fabric While Measuring
Lay pieces flat and relaxed.
Do not pull them.
Making Shoulder Seams Uneven
Measure from each outside edge toward the neckline.
Both shoulder seams should be equal.
Attaching Sleeves Off-Center
Mark the middle of each sleeve.
Match it exactly to the shoulder seam.
Making Cuffs Too Loose
The ribbing should need a little stretch to fit around the wrist.
Crocheting Too Tightly
Oversized cardigans need good drape.
If your fabric feels rigid:
- Relax your tension
- Try a slightly larger hook
Blocking the Finished Cardigan
Blocking helps:
- Relax stitches
- Improve drape
- Straighten seams
- Make panels sit evenly
- Give the cardigan a polished finish
Use the blocking method appropriate for your yarn fiber.
Washing Your Crochet Cardigan
Always check your yarn label.
In general:
- Wash gently.
- Support the garment while wet.
- Avoid hanging it when saturated.
- Reshape it carefully.
- Lay flat to dry when recommended.
Large crochet garments can stretch under their own weight when wet.
How Long Does a Crochet Cardigan Take?
That depends on:
- Crochet speed
- Yarn choice
- Size
- Cardigan length
The advantage of this pattern is that almost every piece uses the same repetitive stitch.
Once you’ve established the first few rows, it’s easy to work on a panel for a little while each evening.
Is This Pattern Suitable for Complete Beginners?
If you’ve only just learned to crochet, I recommend finishing a scarf or beanie first.
If you’re comfortable making:
- Chains
- Half double crochet
- Straight rectangles
then this is a very manageable first garment.
Can I Use Bulky Yarn?
Yes.
Bulky yarn can make the cardigan warmer and faster.
You’ll need:
- Fewer stitches
- Fewer rows
- A larger hook
Use the finished measurements instead of the exact stitch counts.
Can I Use DK Yarn?
Yes.
DK creates a lighter cardigan with beautiful drape.
You’ll need:
- More stitches
- More rows
- More yarn length
Again, use measurements as your main guide.
Can I Skip the Pockets?
Absolutely.
The cardigan looks great without them.
Skipping the pockets also makes the project faster.
Can I Skip the Ribbed Cuffs?
Yes.
You can finish the sleeves with:
1–2 rounds of single crochet
instead.
However, the ribbed cuffs create a more polished cozy finish.
Can I Make the Cardigan Without Buttons?
Yes.
The pattern is designed as an open-front cardigan.
Buttons are completely optional.
Frequently Asked Questions
Is this cardigan worked in one piece?
No. It’s constructed from simple flat panels, which makes sizing and assembly easier to understand.
Is there complicated shaping?
No. The main body and sleeves are rectangular.
What creates the texture?
Half double crochet worked through the back loop only.
Is it oversized?
Yes. The design includes generous positive ease and drop shoulders.
Can I make it longer?
Yes. Simply crochet more rows on all three body panels.
Can I add pockets?
Yes. Instructions for simple rectangular patch pockets are included.
Is this a good first garment?
Yes, especially if you’re already comfortable crocheting straight rectangles.
Final Thoughts
Your first crochet cardigan doesn’t need complicated shaping.
This easy oversized crochet cardigan pattern uses simple rectangular pieces, repetitive stitches, drop shoulders, ribbed cuffs, and an open front to create a cozy garment that looks far more complicated than it really is.
Start with the basic version.
Then personalize it with:
- Pockets
- Buttons
- A wider collar
- Balloon sleeves
- Stripes
- Color blocking
- A longer hem
Choose a soft forest green for a cozy woodland look, cream for a timeless neutral cardigan, or burgundy and camel for classic fall style.
Once you’ve made this cardigan, you’ll understand the basic construction behind many crochet sweaters and jackets.
Save this oversized beginner crochet cardigan pattern for your next cozy fall-to-winter project!