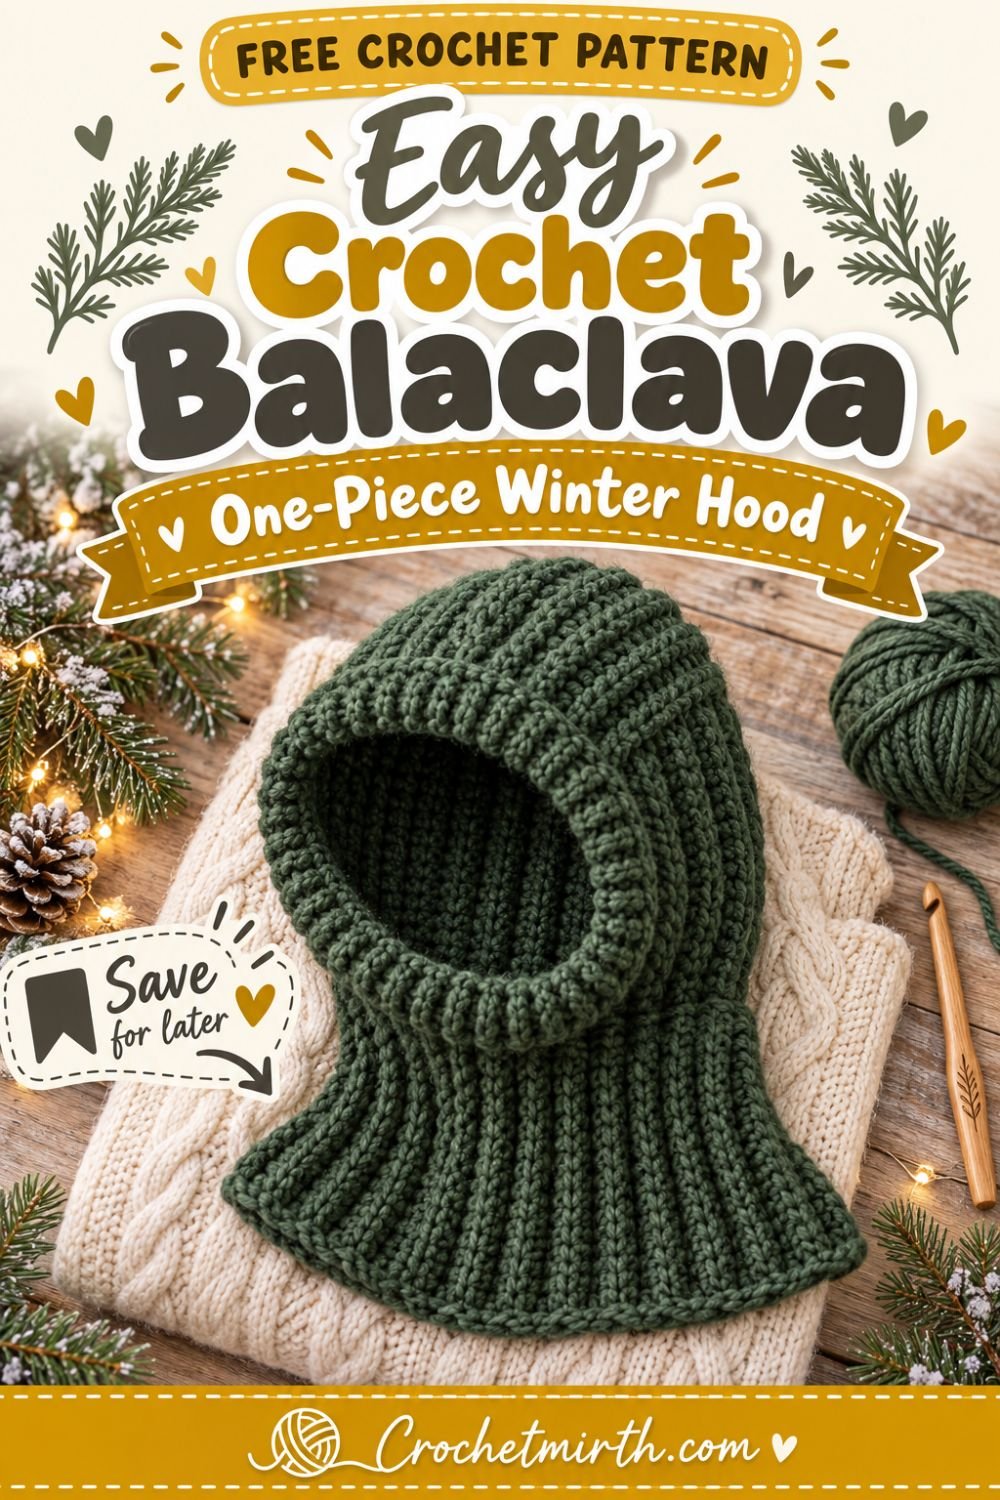
Crochet Balaclava Pattern – Easy One-Piece Winter Hood
When the weather turns cold, few crochet projects feel as cozy as a warm hood that protects your head, ears, and neck all at once.
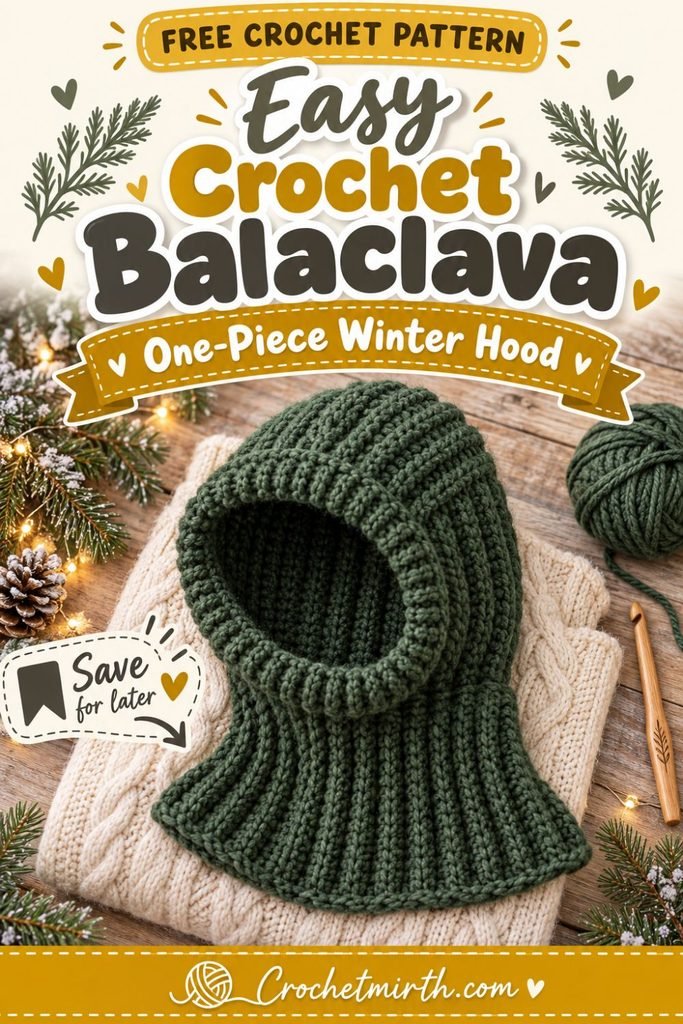
This crochet balaclava pattern is designed to keep the construction as simple as possible for beginners.
Instead of shaping lots of separate pieces, you’ll crochet the main hood as one flat piece, fold and seam it, and then add the face and neck edging directly onto the hood.
The result is a comfortable winter hood with a soft ribbed texture and an open face.
Wear it under a coat for winter walks, make one for a handmade gift, or crochet several in different colors for your cold-weather wardrobe.
Why You’ll Love This Crochet Balaclava
This pattern is:
- Beginner-friendly
- Mostly worked flat
- Made from one main piece
- Warm around the head, ears, and neck
- Easy to customize
- Made with simple stitches
- Great for winter gifts
- Easy to lengthen or shorten
- Stylish without complicated shaping
If you can chain, half double crochet, and sew a simple seam, you can make this hood.
Skill Level
Easy / Beginner
You should know how to:
- Chain
- Half double crochet
- Single crochet
- Slip stitch
- Work in the back loop only
- Sew a basic seam
- Work around an edge
- Fasten off
- Weave in yarn ends
Materials
Yarn
Approximately 250–300 yards of bulky weight yarn, Category 5
A soft yarn is important because the hood sits close to your face.
Good choices include:
- Soft acrylic
- Merino blend
- Acrylic/wool blend
- Washable wool blend
Avoid very scratchy yarn.
Crochet Hook
6.0 mm crochet hook
Adjust your hook size if necessary to match the gauge.
Additional Supplies
- Yarn needle
- Scissors
- Measuring tape
- Stitch markers
- Optional removable markers
Crochet Abbreviations
This pattern uses US crochet terminology.
ch – chain
sc – single crochet
hdc – half double crochet
sl st – slip stitch
st – stitch
sts – stitches
BLO – back loop only
rnd – round
Finished Size
This pattern is written for an approximate Adult Medium.
Finished hood measurements:
Height: approximately 14 inches
Width when laid flat after seaming: approximately 10 inches
Neck extension: approximately 4 inches
Face opening: approximately 8–9 inches tall after edging
The ribbed fabric has stretch, so exact measurements may vary slightly.
Gauge
Approximately:
10 hdc = 4 inches
7 rows = 4 inches
The exact gauge isn’t as critical as it would be for a fitted sweater, but checking it will help ensure that the hood fits comfortably.
How This Balaclava Is Constructed
The pattern has three simple stages.
Stage 1
Crochet one large ribbed rectangle.
Stage 2
Fold the rectangle and seam the top/back portion to create the hood.
Stage 3
Crochet directly around the face opening and neckline.
There are no separate side panels to assemble.
Part 1: Crochet the Main Hood
Ch 36.
This starting chain creates the height of your hood from the lower neck area toward the crown.
Row 1
Hdc in the second chain from the hook.
Hdc in each chain across.
35 sts
Ch 1 and turn.
Row 2
Working in the back loop only, hdc in every stitch across.
35 sts
Ch 1 and turn.
Rows 3–35
Repeat Row 2.
Continue until your rectangle measures approximately:
20 inches wide
and
14 inches tall
Depending on your gauge, you may need slightly more or fewer rows.
The measurement is more important than the exact row count.
Fasten off, leaving a long yarn tail for seaming.
Understanding the Ribbing
Working half double crochet through the back loop creates raised ridges.
While your piece is lying flat, those ridges run horizontally.
Once the hood is folded and worn, the ribbing gives the fabric a soft stretchy texture.
The ribbing also helps the hood sit comfortably around the head.
Part 2: Fold the Hood
Lay your rectangle flat.
Fold it in half so the two shorter edges meet.
You should now have a folded piece measuring approximately:
10 inches wide × 14 inches tall
The folded edge becomes the back of the hood.
The open edge becomes the front.
Seam the Top
Starting at the folded back corner, sew across the top edge of the hood.
Use:
- Mattress stitch
- Whip stitch
- Or slip stitches
Keep your seam flexible.
Fasten off securely.
Turn the hood right side out.
You should now have a basic hood shape.
Check the Fit
Place the hood over your head before continuing.
The front should remain open.
The hood should:
- Cover the crown
- Cover the ears
- Reach comfortably below the chin
- Sit loosely around the face
If it feels slightly oversized, don’t worry.
The face edging will help shape the opening.
Part 3: Shape the Face Opening
Join your yarn at the lower-right corner of the face opening.
Face Edging Round 1
Ch 1.
Work sc evenly around the entire face opening.
Try to space the stitches consistently.
At the upper corners, place:
2 sc in the corner stitch
if needed to help the fabric lie flat.
Join with a sl st.
Face Edging Round 2
Ch 1.
Sc in each stitch around.
Join.
Face Edging Round 3
Work:
sc BLO in each stitch around
Join with a sl st.
Fasten off.
This creates a subtle ribbed border around the face.
Make the Face Opening More Fitted
If you prefer the opening to sit closer to your face, you can work one additional round.
Join yarn at the chin.
Work sc around while making:
2–4 evenly spaced sc2tog decreases
around the opening.
Try the hood on again.
Do not decrease too aggressively.
The opening should remain comfortable and easy to pull over your head.
Part 4: Add the Neck Section
Now we’ll extend the bottom so the balaclava protects the neck.
Join yarn anywhere along the bottom edge.
Neck Round 1
Ch 1.
Work approximately 50 sc evenly around the entire lower edge.
Join with a sl st.
Your exact stitch count may vary slightly.
The main goal is to distribute the stitches evenly without causing the fabric to ripple.
Neck Round 2
Ch 1.
Hdc in each stitch around.
Join.
Neck Rounds 3–7
Repeat Round 2.
Continue until the neck section measures approximately:
4 inches
Ribbed Neck Edging
For a more finished appearance:
Final Neck Round
Ch 1.
Sc BLO in each stitch around.
Join.
Fasten off.
Weave in the end.
Your Crochet Balaclava Is Finished
Try it on and gently adjust the fabric.
The hood should cover:
- Head
- Ears
- Sides of face
- Back of neck
- Upper neck area
while leaving the central face open.
How to Make the Hood More Fitted
If you want a closer fit, there are several easy adjustments.
Option 1: Make Fewer Rows
The width of the original rectangle determines how roomy the hood is around the head.
Instead of approximately 20 inches, make your rectangle around:
18½–19 inches
before folding.
Option 2: Use a Smaller Hook
Going down slightly in hook size creates a denser, more fitted fabric.
Option 3: Add Another Face Edging Round
Another round around the face opening can make the opening slightly smaller.
How to Make a Slouchier Hood
Prefer a more relaxed hood shape?
Make the original rectangle approximately:
21–22 inches wide
before folding.
This adds extra room around the crown and back of the head.
How to Make the Neck Longer
For extra winter coverage, continue the neck rounds.
Instead of stopping at 4 inches, crochet until the neck section measures:
5–6 inches
A longer neck can tuck more easily inside a coat.
Add a Ribbed Neck
If you want an even stronger ribbed look, work the neck in:
hdc BLO
instead of regular half double crochet.
This creates visible texture and additional stretch.
Add a Drawstring Around the Face
A drawstring is optional.
If you want to cinch the face opening slightly:
- Crochet a long chain.
- Fasten off.
- Weave the chain in and out around one of the face edging rounds.
- Tie loosely below the chin.
Avoid pulling it tightly.
The hood should always remain comfortable around the face and neck.
Best Yarn for a Crochet Balaclava
Because this project touches sensitive areas such as the forehead, cheeks, and neck, softness matters.
Acrylic
Soft acrylic is:
- Affordable
- Easy to wash
- Widely available
Wool Blend
Wool blends are:
- Warm
- Comfortable
- Excellent for winter accessories
Merino
Merino is especially soft and warm.
It can be a great choice if you’re making the balaclava as a special handmade gift.
Yarn to Avoid
Very rough yarn can become uncomfortable around the face.
Before beginning, hold the yarn against your cheek.
If it feels scratchy there, choose something softer.
Winter Color Ideas
A simple ribbed balaclava looks especially good in solid colors.
Try:
- Forest green
- Charcoal
- Cream
- Black
- Burgundy
- Navy
- Mustard
- Camel
- Rust
- Sage
Neutral shades create a classic look.
Bold colors can turn the hood into a statement winter accessory.
Two-Tone Crochet Balaclava
You can easily create a two-color version.
Try:
Forest-green hood + cream face edging
Charcoal hood + mustard edging
Cream hood + sage edging
Burgundy hood + warm-gray edging
You can also make the neck section in a contrasting color.
Striped Balaclava
For simple stripes, change colors every:
2–4 rows
while making the original rectangle.
Carry the unused yarn along the edge if the color changes are frequent, or cut and weave in the ends.
Once assembled, the stripes create a cozy retro look.
Add a Decorative Border
The face border is a perfect place for a little extra detail.
Try:
- Contrasting yarn
- Crab stitch
- Slip-stitch edging
- A second ribbed round
Keep the edging soft so it doesn’t feel stiff against the face.
How to Make a Child Size
For children, don’t rely on age alone.
Measure:
- Head circumference
- Crown-to-neck length
- Desired face opening
Create a smaller rectangle based on those measurements.
The finished hood should be comfortable and easy to remove.
For young children, avoid long cords or loose embellishments.
Why This Construction Is Beginner Friendly
More advanced balaclavas can involve:
- Complex increases
- Multiple shaped panels
- Short rows
- Detailed crown shaping
- Several seams
This version simplifies the process.
You start with one rectangle.
Then:
Fold → seam → edge → extend the neck
That makes it easier to understand how the project is taking shape.
Common Beginner Mistakes
Losing Stitches
Count your stitches occasionally.
The rectangle should maintain the same number of stitches in every row.
Forgetting BLO
After Row 1, work your half double crochet stitches through the back loops.
This creates the ribbed texture.
Making the Top Seam Too Tight
A stiff seam can change the shape of the crown.
Keep your sewing tension relaxed.
Adding Too Many Edge Stitches
When crocheting around the face or neck, too many stitches can make the fabric ripple.
If that happens, undo the round and use fewer stitches.
Adding Too Few Edge Stitches
Too few stitches can pull the fabric inward.
The border should sit flat without puckering.
How Long Does a Crochet Balaclava Take?
Crochet speed varies depending on experience.
Using bulky yarn helps the fabric grow more quickly than lightweight yarn.
The simple repeating stitch also makes this a good project for relaxed evening crochet.
Can Beginners Crochet a Balaclava?
Yes.
A simple hood-style balaclava is a manageable project once you know basic crochet stitches.
If you’ve already made:
- A scarf
- A rectangle beanie
- A cowl
this project is a natural next step.
Can I Use Worsted Weight Yarn?
Yes.
The overall construction remains the same, but you’ll need:
- More stitches
- More rows
- Possibly a smaller hook
Instead of following the exact stitch counts, crochet your rectangle to the finished measurements.
Can I Use Super Bulky Yarn?
Yes, but the hood will be much thicker.
Use a hook appropriate for your yarn and work toward the measurements rather than the stitch counts.
Super bulky yarn can create a very cozy oversized hood.
Can I Wear It as a Hood Instead?
Yes.
Because the face opening is generous, you can push the front section backward and wear it more like a regular winter hood.
The neck section then acts almost like a built-in cowl.
Turn It Into a Hooded Cowl
For an even more relaxed hooded-cowl style:
- Make the hood slightly wider
- Keep the face opening larger
- Extend the neck section
- Avoid extra face-opening decreases
This creates a looser hood that can easily be pushed backward.
Make a Matching Winter Set
Use the same yarn to make:
- Ribbed crochet beanie
- Crochet mittens
- Fingerless gloves
- Crochet scarf
- Ear warmer
A matching balaclava and mittens set makes a cozy handmade winter gift.
How to Wash Your Balaclava
Always check your yarn label first.
For washable yarn:
- Wash gently.
- Avoid excessive heat.
- Reshape the hood while damp.
- Lay flat to dry when recommended.
Because the hood sits close to the face, regular gentle washing is helpful.
Frequently Asked Questions
Is this balaclava worked in one piece?
The main hood is crocheted from one continuous rectangle. After it is folded and seamed, the face border and neck are crocheted directly onto it.
Is there complicated crown shaping?
No. The crown is created by folding and seaming the main rectangle.
Is this pattern suitable for beginners?
Yes. It mainly uses chains, half double crochet, single crochet, and one simple seam.
Does this cover the entire face?
No. This is a hood-style balaclava with an open face rather than a tight ski-mask design.
Can I make the face opening smaller?
Yes. Add another edging round with a few evenly spaced decreases.
Can I make the neck longer?
Yes. Simply continue the neck rounds until you reach the desired length.
Final Thoughts
A crochet balaclava doesn’t need complicated shaping to be warm and practical.
With this beginner-friendly construction, you make one simple ribbed rectangle, fold it into a hood, seam the top, and crochet directly around the face and neck.
The result is a cozy winter accessory that protects your head, ears, and neck while keeping the face comfortably open.
Make it in classic forest green, soft cream, charcoal, burgundy, or any color that fits your winter wardrobe.
Once you’ve made one, the simple construction also makes it easy to experiment with different yarns, colors, edging styles, and lengths.
Save this easy crochet balaclava pattern for your next cozy winter project!
SEO
Primary keyword: crochet balaclava pattern
Secondary keywords: easy crochet balaclava, crochet hood pattern, beginner crochet balaclava, free crochet balaclava pattern, winter crochet hood, one piece crochet hood, crochet ski hood, crochet winter accessories
Slug: easy-crochet-balaclava-pattern
Meta description: Make a cozy crochet balaclava with this easy beginner one-piece winter hood pattern featuring simple ribbing, an open face, and warm neck coverage.