Crochet Stocking Garland Pattern – Mini Christmas Stockings for the Mantel
A row of tiny handmade stockings is one of those Christmas decorations that instantly makes a mantel feel cozy.

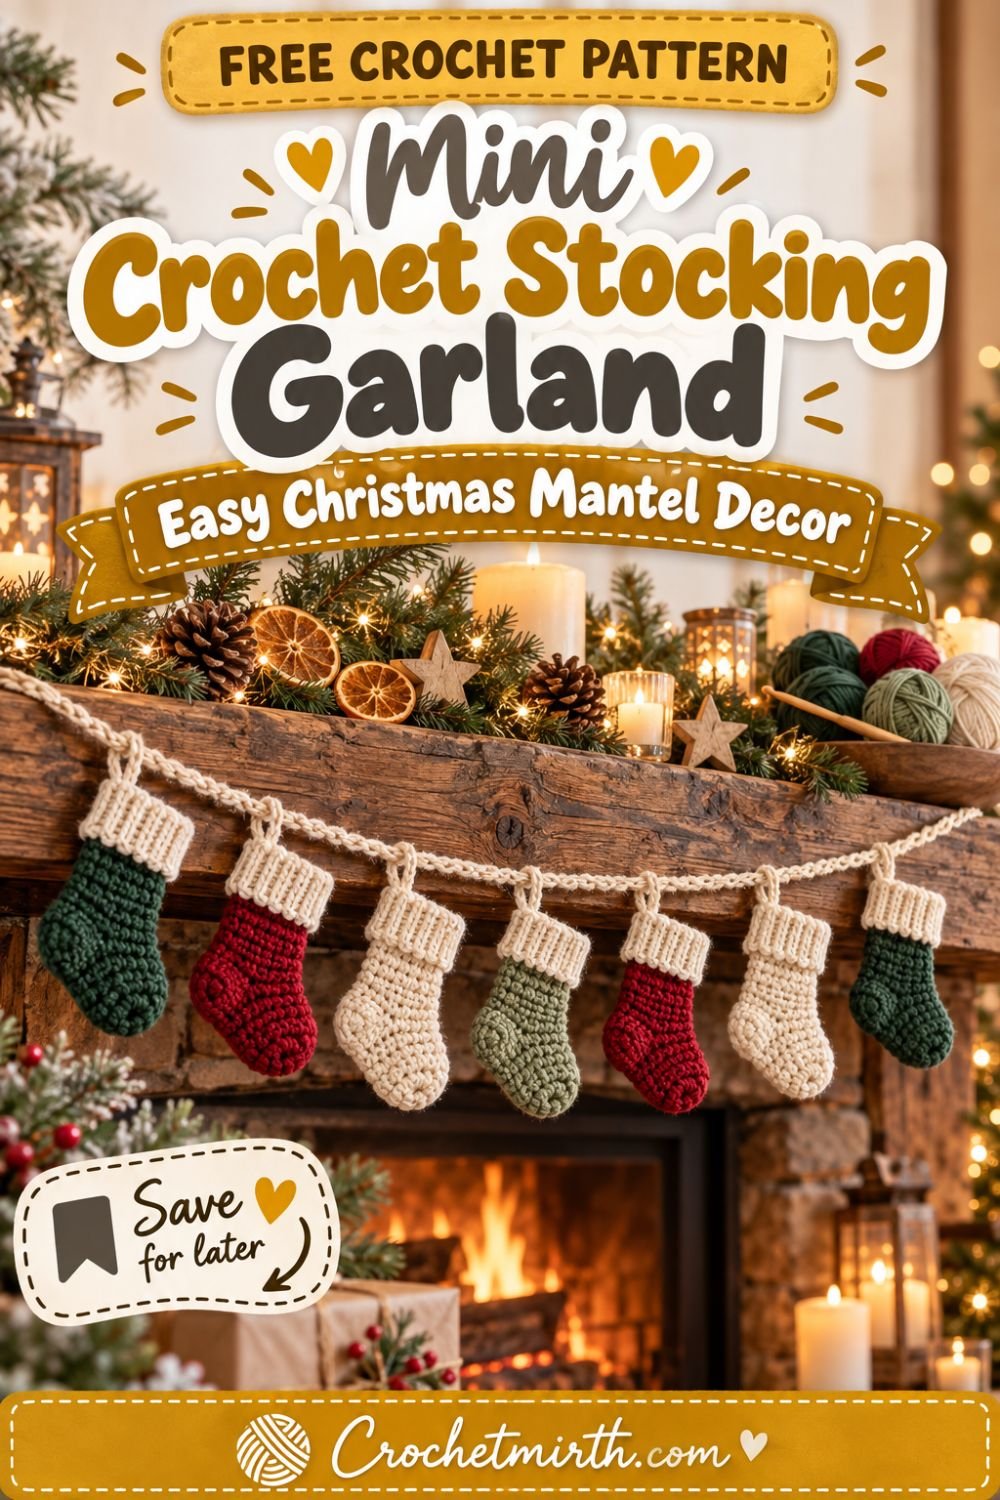
This crochet stocking garland pattern combines seven miniature Christmas stockings with a simple crochet chain to create festive holiday decor you can bring out year after year.
Each stocking is worked from the toe upward using basic crochet stitches.
You’ll make:
- A rounded toe
- Short foot
- Simple heel opening
- Straight leg
- Contrast ribbed cuff
Then you’ll crochet one long garland chain and attach all seven stockings with even spacing.
Use traditional cranberry red and forest green, create a softer cream-and-sage version, or raid your yarn basket and make every stocking different.
Why You’ll Love This Crochet Stocking Garland
This project is:
- Beginner-friendly
- Perfect for Christmas
- Great for leftover yarn
- Easy to customize
- Quick to repeat
- Made with mini stockings
- Adjustable to any mantel length
- Beautiful in traditional or neutral colors
- Easy to turn into an Advent garland
- Reusable year after year
Once you’ve finished the first stocking, the remaining six become a relaxing repetitive project.
Skill Level
Advanced Beginner
You should know how to:
- Make a magic ring
- Chain
- Half double crochet
- Single crochet
- Work in joined rounds
- Work in the back loop only
- Make simple decreases
- Slip stitch
- Sew a small ribbed cuff
- Fasten off
- Weave in ends
The heel is simple and doesn’t require traditional sock heel-turning.
Materials
Yarn
Use Category 3 DK-weight yarn.
For seven mini stockings, you’ll need approximately:
180–220 yards total
depending on your tension and cuff colors.
This pattern is excellent for scraps.
Suggested Colors
For the sample garland:
- 2 cranberry red stockings
- 2 forest green stockings
- 1 sage green stocking
- 1 warm cream stocking
- 1 additional red or green stocking
Use warm cream for most cuffs and the garland chain.
Crochet Hook
4.0 mm crochet hook
If your stitches feel very loose, try:
3.5 mm
A slightly firm fabric helps the mini stockings keep their shape.
Other Supplies
- Yarn needle
- Scissors
- Measuring tape
- Stitch markers
Crochet Abbreviations
This pattern uses US crochet terminology.
ch – chain
sc – single crochet
hdc – half double crochet
hdc2tog – half double crochet two stitches together
sl st – slip stitch
st – stitch
sts – stitches
BLO – back loop only
rnd – round
Finished Measurements
Each mini stocking measures approximately:
4½–5 inches tall
with a foot approximately:
3½–4 inches long
The seven-stocking garland measures approximately:
55–65 inches
depending on the spacing between stockings.
You can make it much longer or shorter.
Construction Overview
Each stocking is worked in four sections:
- Toe
- Foot
- Heel opening and leg
- Contrast ribbed cuff
The heel is crocheted afterward.
Once all seven stockings are finished, you’ll attach them to one long crochet chain.
PART 1: CROCHET THE TOE
Using your first stocking color:
Make a magic ring.
Round 1
Ch 1.
Work:
6 hdc
into the ring.
Pull the ring closed.
Join with a sl st.
6 sts
Round 2
Ch 1.
Work:
2 hdc in each stitch
around.
Join.
12 sts
Round 3
Ch 1.
Repeat:
hdc in next st, 2 hdc in next st
around.
Join.
18 sts
Check the Toe
The piece should begin forming a small rounded cup.
This becomes the toe of the stocking.
PART 2: CROCHET THE FOOT
Round 4
Ch 1.
Working in the back loop only:
Hdc BLO in each stitch around.
Join.
18 sts
Rounds 5–8
Repeat Round 4.
Continue until the foot measures approximately:
2½–3 inches
from the toe.
PART 3: CREATE THE HEEL OPENING
Round 9
Ch 1.
Hdc BLO in the next:
5 sts
Ch:
8
Skip the next:
8 sts
Hdc BLO in the final:
5 sts
Join.
You still have:
18 sts/spaces
around the stocking.
What You’ve Created
The skipped stitches create an opening.
Later, you’ll return and crochet the heel directly around this opening.
PART 4: CROCHET THE LEG
Round 10
Ch 1.
Hdc BLO in the first 5 stitches.
Work:
1 hdc in each of the 8 chains
Hdc BLO in the final 5 stitches.
Join.
18 sts
Rounds 11–17
Hdc BLO in every stitch around.
Join after each round.
18 sts
Check the Stocking Height
From toe to upper edge, the stocking should measure approximately:
4–4½ inches
before adding the cuff.
If you’d like a slightly taller stocking, add:
1–2 extra rounds
Fasten Off
Cut the yarn.
Weave in the end.
PART 5: CROCHET THE HEEL
Return to the heel opening.
Join the same stocking color at one side.
Heel Round 1
Ch 1.
Work approximately:
16 sc evenly around the heel opening
Join.
16 sts
Heel Round 2
Repeat:
sc in next 2 sts, sc2tog
around.
Join.
12 sts
Heel Round 3
Repeat:
sc in next st, sc2tog
around.
Join.
8 sts
Heel Round 4
Work:
sc2tog
four times.
4 sts
Fasten off, leaving a long tail.
Close the Heel
Thread the tail through a yarn needle.
Pass it through the remaining stitches.
Pull firmly.
Secure.
Weave in the end.
Shape the Stocking
Push the heel outward gently.
Use your fingers to shape:
- Rounded toe
- Small heel
- Straight leg
Now the piece should clearly look like a miniature Christmas stocking.
PART 6: CROCHET THE RIBBED CUFF
Using warm-cream yarn:
Ch 5.
Cuff Row 1
Sc in the second chain from the hook.
Sc across.
4 sts
Ch 1 and turn.
Cuff Row 2
Working in the back loop only:
Sc across.
4 sts
Ch 1 and turn.
Continue
Repeat Row 2 until the ribbed strip comfortably wraps around the stocking opening.
Aim for approximately:
18 rows
but measure against your actual stocking.
Join the Cuff
Bring the short edges together.
Slip stitch or sew them together.
You now have a tiny ribbed ring.
Attach the Cuff
Place the cuff around the upper edge of the stocking.
Match the cuff seam with the back of the leg.
Sew the lower edge evenly to the stocking.
Fold the Cuff
Fold the upper portion downward.
The visible cuff should measure approximately:
¾ inch
deep.
This gives the stocking its classic Christmas look.
First Mini Stocking Finished
Your first stocking should now include:
- Rounded toe
- Short foot
- Small heel
- Ribbed body
- Contrast cuff
Gently shape it with your fingers.
Make Six More Stockings
Repeat the entire pattern until you have:
7 mini stockings
Suggested Color Arrangement
Try this sequence:
- Cranberry red
- Forest green
- Warm cream
- Sage green
- Cranberry red
- Forest green
- Cranberry or cream
Use cream cuffs on the colored stockings.
For the cream stocking, use:
Forest-green cuff
to create contrast.
Traditional Garland
Make:
4 red stockings
and:
3 green stockings
Use cream cuffs on all seven.
This creates the most traditional Christmas palette.
Neutral Garland
Use:
- Warm cream
- Taupe
- Sage
- Camel
This works especially well for Scandinavian or farmhouse Christmas decor.
Vintage Christmas Garland
Try:
- Dusty cranberry
- Muted sage
- Cream
- Mustard
- Warm beige
The softer shades give the garland a nostalgic handmade look.
PART 7: MAKE THE GARLAND CHAIN
Using cream yarn:
Ch approximately:
25
This creates the first hanging section.
Attach the First Stocking
Insert your hook through the upper back corner of the first cuff.
Work:
1 sl st
to attach the stocking directly to the chain.
Space Between Stockings
Ch:
20–25
Then attach the second stocking with another sl st.
Repeat.
Continue Across
Your pattern becomes:
Attach stocking → ch 20–25 → attach next stocking
until all seven stockings are connected.
Finish the Garland
After the seventh stocking:
Ch another:
25
Fasten off.
Weave in both garland ends.
Adjust the Spacing
There is no required spacing.
For stockings closer together:
Use:
15–18 chains
For a longer airy garland:
Use:
25–30 chains
Check Your Mantel Before Fastening Off
If possible:
Lay the garland across your mantel.
Check:
- Overall length
- Stocking spacing
- End-chain length
Make adjustments before finishing.
Create Hanging Loops
If you’d like loops at both ends:
After the final chain section:
Ch another:
15
Join back into the chain with a sl st.
Repeat at the opposite end if desired.
These loops can make hanging easier.
Alternate the Toe Direction
For a playful look:
Attach one stocking with the toe pointing left.
Attach the next with the toe pointing right.
Continue alternating.
Keep Every Toe Facing the Same Way
For a more traditional uniform garland:
Arrange all stockings with toes pointing in the same direction.
Both options work.
Add Wooden Beads Between Stockings
For an adult decorative garland, you could incorporate suitable decorative beads.
However, a yarn-only garland is:
- Simpler
- Softer
- Easier to store
- More lightweight
The written version uses yarn only.
Add Tiny Crochet Bows
Crochet a small bow in:
- Red
- Cream
- Mustard
Attach one near the cuff of selected stockings.
Don’t add a bow to every stocking unless you want a very decorative look.
Add Embroidered Snowflakes
Using cream yarn:
Embroider a tiny snowflake onto the front of a red or green stocking.
Keep the stitches flat.
Add Initials
If your garland represents family members:
Embroider one initial onto each cuff.
This turns the decoration into personalized Christmas decor.
Add Numbers for an Advent Garland
Make:
24 stockings
instead of seven.
Embroider or attach numbers:
1–24
Then place a:
- Note
- Candy
- Small activity
- Tiny surprise
inside each stocking.
Current crochet patterns also use mini stockings specifically for reusable Advent garlands and small treats.
Can the Stockings Hold Small Treats?
Yes.
These stockings are small but functional.
They can hold lightweight items such as:
- Wrapped candy
- Small note
- Tiny chocolate
- Mini ornament
Don’t overload the garland with heavy objects.
Make the Stockings Larger
Use:
Worsted-weight yarn
with approximately a:
5 mm hook
The same construction will produce larger stockings.
Make Them Smaller
Use:
Sport-weight yarn
with approximately:
3–3.5 mm hook
The resulting stockings are ideal for:
- Christmas trees
- Small shelves
- Delicate garlands
Turn Individual Stockings Into Ornaments
Skip the long garland chain.
Add a hanging loop to one upper corner.
Now each mini stocking becomes a:
Christmas tree ornament
Use Individual Stockings as Gift Toppers
Tie one stocking onto:
- Wrapped present
- Gift bag
- Cookie box
Add a tiny candy or note inside.
Add the Garland to a Christmas Tree
A mini stocking garland isn’t limited to the mantel.
Wrap it loosely around your Christmas tree.
Use a longer chain between stockings so the garland drapes naturally.
Decorate a Staircase
Make:
10–12 stockings
and create a longer chain.
Attach it alongside evergreen staircase greenery.
Shelf Garland
For a smaller shelf:
Make only:
3–5 stockings
Reduce the end chains.
Window Garland
Make:
5–7 stockings
and hang them across a window frame.
Cream and red look especially pretty against natural daylight.
Kids’ Room Christmas Decor
Use playful colors such as:
- Pink
- Mint
- Pale blue
- Cream
- Mustard
The stocking shape keeps the project clearly Christmas-themed even without traditional red and green.
Best Yarn for Mini Stockings
DK Acrylic
DK acrylic is a great all-around choice because it is:
- Lightweight
- Affordable
- Easy to crochet
- Available in many colors
DK Cotton
Cotton creates:
- Crisp stitches
- Firmer stockings
- Excellent shape
- Minimal fuzz
Wool Blend
A soft wool blend creates:
- Cozy texture
- Warm handmade appearance
- Slight natural fuzz
Why DK Yarn Works Well
For garlands, you don’t want each stocking to become too heavy.
DK yarn keeps the decorations:
- Small
- Lightweight
- Detailed
- Easy to hang
Scrap Yarn Project
A stocking garland is ideal for using leftovers.
Save small amounts of:
- Red
- Green
- Cream
- Sage
- Burgundy
- Mustard
Even if you don’t have enough for an entire larger project, you may have enough for one mini stocking.
Batch-Making Method
If you’re making seven or more stockings, batching can save time.
Step 1
Crochet all toes.
Step 2
Finish all feet.
Step 3
Create all heel openings and legs.
Step 4
Finish all heels.
Step 5
Make every cuff.
Step 6
Attach all cuffs.
Step 7
Make the garland chain.
This reduces constant switching between construction steps.
Quick Christmas Project
Once you understand the first stocking, the pattern becomes repetitive.
Mini stocking designs are commonly used for quick holiday crochet, and one 2025 worsted-weight version is listed at approximately 45 yards and just under 45 minutes per stocking.
Handmade Christmas Gift
A finished stocking garland makes a beautiful handmade gift for:
- New homeowners
- Families
- Christmas hosts
- Newlyweds
- Crochet-loving friends
Fold it carefully into a kraft box with tissue paper.
Gift a DIY Kit
You could also prepare:
- Printed pattern
- Small yarn balls
- Crochet hook
- Yarn needle
as a personal DIY crochet gift for someone who already crochets.
Common Beginner Mistakes
Losing Stitches
Count regularly.
The main body should remain at:
18 stitches
after the toe increases.
Heel Opening Too Small
Make sure you:
skip 8 stitches
and:
chain 8
Holes at Heel Corners
Small gaps can sometimes appear where the heel begins.
Use your yarn tail to close tiny gaps when weaving in ends.
Cuff Too Tight
Measure the cuff around the actual stocking before joining.
It should fit snugly but shouldn’t squeeze the opening.
Unequal Stocking Sizes
Use the same:
- Yarn weight
- Hook size
- Stitch counts
- Number of rounds
for all stockings.
Different Tension Between Colors
Some yarn colors or brands can behave differently.
Measure the first stocking in every yarn if you’re mixing brands.
Uneven Garland Spacing
Count the same number of chains between each stocking.
Stockings Twisting on the Chain
Attach through a secure point at the upper back edge of the cuff.
This helps each stocking hang more evenly.
Blocking
Blocking is optional.
If your stockings look uneven:
Lightly block them before attaching to the garland.
Shape:
- Toe
- Heel
- Leg
- Cuff
Let them dry completely.
Storage After Christmas
Remove any treats before storage.
Lay the garland loosely inside a box.
Avoid compressing the stockings under heavy decorations.
Make sure everything is completely dry.
Frequently Asked Questions
How many stockings are in the garland?
The sample uses seven.
Can I make more or fewer?
Absolutely. The garland is completely adjustable.
What yarn weight is used?
Category 3 DK yarn.
What hook size is used?
4.0 mm.
How large is each stocking?
Approximately 4½–5 inches tall.
Are the stockings functional?
Yes. They can hold very small lightweight treats or notes.
Can I turn this into an Advent calendar?
Yes. Make 24 stockings and number them.
Can the stockings be used separately?
Yes. Add a hanging loop and use them as Christmas tree ornaments.
Is this beginner-friendly?
A confident beginner who is comfortable crocheting in rounds can make the pattern.
Final Thoughts
A Christmas garland is even more charming when every little piece is handmade.
This crochet stocking garland pattern combines seven miniature stockings in classic holiday colors and strings them together into cozy mantel decor.
Make yours in cranberry and forest green for a traditional Christmas look.
Choose cream, sage, and beige for softer neutral decor.
Or use every Christmas-colored yarn scrap in your stash and make each stocking unique.
You can also expand the idea into a 24-stocking Advent calendar, use individual stockings as ornaments, or tuck tiny treats inside them.
Once you’ve made the first miniature stocking, the rest become an easy repetitive Christmas project.
Save this mini crochet stocking garland pattern for your handmade holiday decor list!