Crochet Christmas Stocking Pattern – Classic Ribbed Stocking with Cuff
Nothing makes a Christmas mantel feel more personal than a row of handmade stockings.
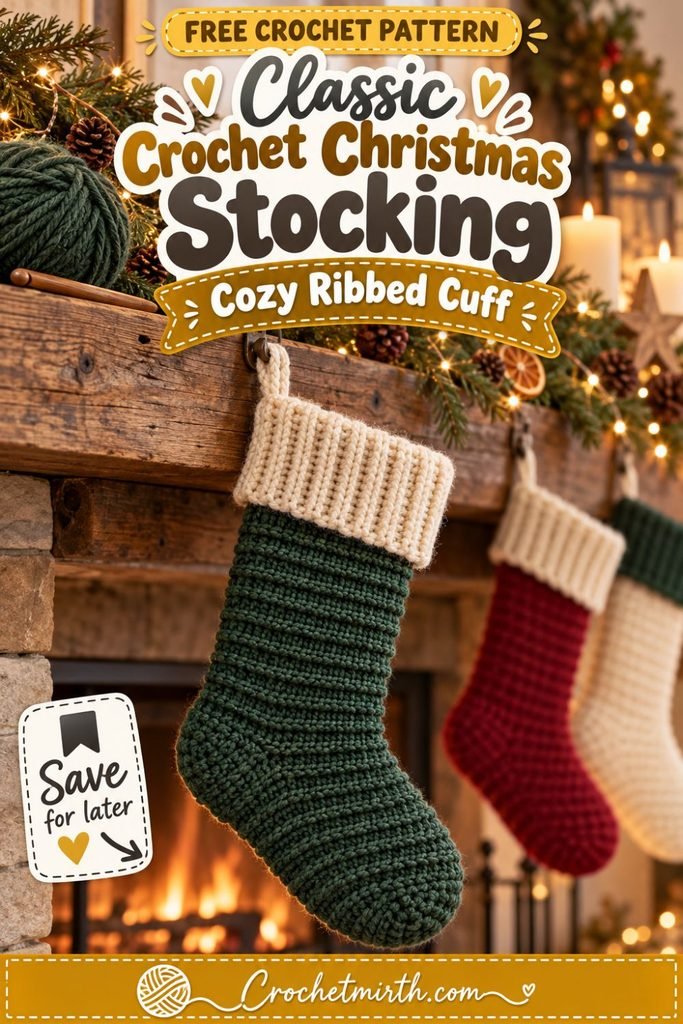
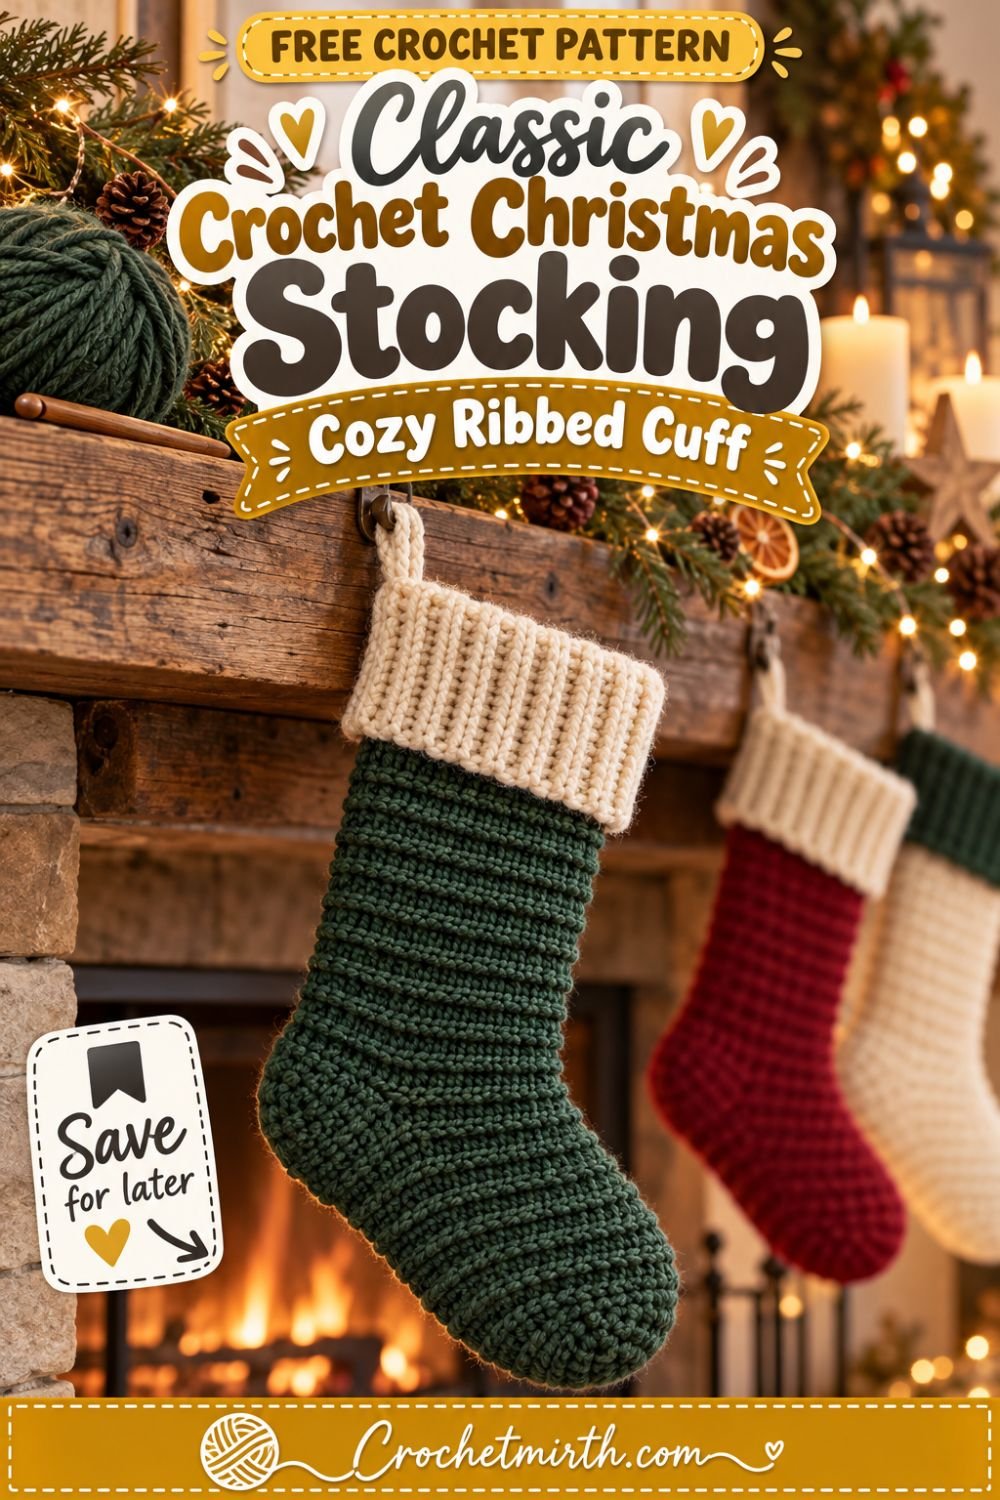
This crochet Christmas stocking pattern combines a classic holiday silhouette with cozy ribbed texture, a roomy heel and toe, a wide contrasting cuff, and a sturdy hanging loop.
The stocking is worked from the toe upward.
You’ll first crochet the rounded toe, continue the foot in easy rounds, leave an opening for the heel, and then work the long leg.
Afterward, you’ll return to the heel opening and shape the heel with simple decreases.
A separate back-loop ribbed cuff gives the top a polished knit-like appearance.
The result is a full-size Christmas stocking that’s practical enough to fill with small gifts while still looking beautiful as handmade holiday decor.
Why You’ll Love This Crochet Christmas Stocking
This pattern is:
- Classic and timeless
- Worked mostly in the round
- Made with worsted-weight yarn
- Textured with simple back-loop stitches
- Finished with a wide ribbed cuff
- Designed with an easy afterthought heel
- Easy to customize in several colors
- Large enough for treats and small gifts
- Great for Christmas mantels
- Perfect for personalized family sets
Once you’ve made the first stocking, it’s easy to repeat the pattern in different colors for everyone in the family.
Skill Level
Advanced Beginner
You should know how to:
- Chain
- Half double crochet
- Single crochet
- Work in joined rounds
- Work in the back loop only
- Increase
- Half double crochet two together
- Slip stitch
- Crochet around an opening
- Sew a simple cuff
- Fasten off
- Weave in ends
The heel requires a little counting, but there is no complicated heel flap.
Materials
Main Yarn
Approximately 220–260 yards of Category 4 worsted-weight yarn
for one full-size stocking.
Suggested main color:
Forest green
Other beautiful options include:
- Cranberry red
- Burgundy
- Sage
- Cream
- Charcoal
- Navy
Contrast Yarn
Approximately:
60–80 yards
for the ribbed cuff and hanging loop.
For the classic version, use:
Warm cream
Crochet Hooks
5.0 mm crochet hook for the stocking.
Optional:
4.5 mm hook for slightly firmer cuff ribbing.
Other Supplies
- Yarn needle
- Scissors
- Measuring tape
- Stitch markers
Crochet Abbreviations
This pattern uses US crochet terminology.
ch – chain
hdc – half double crochet
hdc2tog – half double crochet two stitches together
sc – single crochet
sl st – slip stitch
st – stitch
sts – stitches
BLO – back loop only
rnd – round
Finished Size
Approximate finished measurements:
Overall length: 16–17 inches
Foot from heel to toe: approximately 9 inches
Leg from heel to upper edge: approximately 10–11 inches
Width laid flat: approximately 5–5½ inches
Cuff depth: approximately 3½–4 inches
The stocking is intentionally roomy.
Gauge
Approximately:
12 hdc = 4 inches
8 rounds = 4 inches
Exact gauge isn’t as critical as for a fitted garment, but it affects the final stocking size.
Construction Overview
The stocking has five sections:
- Toe
- Foot
- Heel opening
- Leg
- Ribbed cuff
Then you’ll return to complete the heel and add the hanging loop.
PART 1: CROCHET THE TOE
Using forest-green yarn:
Make a magic ring.
Round 1
Ch 1.
Work:
8 hdc
into the ring.
Pull the ring closed.
Join with a sl st.
8 sts
Round 2
Ch 1.
Work:
2 hdc in every stitch
around.
Join.
16 sts
Round 3
Ch 1.
Repeat:
hdc in next st, 2 hdc in next st
around.
Join.
24 sts
Round 4
Ch 1.
Repeat:
hdc in next 2 sts, 2 hdc in next st
around.
Join.
32 sts
Check the Toe
You should now have a shallow rounded cup.
The toe should measure approximately:
4½–5 inches wide when flattened
depending on your gauge.
PART 2: CROCHET THE FOOT
From this point, begin working the ribbed texture.
Round 5
Ch 1.
Working in the back loop only:
Hdc BLO in every stitch around.
Join.
32 sts
Rounds 6–16
Repeat Round 5.
Continue until the foot measures approximately:
7½–8 inches
from the toe tip.
Why Use HDC BLO?
Working half double crochet through the back loop creates a subtle raised line around each round.
The texture is:
- Simple
- Repetitive
- Cozy
- Easy to see
- Beautiful in solid-colored yarn
PART 3: CREATE THE HEEL OPENING
Round 17
Ch 1.
Hdc BLO in the next:
8 sts
Ch:
16
Skip the next:
16 sts
Hdc BLO in the remaining:
8 sts
Join.
You have created the heel opening.
Important
Don’t crochet into the 16 skipped stitches yet.
You’ll return to this opening later.
PART 4: CONTINUE THE LEG
Round 18
Ch 1.
Hdc BLO in each of the first 8 stitches.
When you reach the chain section:
Work 1 hdc into each of the 16 chains.
Continue Hdc BLO in the final 8 stitches.
Join.
32 sts
Rounds 19–36
Continue:
Hdc BLO in every stitch around
Join after each round.
Check the Leg Length
Your leg should measure approximately:
10–11 inches
from heel opening to upper edge.
If you’d like a longer stocking, simply add more rounds.
Finish the Leg
Fasten off forest-green yarn.
Weave in the end.
PART 5: CROCHET THE HEEL
Return to the heel opening.
Join forest-green yarn at one side.
Heel Round 1
Ch 1.
Work approximately:
32 hdc evenly around the heel opening
This includes:
- 16 skipped stitches
- 16 chain stitches
Join.
32 sts
Heel Round 2
Ch 1.
Repeat around:
hdc in next 6 sts, hdc2tog
Join.
28 sts
Heel Round 3
Hdc in each stitch around.
Join.
28 sts
Heel Round 4
Repeat:
hdc in next 5 sts, hdc2tog
around.
Join.
24 sts
Heel Round 5
Repeat:
hdc in next 4 sts, hdc2tog
around.
Join.
20 sts
Heel Round 6
Repeat:
hdc in next 3 sts, hdc2tog
around.
Join.
16 sts
Heel Round 7
Work:
hdc2tog around
Join.
8 sts
Fasten off, leaving a long yarn tail.
Close the Heel
Thread the yarn tail through a yarn needle.
Pass the needle through the remaining 8 stitches.
Pull firmly.
The opening should close.
Secure the yarn.
Weave in the end.
Shape the Heel
Use your fingers to push the heel outward slightly.
The stocking should now have a recognizable:
- Foot
- Heel
- Long leg
PART 6: CROCHET THE RIBBED CUFF
Using warm-cream yarn:
Ch 15.
Cuff Row 1
Sc in second chain from hook.
Sc across.
14 sts
Ch 1 and turn.
Cuff Row 2
Working in the back loop only:
Sc across.
14 sts
Ch 1 and turn.
Continue
Repeat Row 2 until the strip comfortably wraps around the top opening of the stocking.
Depending on your gauge, you’ll need approximately:
36–40 rows
Do not stretch the cuff excessively while measuring.
Join the Cuff
Bring the first and final rows together.
Slip stitch or sew the edges together.
You now have a ribbed ring.
Attach the Cuff
Place the cuff around the top of the stocking.
Match:
Cuff seam → back of stocking
Using cream yarn and a yarn needle, sew the lower edge of the cuff evenly around the stocking opening.
Fold the Cuff
Fold the upper part of the ribbing downward.
Aim for a visible cuff approximately:
3–3½ inches deep
Adjust until it sits evenly.
Optional Permanent Fold
If you’d like the cuff to remain folded:
Use cream yarn to tack it in place at:
- Back seam
- Both sides
- Front center
A few tiny hidden stitches are enough.
PART 7: ADD THE HANGING LOOP
Using cream yarn:
Join near the upper back corner of the stocking.
Ch approximately:
24–28
Sl st into the same attachment point.
Fasten off securely.
Reinforce the Loop
Because the stocking may hold small gifts, reinforce the loop.
Use your yarn needle to stitch through the base several times.
The loop should feel secure before hanging.
Your Christmas Stocking Is Finished
You should now have:
- Rounded toe
- Ribbed foot
- Shaped heel
- Long textured leg
- Wide cream cuff
- Hanging loop
Gently shape the stocking with your hands.
Classic Forest Green Stocking
Use:
Forest green body
Cream cuff
This creates a timeless woodland Christmas look.
Traditional Red Stocking
Use:
Cranberry red body
Warm cream cuff
This is perfect for classic Christmas decor.
Neutral Christmas Stocking
Try:
Cream body
with:
Camel or forest-green cuff
This works beautifully with Scandinavian and farmhouse Christmas styling.
Sage Green Version
Use:
Muted sage body
Cream cuff
Pair with natural wood, dried oranges, and warm lights.
Burgundy Stocking
Deep burgundy creates a richer traditional style.
Combine it with:
Cream
or:
Soft gold-colored yarn
for the cuff.
Make a Matching Family Set
Use the same pattern for everyone.
Change only the stocking color.
For example:
- Forest green
- Cranberry
- Cream
- Sage
- Burgundy
Keep every cuff cream so the set looks coordinated.
Add a Personalized Name
Using contrasting yarn and a yarn needle, embroider a name across the cuff.
Keep the letters simple and large.
This works especially well when making stockings for family members.
Add a Crochet Initial
Instead of embroidering an entire name:
Crochet or embroider one large initial onto the cuff.
This keeps the design simple and personalized.
Add Stripes
Change color every:
3–5 rounds
on the leg.
Try:
Forest green + cream
or:
Red + cream
Keep the toe and heel in one solid color for a traditional sock-inspired look.
Contrast Toe and Heel
For a classic stocking:
Make:
- Cuff in cream
- Heel in cream
- Toe in cream
- Body in red or green
Simply change colors before the desired section.
Candy Cane Stocking
Alternate:
Red and cream
every few rounds.
Finish with a cream cuff.
This creates a festive candy-cane-inspired stocking.
Woodland Stocking
Use:
- Forest green
- Brown
- Cream
Add a tiny embroidered tree or star on the cuff.
Minimalist Stocking
Use one solid color for:
- Body
- Heel
- Toe
Then add only a contrasting ribbed cuff.
This keeps the stocking modern and simple.
Add a Faux-Fur Style Cuff
You can replace the standard cuff with soft faux-fur yarn.
However, fuzzy yarn makes stitches harder to see.
For beginners, I recommend making the ribbed cuff first.
Add Tassels
Attach two small yarn tassels near the upper corner.
Keep them decorative rather than using them as the hanging loop.
Add a Pom-Pom
A single yarn pom-pom attached near the cuff can add a playful finish.
Make sure it is securely attached.
Make the Stocking Longer
Add more leg rounds before making the cuff.
For an oversized mantel stocking, add:
4–8 rounds
Make It Shorter
Work fewer leg rounds.
A shorter stocking is useful for:
- Small mantels
- Kids’ rooms
- Decorative displays
Make the Foot Longer
Add extra straight foot rounds before creating the heel opening.
Make the Foot Shorter
Remove a few straight rounds.
Keep enough length for the stocking to retain a classic shape.
Mini Stocking Version
For an ornament-sized stocking, use:
- DK yarn
- Smaller hook
- Fewer toe increases
- Shorter foot
- Shorter leg
For SEO purposes, it’s better to publish that as its own dedicated Mini Crochet Stocking Ornament Pattern, because the search intent differs from this full-size mantel stocking.
Best Yarn for Christmas Stockings
Worsted Acrylic
Acrylic is a practical choice because it is:
- Affordable
- Easy to find
- Available in many Christmas colors
- Durable
- Good for decorative stockings
Wool Blends
Wool blends create:
- Cozy texture
- Beautiful stitch definition
- Traditional handmade appearance
They work especially well for heirloom-style stockings.
Cotton
Cotton gives the stocking:
- Firm structure
- Crisp stitches
- Less stretch
It can work well, although the finished stocking may feel heavier.
Why Worsted Weight Works Well
Worsted yarn gives a good balance between:
- Structure
- Crochet speed
- Texture
- Finished size
It also keeps the stocking flexible enough to fill with small gifts.
What Can You Put Inside?
A crochet stocking can hold lightweight Christmas surprises such as:
- Candy
- Socks
- Small toys
- Gift cards
- Beauty products
- Small craft supplies
Avoid extremely heavy items that could stretch the hanging loop.
Reinforce for Heavier Gifts
If you plan to fill the stocking:
- Reinforce the hanging loop
- Consider lining the stocking
- Avoid hanging very heavy contents from delicate mantel hooks
Optional Fabric Lining
A fabric lining can help prevent small objects from stretching through the crochet fabric.
Trace the finished stocking onto folded fabric.
Add seam allowance.
Sew the lining.
Insert it inside the stocking.
Hand-stitch around the upper edge below the cuff.
Handmade Christmas Gift
Make the stocking itself part of the gift.
Fill it with:
- Hot cocoa
- Candy
- Small handmade items
- Gift card
Add the recipient’s name to the cuff.
Christmas Mantel Styling
For a coordinated mantel:
Use stockings in:
- Forest green
- Cream
- Cranberry
Add:
- Evergreen
- Pinecones
- Wood
- Warm lights
The ribbed texture gives the display plenty of detail without needing excessive decoration.
Why the Afterthought Heel Is Useful
A traditional sock heel can require turning rows and more complicated shaping.
For this stocking:
You simply leave an opening.
Finish the rest of the stocking.
Then return to that opening.
Decrease around it until the heel closes.
This keeps the main stocking construction much easier to follow.
Common Beginner Mistakes
Losing Stitches in the Foot
Count periodically.
You should maintain:
32 stitches
through the straight foot and leg.
Missing the Back Loop
If you accidentally work through both loops, you’ll lose part of the ribbed texture.
The stocking will still function, but the appearance will change.
Making the Heel Opening Too Small
Make sure you:
skip 16 stitches
and:
chain 16
for the written version.
Leaving Gaps at Heel Corners
If small holes appear:
Pick up one extra stitch at each corner.
Decrease those extra stitches on the next round.
Making the Cuff Too Loose
The cuff should fit comfortably around the upper stocking.
Don’t add excessive extra rows.
Weak Hanging Loop
Always reinforce the base.
This is especially important if the stocking will actually be filled.
Blocking the Stocking
Blocking helps:
- Relax ribbing
- Improve heel shape
- Straighten leg
- Define toe
- Smooth cuff
Use the blocking method appropriate for your yarn.
Stuff the Stocking While Blocking
For a fuller shape, place:
- Clean towel
- Tissue paper
- Soft fabric
inside the stocking while it dries.
Don’t overfill.
Washing Your Crochet Stocking
Check your yarn label.
If washing is necessary:
- Wash gently.
- Avoid excessive heat.
- Reshape while damp.
- Lay flat to dry.
- Make sure it is completely dry before storing.
Storage After Christmas
Before storing:
Make sure the stocking is clean and dry.
Fold it loosely.
Avoid crushing the cuff under heavy decorations.
Store in a dry container.
How Long Does a Crochet Christmas Stocking Take?
Time depends on:
- Crochet speed
- Yarn
- Size
- Experience
Worsted yarn provides a good balance between speed and structure.
The repetitive foot and leg rounds are easy to work on over several evenings.
Can Beginners Make This?
A confident beginner can.
If you already know how to crochet in rounds and make basic decreases, the main new technique is the afterthought heel.
For an absolute first crochet project, start with a scarf or coaster first.
Can I Use Bulky Yarn?
Yes.
Bulky yarn creates a larger, faster stocking.
Use a larger hook and work from measurements rather than the exact stitch counts.
Can I Use DK Yarn?
Yes.
The stocking will be smaller unless you add more stitches.
DK is especially suitable for mini stockings and ornaments.
Can I Make It Without Ribbing?
Yes.
Work ordinary hdc through both loops instead of BLO.
The stocking will have a smoother surface.
Can I Skip the Folded Cuff?
Yes.
You can add a simple:
2–3 rounds of sc
around the top instead.
The wide ribbed cuff gives the classic Christmas look, though.
Frequently Asked Questions
Is this stocking worked from the top down?
No. The written version is worked from the toe upward.
How is the heel made?
An opening is left while working the foot, then the heel is crocheted afterward with simple decreases.
What creates the ribbed body?
Half double crochet worked through the back loop only.
What creates the cuff ribbing?
Single crochet worked through the back loop only.
How large is the stocking?
Approximately 16–17 inches long.
Can I make it in several colors?
Yes. The pattern works beautifully with contrast heel, toe, cuff, or stripes.
Can I personalize the cuff?
Yes. Add embroidered names or initials.
Is this a full-size mantel stocking?
Yes. This article is designed for a large Christmas stocking rather than a mini tree ornament.
Final Thoughts
A handmade stocking is one of those crochet projects that can come out year after year and become part of your family’s Christmas traditions.
This classic crochet Christmas stocking pattern combines simple shaping with cozy back-loop ribbing, an easy afterthought heel, a wide contrasting cuff, and a sturdy hanging loop.
Make one in traditional cranberry red.
Choose forest green for a woodland-inspired mantel.
Use cream and sage for a softer modern Christmas palette.
Or crochet a matching set in different colors and personalize every cuff with a family member’s name.
Once you’ve completed the first stocking, the repeating construction makes it easy to create several more.
Save this classic ribbed crochet Christmas stocking pattern for your handmade holiday decor!