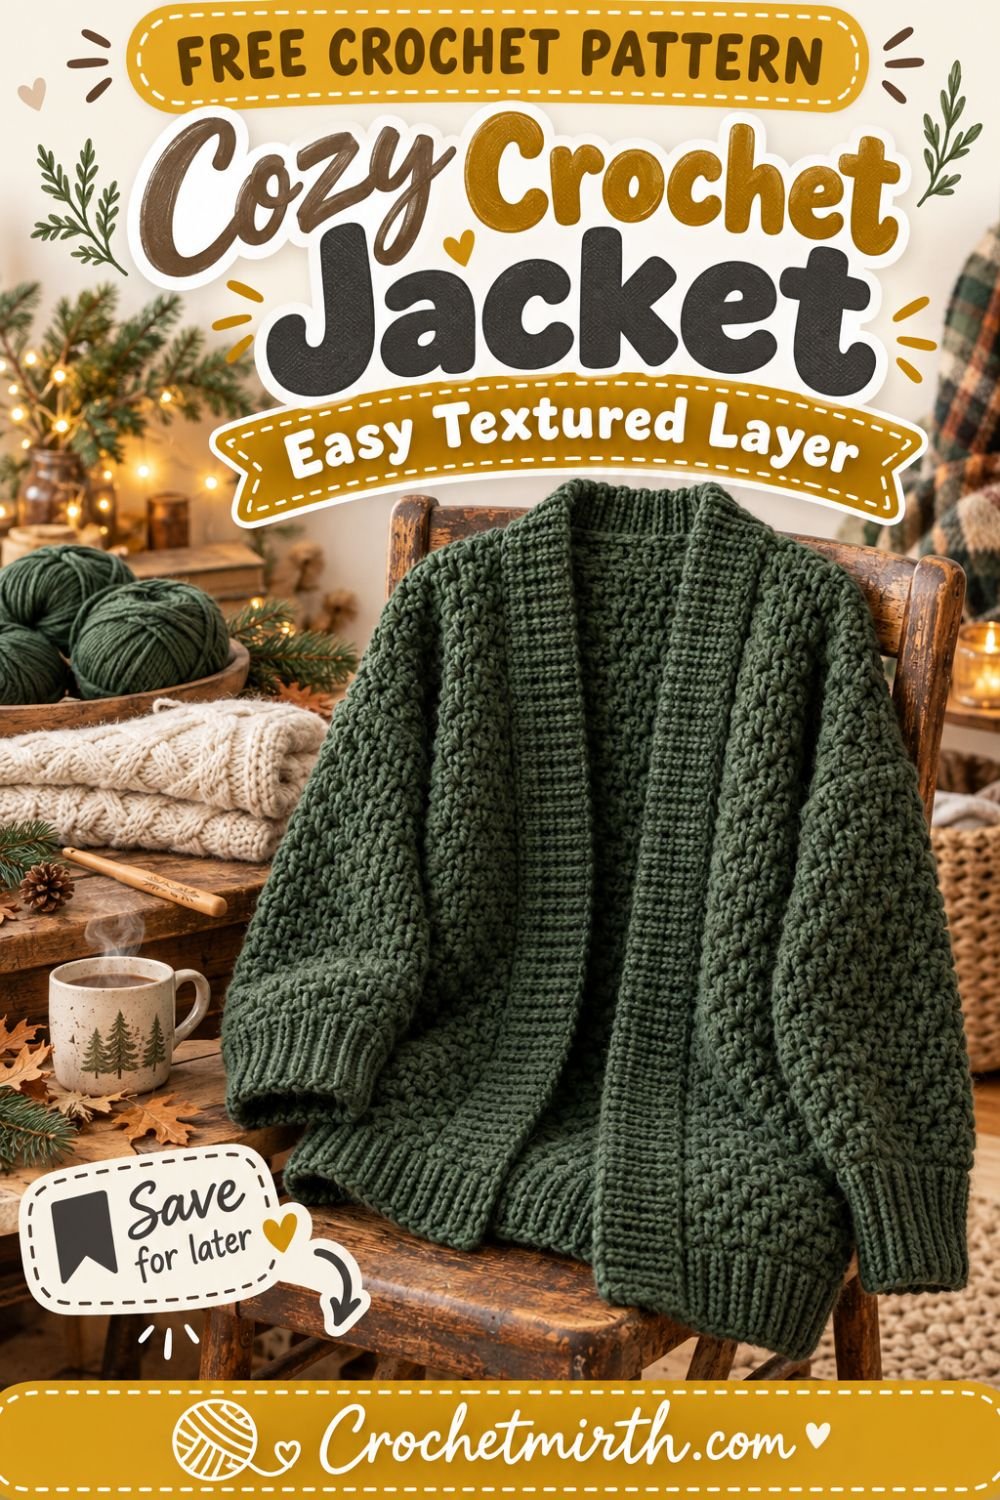
Crochet Jacket Pattern – Cozy Textured Fall-to-Winter Layer
A handmade crochet jacket is one of those pieces you can reach for again and again as the weather changes.
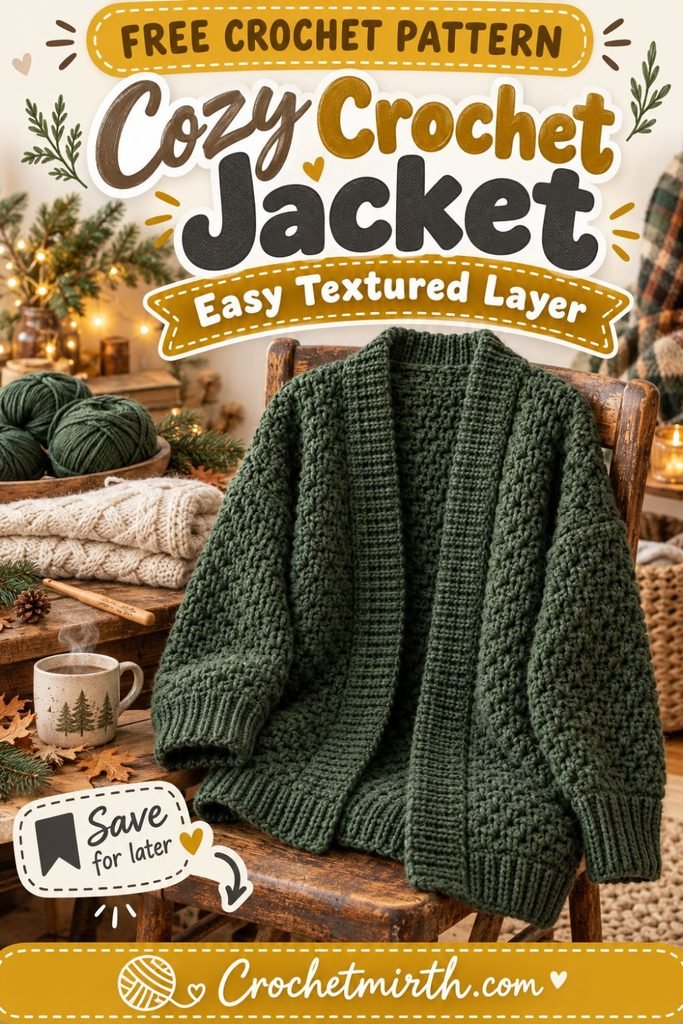
This crochet jacket pattern combines a relaxed open-front silhouette, cozy textured stitches, and stretchy ribbed cuffs to create an easy layering piece for fall and winter.
The construction is intentionally straightforward.
Instead of complicated garment shaping, you’ll crochet:
- One back panel
- Two front panels
- Two simple sleeve rectangles
- Two ribbed cuffs
Then you’ll seam everything together and add an easy border around the front opening.
The result looks polished and textured without requiring advanced garment techniques.
If you’ve already crocheted scarves, hats, ponchos, or simple cowls and you’re ready to try your first jacket, this is a great next project.
Why You’ll Love This Crochet Jacket
This jacket features:
- Simple rectangular panels
- Cozy textured crochet
- Relaxed drop shoulders
- Open-front styling
- Deep ribbed cuffs
- Minimal shaping
- Easy customization
- A comfortable layering fit
- No buttons required
- No complicated armhole shaping
It’s a great transition project between beginner accessories and more fitted crochet sweaters.
Skill Level
Advanced Beginner
You’ll need to know how to:
- Chain
- Single crochet
- Double crochet
- Back-loop-only single crochet
- Slip stitch
- Work flat in rows
- Sew simple seams
- Work evenly around an edge
- Fasten off
- Weave in ends
Materials
Yarn
Approximately 1,500–1,800 yards of Category 4 worsted-weight yarn for the Adult Medium sample.
You may need more or less depending on your chosen size and jacket length.
Look for yarn that is:
- Soft
- Warm
- Comfortable against the skin
- Flexible enough to drape
Good fiber choices include:
- Acrylic
- Wool
- Wool/acrylic blends
- Soft washable wool
- Acrylic/alpaca blends
Crochet Hook
5.5 mm crochet hook
Use a different hook size if necessary to match gauge.
Other Supplies
- Yarn needle
- Scissors
- Measuring tape
- Stitch markers
- Blocking mats and pins, optional
Crochet Abbreviations
This pattern uses US crochet terminology.
ch – chain
sc – single crochet
dc – double crochet
sl st – slip stitch
st – stitch
sts – stitches
BLO – back loop only
Finished Size
The written sample is approximately an Adult Medium with a relaxed fit.
Approximate finished measurements:
Finished bust circumference: 44 inches
Jacket length: 25 inches
Back width: 22 inches
Sleeve length from underarm: 18 inches
Upper sleeve width: approximately 16 inches
The open front gives the garment additional flexibility.
Gauge
In the textured stitch pattern:
13 stitches = 4 inches
11 rows = 4 inches
Make a gauge swatch before beginning.
Garments depend much more on gauge than scarves or blankets.
If you have too many stitches per 4 inches, use a larger hook.
If you have too few, try a smaller hook.
Choosing Your Jacket Size
For a relaxed jacket, aim for approximately:
6–10 inches of positive ease
Positive ease means the finished jacket is larger than your actual bust measurement.
For example:
If your bust is 36 inches, a finished jacket around 42–46 inches will create a relaxed layering fit.
If you prefer a closer fit, use less ease.
For an oversized jacket, use more.
The Textured Stitch
We’ll use a simple lemon peel-style texture made from alternating single and double crochet.
The basic repeat is:
sc in one stitch, dc in the next stitch
Across the following row, work:
sc into the previous dc
and
dc into the previous sc
This creates a slightly bumpy, rich texture without requiring complicated post stitches.
Back Panel
Ch 73.
Row 1
Sc in the second chain from the hook.
Dc in the next chain.
Continue alternating:
sc, dc
across.
You should have:
72 sts
Ch 1 and turn.
Row 2
Sc in the first stitch.
Dc in the next stitch.
Continue alternating sc and dc across.
72 sts
Ch 1 and turn.
Repeat
Continue repeating Row 2 until the back panel measures approximately:
25 inches long
or about 69 rows, depending on your gauge.
Fasten off.
First Front Panel
Ch 37.
Row 1
Sc in the second chain from hook.
Dc in next chain.
Continue alternating sc and dc across.
36 sts
Ch 1 and turn.
Row 2
Continue the same textured stitch pattern.
36 sts
Continue
Repeat until the front panel measures the same length as the back:
25 inches
Fasten off.
Second Front Panel
Make another front panel exactly the same.
You should now have:
- One wide back rectangle
- Two narrower front rectangles
Block the Body Panels
Before assembling the jacket, gently block the three body panels.
Shape them to approximately:
Back: 22 × 25 inches
Each front: 11 × 25 inches
Allow them to dry completely.
Blocking helps make the edges easier to align when seaming.
Join the Shoulders
Place the back panel flat.
Place both front panels on top with:
- Outer edges aligned
- Bottom hems aligned
- Inner front edges facing the center
At the top, you’ll leave an opening for the back neckline.
Shoulder Seam Placement
Measure approximately:
7½ inches
from each outer shoulder edge toward the center.
Use stitch markers to mark the seams.
You should leave approximately:
7 inches
unseamed across the center back.
This creates the neckline.
Seam the Shoulders
Using a yarn needle and matching yarn, sew each shoulder seam.
You can use:
- Mattress stitch
- Whip stitch
- Slip stitch seam
Keep the seam flexible.
Fasten off.
Crochet the Sleeves
The sleeves use the same textured stitch.
Ch 53.
Row 1
Sc in the second chain.
Dc in the next.
Continue alternating sc and dc across.
52 sts
Ch 1 and turn.
Row 2
Continue the texture pattern across.
52 sts
Continue
Work until the sleeve measures approximately:
18 inches long
Fasten off.
Make a second identical sleeve.
These sleeves are intentionally straight rather than heavily tapered.
The ribbed cuffs will gently gather them at the wrists.
Attach the Sleeves
Lay the body flat with the right side facing up.
Find the center of the top edge of one sleeve.
Mark it with a stitch marker.
Align that marker with the shoulder seam.
Lay the sleeve edge along the body side.
Pin approximately:
8 inches
of sleeve width on each side of the shoulder seam.
This creates an armhole circumference around 16 inches.
Sew the sleeve to the body.
Repeat with the other sleeve.
Seam the Sides and Sleeves
Fold the jacket so the front panels lie over the back.
Match the sleeve edges.
Beginning at the wrist end, sew along:
- Sleeve underside
- Underarm
- Side of jacket
- Down to the hem
Repeat on the second side.
Turn the jacket right side out.
You now have the main jacket shape.
Make the Ribbed Cuffs
The separate cuffs create a fitted wrist even though the sleeves are straight.
Ch 9.
Cuff Row 1
Sc in the second chain from the hook.
Sc across.
8 sts
Ch 1 and turn.
Cuff Row 2
Working in the back loop only, sc across.
8 sts
Ch 1 and turn.
Continue
Repeat Row 2 until the strip wraps comfortably around your wrist.
It should stretch slightly.
Do not make it loose.
Join the Cuff
Bring the first and final rows together.
Slip stitch or sew the edges together.
You now have a ribbed cuff ring.
Make a second identical cuff.
Attach the Cuffs
Place one cuff around the bottom of a sleeve.
Match the cuff seam with the sleeve seam.
Using matching yarn, sew the cuff evenly around the sleeve opening.
Because the sleeve is wider than the cuff, gently distribute the extra sleeve fabric around the cuff.
Repeat for the second sleeve.
Add the Front and Neck Border
This border runs continuously:
- Up one front
- Around the back neckline
- Down the opposite front
Join yarn at the bottom corner of one front panel.
Border Row 1
Ch 1.
Work sc evenly up the entire front edge.
Continue around the back neckline.
Then work down the opposite front edge.
Fasten off.
Border Row 2
Rejoin yarn at the same lower corner.
Work sc in BLO along the entire border.
Fasten off.
Border Rows 3–5
Repeat the BLO row for a wider structured front band.
The finished border should measure approximately:
1½–2 inches wide
This gives the jacket a polished open-front finish.
Make the Border Wider
For a more cardigan-like shawl border, continue for:
7–10 rows
instead.
A wider border creates extra warmth around the neck and front.
Add Pockets
Pockets are optional, but they make a cozy jacket even more practical.
Make two matching rectangles.
Ch 23.
Work the same sc/dc texture until each pocket measures approximately:
7 × 7 inches
Fasten off.
Position the Pockets
Put the jacket on.
Use stitch markers to place the pockets where your hands naturally rest.
Remove the jacket.
Sew:
- Bottom
- Left side
- Right side
Leave the top open.
Repeat for the second pocket.
Optional Ribbed Pocket Edge
Before attaching the pockets, add:
2–3 rows of sc BLO
across the top.
This coordinates the pockets with the cuffs and front border.
How to Make the Jacket Longer
Simply continue each body panel before fastening off.
For a longer jacket:
28–30 inches
works well.
For a coat-style layer:
Try:
32–36 inches
Remember that additional length requires additional yarn.
Make a Cropped Jacket
For a shorter silhouette, stop the panels around:
18–20 inches
This creates a cropped cardigan-style jacket that pairs well with high-waisted jeans or skirts.
How to Adjust the Width
The easiest method is to work from your desired finished bust circumference.
For example:
Desired finished circumference:
48 inches
Back panel:
Approximately 24 inches
Each front:
Approximately 12 inches
The back should equal approximately half the finished circumference.
Each front should equal approximately one quarter.
Made-to-Measure Formula
Use:
Desired finished bust ÷ 2 = back width
Then:
Back width ÷ 2 = each front panel width
Example:
Finished bust = 48 inches
Back = 24 inches
Each front = 12 inches
This makes resizing much easier than relying only on standard size labels.
Adjusting the Armholes
The armhole depth should comfortably accommodate your upper arm plus ease.
For most adult jackets, an armhole depth somewhere around:
8–10 inches
is a useful starting point.
Before attaching the sleeves, pin them temporarily and try the jacket on if possible.
Adjusting Sleeve Length
Measure from your underarm to your wrist.
Crochet the sleeve rectangle until it matches that measurement.
Remember that the ribbed cuff adds additional length.
If your cuff is about 2½ inches long, subtract that amount from the main sleeve length if necessary.
Make Wider Sleeves
Increase your starting chain.
This creates more room around the upper arm.
For a very relaxed jacket, balloon-style sleeves can also work beautifully with fitted ribbed cuffs.
Make Narrower Sleeves
Reduce your starting chain.
Just make sure the sleeve still comfortably fits around your upper arm.
Why Ribbed Cuffs Work Well
The cuffs provide more than decoration.
They:
- Pull the sleeve gently toward the wrist
- Add stretch
- Create a cozy finished look
- Help block cold air
- Contrast nicely with textured body stitches
The vertical ribs also give the jacket a knit-inspired appearance.
Best Yarn for This Jacket
Worsted-weight yarn provides a good balance between:
- Warmth
- Drape
- Stitch definition
- Reasonable project speed
Acrylic
A soft acrylic is affordable and practical.
It can also be easier to wash than some natural fibers.
Wool Blends
Wool blends are excellent for a fall-to-winter layer.
They provide:
- Warmth
- Elasticity
- Texture
- Good stitch definition
Alpaca Blends
A little alpaca can add softness and warmth.
Choose a blend rather than extremely fuzzy yarn if you want the textured stitches to remain visible.
Cozy Color Ideas
Try:
- Forest green
- Charcoal
- Cream
- Camel
- Chocolate brown
- Burgundy
- Rust
- Mustard
- Navy
- Sage
Fall Color Palette
For a strong autumn look:
- Rust
- Burnt orange
- Olive
- Mustard
- Warm brown
Winter Color Palette
For a classic winter jacket:
- Forest green
- Charcoal
- Cream
- Burgundy
- Navy
Add Buttons
The jacket is designed to remain open, but buttons can be added.
Sew two or three large buttons to one front border.
Create simple chain-loop buttonholes on the opposite border.
Large wooden buttons look especially good with textured crochet.
Add a Belt
For another styling option, crochet a long belt.
Ch until your chain measures approximately:
60–70 inches
Work several rows of sc.
Fasten off.
Tie the belt around your waist for a more fitted silhouette.
Make a Matching Belt Loop
You can also add two small crochet loops to the side seams to hold the belt in place.
Add a Hood
Want an even warmer jacket?
A hood can be added around the neckline.
One beginner-friendly method is to crochet a large rectangle and attach it around the back neckline.
Fold the upper edge and seam it to create the hood.
This changes the look into a cozy crochet hooded jacket.
Why This Pattern Works for Advanced Beginners
A fitted sweater may require:
- Armhole shaping
- Shoulder shaping
- Neckline decreases
- Sleeve caps
- Precise garment construction
This jacket keeps those details simple.
The main pieces are rectangles.
The drop-shoulder construction eliminates complicated sleeve-cap shaping.
That lets you focus on:
- Keeping even tension
- Matching panel measurements
- Seaming
- Creating a polished border
Common Beginner Mistakes
Skipping the Gauge Swatch
A small gauge difference across a large garment can significantly change the finished size.
Always check before making all five panels.
Making Different-Length Front Panels
Count your rows or measure both front panels carefully.
They need to match.
Stretching Panels While Measuring
Lay your crochet flat and relaxed.
Do not pull on the fabric while measuring.
Making the Shoulder Seam Too Long
Leave enough opening for your neck.
Pin the shoulders first and try the jacket on before final seaming when possible.
Attaching Sleeves Unevenly
Mark the center of each sleeve.
Match that center to the shoulder seam before attaching.
Making the Cuffs Too Loose
The cuff should stretch around your wrist.
If it already hangs loose before stretching, remove a few ribbing rows.
Blocking the Finished Jacket
Blocking can significantly improve the final appearance.
It helps:
- Relax the stitches
- Smooth the seams
- Improve drape
- Even out panel dimensions
Use a blocking method appropriate for your yarn fiber.
How Long Does a Crochet Jacket Take?
A jacket requires more crochet time than small accessories because you’re making several large panels.
However, this pattern uses a repetitive two-stitch texture and simple rectangular construction.
That makes it a relaxing project to work on over multiple evenings or weekends.
Is This a Good First Crochet Garment?
If you’re comfortable with basic crochet and have already finished a few smaller projects, yes.
This pattern avoids many of the shaping techniques used in fitted sweaters.
A poncho is still easier, but this jacket is a natural next step when you’re ready to make sleeves and assemble garment panels.
Can I Use Bulky Yarn?
Yes, but your stitch counts will change significantly.
Use a larger hook and crochet each panel to the finished measurements rather than following the exact stitch counts.
Bulky yarn will create:
- A warmer jacket
- Thicker texture
- Faster-growing fabric
Can I Use DK Yarn?
Yes.
DK yarn will create a lighter jacket with more drape.
You’ll need:
- More stitches
- More rows
- More total yardage
Again, work from measurements.
Can I Make This Without Pockets?
Absolutely.
The pockets are completely optional.
Leaving them off gives the jacket a cleaner, minimalist appearance.
How to Wash Your Crochet Jacket
Always check the yarn label.
In general:
- Wash gently.
- Support the garment when wet.
- Avoid hanging it while saturated.
- Reshape carefully.
- Lay flat to dry when recommended.
Proper care helps prevent the jacket from stretching out of shape.
Frequently Asked Questions
Is this crochet jacket beginner-friendly?
It is best suited to an advanced beginner who already knows basic stitches and simple seaming.
Is there complicated shaping?
No. The jacket is built primarily from rectangular panels with drop shoulders.
What stitch creates the texture?
Alternating single and double crochet creates the textured fabric.
Can I make it oversized?
Yes. Increase the back and front panel widths to add positive ease.
Are the pockets required?
No. They’re optional.
Can I make a longer coat version?
Yes. Simply lengthen all three body panels before assembly.
Can I add a hood?
Yes. A simple rectangle hood can be attached around the neckline.
Final Thoughts
A cozy crochet jacket doesn’t need complicated shaping to become a beautiful handmade wardrobe piece.
This crochet jacket pattern uses simple rectangular panels, an easy textured stitch, drop shoulders, and cozy ribbed cuffs to create a practical layer you can wear from fall into winter.
Keep it open for a casual cardigan-style fit, add pockets for everyday practicality, or customize it with buttons, a belt, or even a hood.
Once you understand the basic panel construction, the same idea can be adapted into cropped jackets, oversized cardigans, or longer crochet coats.
Choose a soft yarn in your favorite fall or winter shade and enjoy turning basic crochet stitches into a garment you’ll actually want to wear.
Save this cozy textured crochet jacket pattern for your next fall-to-winter crochet project!
SEO
Primary keyword: crochet jacket pattern
Secondary keywords: easy crochet jacket, textured crochet cardigan, crochet cardigan pattern, beginner crochet jacket, fall crochet jacket, winter crochet cardigan, free crochet jacket pattern, cozy crochet cardigan
Slug: cozy-crochet-jacket-pattern
Meta description: Crochet a cozy textured jacket with this easy pattern featuring simple panels, drop shoulders, ribbed cuffs, pockets, and a relaxed fall-to-winter fit.