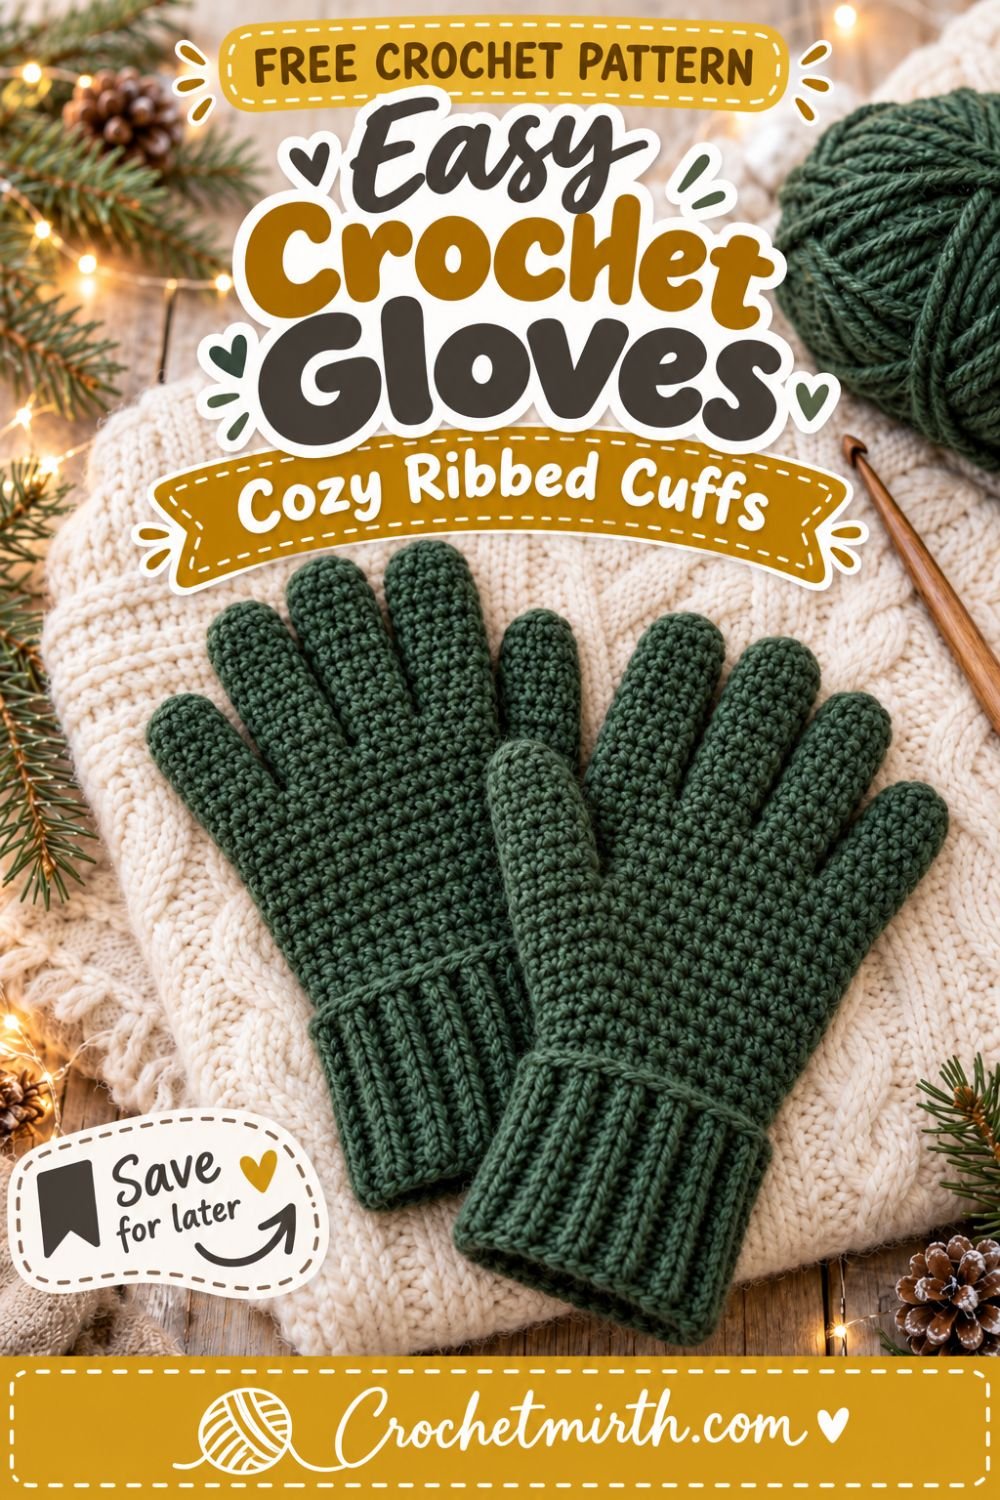
Easy Crochet Gloves Pattern with Cozy Ribbed Cuffs
Crocheting a pair of gloves with individual fingers may look intimidating, but the process becomes much easier when you break it into small sections.
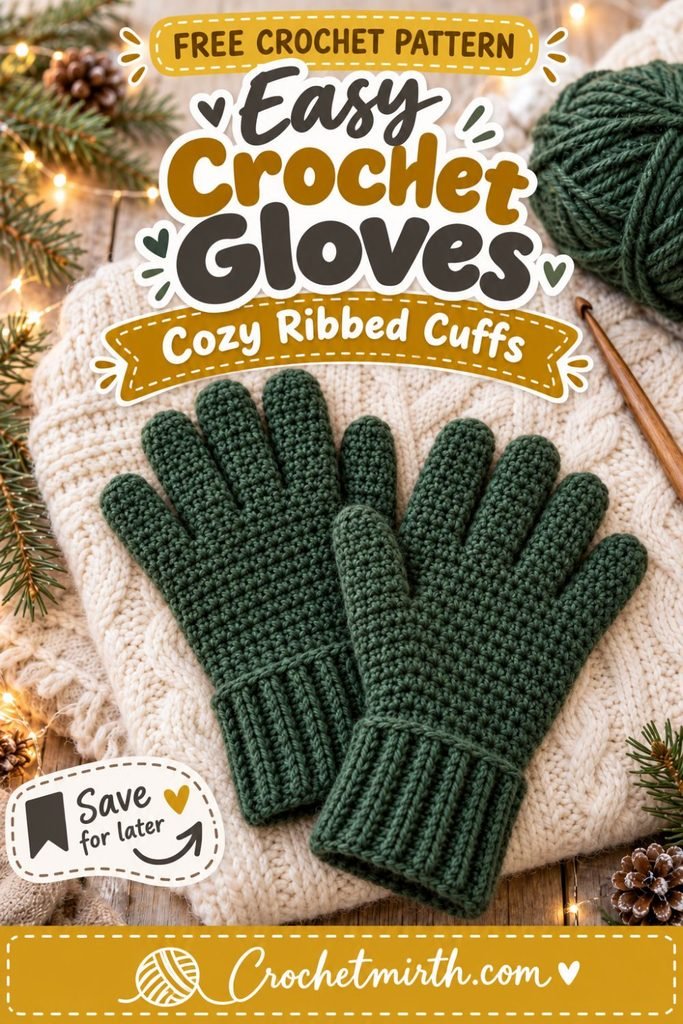
This easy crochet gloves pattern starts with a stretchy ribbed cuff, continues with a simple fitted hand worked in rounds, and then finishes each finger individually.
The result is a classic pair of full-finger crochet gloves that keep your wrists, palms, and fingers covered on chilly days.
The pattern also uses a simple custom-fit method for the fingers, which means you can adjust each finger length as you work instead of depending entirely on fixed measurements.
They make a beautiful cold-weather accessory and a thoughtful handmade Christmas gift.
Why You’ll Love These Crochet Gloves
These gloves feature:
- Cozy ribbed cuffs
- Five full fingers
- Simple crochet stitches
- Customizable finger lengths
- A snug winter fit
- Easy-to-adjust sizing
- Warm wrist coverage
- Classic unisex styling
- Minimal complicated shaping
The main hand uses repetitive stitches, while the finger sections are made one at a time.
Skill Level
Advanced Beginner
The title says easy because the stitches themselves are simple, but a glove with five individual fingers naturally requires a little more patience than mittens or fingerless gloves.
You should already feel comfortable with:
- Chain stitches
- Single crochet
- Back-loop crochet
- Working in continuous rounds
- Simple increases
- Simple decreases
- Using stitch markers
- Joining yarn
- Weaving in ends
If you’ve already made mittens or fingerless gloves, this is a great next project.
Materials
Yarn
Approximately 320–360 yards of Sport Weight yarn, Category 2
A lightweight yarn helps the fingers remain flexible rather than bulky.
Choose something soft enough to wear directly against your skin.
Good options include:
- Soft acrylic
- Merino wool
- Superwash wool
- Wool/acrylic blends
Crochet Hook
3.5 mm crochet hook
You can adjust the hook size if needed to obtain gauge.
Other Supplies
- Yarn needle
- Scissors
- Measuring tape
- 8–10 removable stitch markers
Stitch markers are especially helpful when dividing the hand for the individual fingers.
Crochet Abbreviations
This pattern uses US crochet terminology.
ch – chain
sc – single crochet
sc2tog – single crochet 2 together
sl st – slip stitch
st – stitch
sts – stitches
BLO – back loop only
rnd – round
Finished Size
The basic instructions are designed for approximately an Adult Medium.
Approximate finished measurements:
Palm circumference: 7½–8 inches
Glove length: approximately 9½–10½ inches
Cuff length: approximately 2½ inches
Because hands and fingers vary considerably, the pattern includes fitting instructions as you crochet.
Gauge
Approximately:
22 sc = 4 inches
The fabric should feel:
- Dense enough for warmth
- Flexible enough for finger movement
- Slightly stretchy
Gloves should fit fairly close to the hand.
If the fabric is very loose, use a smaller hook.
If it feels stiff and uncomfortable, go up a hook size.
Construction Overview
Each glove is made in four stages:
- Crochet a ribbed wrist cuff.
- Crochet the palm and back of the hand.
- Add the thumb.
- Divide the upper hand and crochet each finger separately.
The right and left gloves use almost identical construction, with the thumb opening positioned on opposite sides.
Part 1: Crochet the Ribbed Cuff
Ch 13.
Row 1
Sc in the second chain from the hook.
Sc across.
12 sts
Ch 1 and turn.
Row 2
Working in the back loop only, sc across.
12 sts
Ch 1 and turn.
Continue the Ribbing
Repeat Row 2 until the cuff wraps comfortably around your wrist.
For an Adult Medium, this will usually be approximately:
30–34 rows
depending on your gauge.
Do not make the cuff loose.
It should stretch slightly around the wrist.
Join the Cuff
Bring the first and final rows together.
Make sure the ribbing is not twisted.
Slip stitch through both layers to join the cuff into a tube.
Do not fasten off.
Part 2: Crochet the Hand
Turn the cuff so you’ll work around the long edge.
Hand Round 1
Ch 1.
Work approximately:
40 sc evenly around the cuff
Do not join.
From now on, work in continuous rounds.
Place a stitch marker in the first stitch.
Rounds 2–7
Sc in each stitch around.
40 sts
Move your marker upward after each round.
Try the glove on after Round 7.
The crochet should reach approximately to the lower base of your thumb.
Add or remove one round if necessary.
Create the Thumb Opening
Because the right and left thumbs sit on opposite sides, the opening placement changes slightly.
Right Glove
Sc in the next 5 sts.
Ch 7.
Skip the next 7 sts.
Sc in each remaining stitch around.
Left Glove
Sc in the next 28 sts.
Ch 7.
Skip the next 7 sts.
Sc in the remaining 5 sts.
Next Round
Sc normally around.
When you reach the chain opening:
Work 1 sc in each chain.
You should return to approximately:
40 sts
Continue the Hand
Sc around until the glove reaches the base of your fingers.
For many adults, this will be approximately:
8–11 additional rounds
after the thumb opening.
Try the glove on frequently.
Stop when the crochet reaches the natural spaces between your fingers.
Do not continue too high.
Part 3: Divide the Fingers
Hands vary greatly in finger width, so using your own hand is much more reliable than forcing the same stitch count on everyone.
Put the unfinished glove on.
Flatten the top edge around your fingers.
Use removable stitch markers to identify the spaces between:
- Index and middle finger
- Middle and ring finger
- Ring finger and pinky
You are essentially dividing the remaining hand opening into four finger sections.
The middle finger should generally receive slightly more room than the pinky.
Beginner-Friendly Finger Fitting Method
For each finger:
- Place the glove on your hand.
- Pinch the front and back crochet fabric gently around that finger.
- Mark both sides with stitch markers.
- Remove the glove.
- Crochet only around the stitches between those markers.
- Add 2 chain stitches across the web of the finger if needed.
The goal is for the finger tube to feel fitted but not tight.
Part 4: Crochet the Pinky
It is easiest to begin with the pinky.
Join yarn at the outside edge of the pinky section.
Sc around the marked pinky stitches.
At the inner side of the finger:
Ch 2.
Continue around the opposite side.
Do not join.
Work in continuous rounds.
Pinky Rounds
Sc in each stitch around until the crochet reaches approximately:
¼ inch below the fingertip
Try the glove on frequently.
Close the Pinky
Begin decreasing.
Decrease Round 1
Repeat:
sc in next 2 sts, sc2tog
around as evenly as possible.
Decrease Round 2
Sc2tog around.
Fasten off, leaving a yarn tail.
Thread the tail through the remaining stitches.
Pull closed.
Secure and weave in the end.
Return to the Hand
Join yarn at the base of the remaining finger opening.
Work one round of sc around the remaining top of the hand.
When you reach the side of the finished pinky, pick up 1–2 stitches along its base if needed.
This helps prevent a gap between the fingers.
Crochet the Ring Finger
Put the glove on again.
Use your stitch markers to confirm the ring finger placement.
Join yarn.
Sc around the marked ring-finger stitches.
Ch 2 across the web space.
Continue around the opposite side.
Work in continuous rounds.
Ring Finger Length
Continue until approximately:
¼ inch below the fingertip
Then repeat the same decrease method used for the pinky.
Fasten off and close the tip.
Crochet the Middle Finger
The middle finger is usually the longest.
Join yarn around the marked middle-finger section.
Work sc around the finger.
Add:
ch 2
across the web space if needed.
Continue in continuous rounds.
Try the glove on regularly.
Stop about ¼ inch before the fingertip.
Decrease and close the finger.
Crochet the Index Finger
The remaining upper hand opening becomes the index finger.
Join yarn.
Work sc evenly around the opening.
Pick up a stitch or two beside the middle finger if necessary to close any gaps.
Continue until approximately:
¼ inch below the tip of the index finger
Decrease gradually.
Fasten off and close.
Part 5: Crochet the Thumb
Return to the thumb opening.
Join yarn at the lower corner.
Work approximately:
16–18 sc evenly around the opening
The exact number can vary slightly.
Pick up an extra stitch in each corner if necessary to avoid holes.
Thumb Rounds
Sc around continuously.
Try the glove on.
Continue until the crochet reaches approximately:
¼ inch below the thumb tip
Shape the Thumb Tip
Repeat:
sc in next 2 sts, sc2tog
around.
On the following round:
sc2tog around
Fasten off.
Thread the yarn through the remaining stitches.
Pull closed and secure.
Preventing Gaps Between the Fingers
Small gaps occasionally appear where one finger meets another.
This is normal with crochet gloves.
You can prevent them by:
- Picking up one extra stitch in the finger corner
- Working through the side of the neighboring finger
- Using the yarn tail to close any tiny opening afterward
Do not add too many stitches or the fingers may become too wide.
How to Make the Fingers Fit Better
The easiest rule is:
Try the glove on frequently.
Finger lengths vary much more than most clothing measurements.
Instead of relying only on row counts, crochet until each finger reaches about:
¼ inch below your actual fingertip
Then begin decreasing.
How Tight Should Crochet Gloves Fit?
The finished glove should feel:
Snug but comfortable
You should be able to:
- Bend your fingers
- Make a fist
- Hold a phone
- Grip a cup
- Move your thumb comfortably
The glove should not slide loosely around your hand.
How to Adjust the Hand Width
The written pattern starts with approximately:
40 stitches around the hand
For smaller hands, use fewer stitches.
For larger hands, add stitches.
A good rule is to crochet until the circumference is slightly smaller than the actual hand circumference because the fabric will stretch.
How to Adjust the Cuff
The ribbed cuff is very easy to customize.
Smaller Wrist
Crochet fewer ribbing rows.
Larger Wrist
Add more rows.
Before joining the cuff, wrap it around the wrist to check the fit.
Make Longer Ribbed Cuffs
For extra warmth, increase the starting chain.
Instead of:
ch 13
try:
ch 17–21
This creates a longer cuff extending farther up the forearm.
Make Shorter Cuffs
For a simple everyday glove, reduce the starting chain.
Try:
ch 9–11
The glove will have a shorter wrist section.
Why Use Sport Weight Yarn?
Full-finger gloves need flexibility.
Using a relatively fine yarn helps:
- Keep the fingers slim
- Improve movement
- Create better shaping
- Reduce bulk between fingers
- Produce a more wearable glove
Very thick yarn can make individual fingers feel bulky.
Best Yarn Fibers for Winter Gloves
Wool
Wool provides excellent warmth.
It’s a classic choice for winter accessories.
Superwash Wool
Superwash wool offers warmth while often being easier to care for.
Acrylic
Soft acrylic is affordable, widely available, and generally easy to wash.
Wool Blends
Blended yarn can offer a balance of:
- Warmth
- Softness
- Durability
- Easy care
Choose a yarn that feels comfortable directly against your skin.
Cozy Winter Color Ideas
Try:
- Forest green
- Charcoal gray
- Cream
- Camel
- Burgundy
- Navy
- Sage green
- Rust
- Mustard
- Chocolate brown
A solid yarn also makes the ribbed cuff texture stand out beautifully.
Two-Tone Crochet Gloves
Use one color for the cuff and another for the glove.
For example:
Forest green glove + cream cuff
Charcoal glove + mustard cuff
Burgundy glove + warm-gray cuff
Cream glove + sage cuff
This is also a great way to use smaller amounts of leftover yarn.
Add Contrasting Fingertips
For a fun modern look, change yarn color for the final few rounds of each finger.
You could make:
- Cream fingertips
- Mustard fingertips
- Multicolor fingertips
- Matching fingertips and cuffs
Make Touchscreen-Friendly Gloves
Standard crochet yarn does not operate most touchscreens reliably.
One option is to leave the very tip of the index finger open.
Simply stop crocheting before the final decrease rounds and finish the edge with one round of slip stitches or single crochet.
You can do the same with the thumb.
This creates a hybrid full/fingerless glove that’s useful for phones.
Make Matching Winter Accessories
Use the same yarn to crochet:
- Ribbed beanie
- Balaclava
- Scarf
- Cowl
- Ear warmer
A pair of gloves combined with a matching beanie makes a beautiful handmade Christmas gift.
Common Beginner Mistakes
Making the Cuff Too Loose
The ribbing should stretch around the wrist.
It shouldn’t already be loose before stretching.
Losing Stitches in Continuous Rounds
Always keep a marker in the first stitch.
Move it after every round.
Making the Fingers Too Wide
Crochet finger tubes should fit fairly closely.
Check each finger before continuing too far.
Making All Fingers the Same Length
Human fingers have different lengths.
Fit each finger individually.
Leaving Large Gaps
Pick up an extra stitch where finger sections meet.
Any tiny remaining hole can be closed with the yarn tail.
Making the Gloves Too Large
Crochet fabric often relaxes slightly with wear.
A fitted glove generally performs better than an oversized one.
How Long Does It Take to Crochet Full Gloves?
Full-finger gloves take longer than mittens or fingerless gloves because each finger is crocheted separately.
The main hand works up quite quickly because it uses repetitive single crochet.
Most of the extra time goes into:
- Dividing the fingers
- Checking the fit
- Crocheting the individual finger tubes
- Weaving in the additional yarn ends
Once you finish the first glove, the second usually feels much easier.
Are Full Crochet Gloves Good for Beginners?
If you’ve never crocheted anything before, start with a scarf, beanie, or fingerless gloves first.
If you’re comfortable with:
- Single crochet
- Working in rounds
- Stitch markers
- Simple shaping
then this glove pattern is a manageable next challenge.
Can I Make Fingerless Gloves From This Pattern?
Yes.
Complete:
- The cuff
- Hand
- Thumb opening
Then stop at the base of the fingers.
Work one or two finishing rounds around the top edge instead of creating individual fingers.
You can also make short half-fingers.
Can I Make Mittens Instead?
Yes.
Instead of dividing the upper hand into four fingers, continue crocheting around the entire hand.
Then decrease gradually at the top.
Crochet the thumb separately.
This turns the same basic cuff and hand construction into mittens.
Washing Your Crochet Gloves
Always check your yarn label.
In general:
- Wash gently.
- Avoid excessive heat.
- Reshape each finger while damp.
- Lay flat to dry if recommended.
- Make sure the gloves are completely dry before storing.
Frequently Asked Questions
Are these full-finger gloves?
Yes. The pattern includes separate sections for the pinky, ring finger, middle finger, index finger, and thumb.
Why isn’t every finger given an exact row count?
Finger lengths vary greatly from person to person. Fitting each finger as you crochet produces a much more comfortable result.
Can I use worsted-weight yarn?
You can, but the fingers will be thicker. You’ll also need fewer stitches and a larger hook.
Why use a ribbed cuff?
Back-loop single crochet creates a stretchy cuff that fits closely around the wrist and helps keep cold air out.
Do I need separate instructions for both hands?
The main difference is the location of the thumb opening. The rest of the construction follows the same method.
Can I make longer gloves?
Yes. Increase the cuff length or add additional rounds between the cuff and thumb opening.
Final Thoughts
Full crochet gloves take a little more patience than mittens, but you don’t need complicated stitches to make a warm, wearable pair.
Start with a stretchy ribbed cuff.
Crochet the hand in simple rounds.
Create the thumb opening.
Then divide the top of the glove and work each finger individually.
The custom-fit finger method makes it easy to adjust the glove to the person who will actually wear it.
Once you’ve completed the first glove, the construction of the second will feel much more familiar.
Make your pair in classic forest green, neutral cream, charcoal, burgundy, or any color that suits your winter wardrobe.
Save this easy crochet gloves pattern with cozy ribbed cuffs for your next cold-weather project!
SEO
Primary keyword: easy crochet gloves pattern
Secondary keywords: crochet gloves pattern, full finger crochet gloves, crochet gloves with fingers, beginner crochet gloves, ribbed crochet gloves, winter crochet gloves, free crochet glove pattern, warm crochet gloves
Slug: easy-crochet-gloves-pattern
Meta description: Make warm full-finger crochet gloves with this easy pattern featuring cozy ribbed cuffs, simple hand shaping, and customizable finger lengths.