Crochet Stocking Advent Calendar Pattern – 24 Mini Stockings for Christmas
December feels a little more magical when there’s something handmade waiting for you every morning.

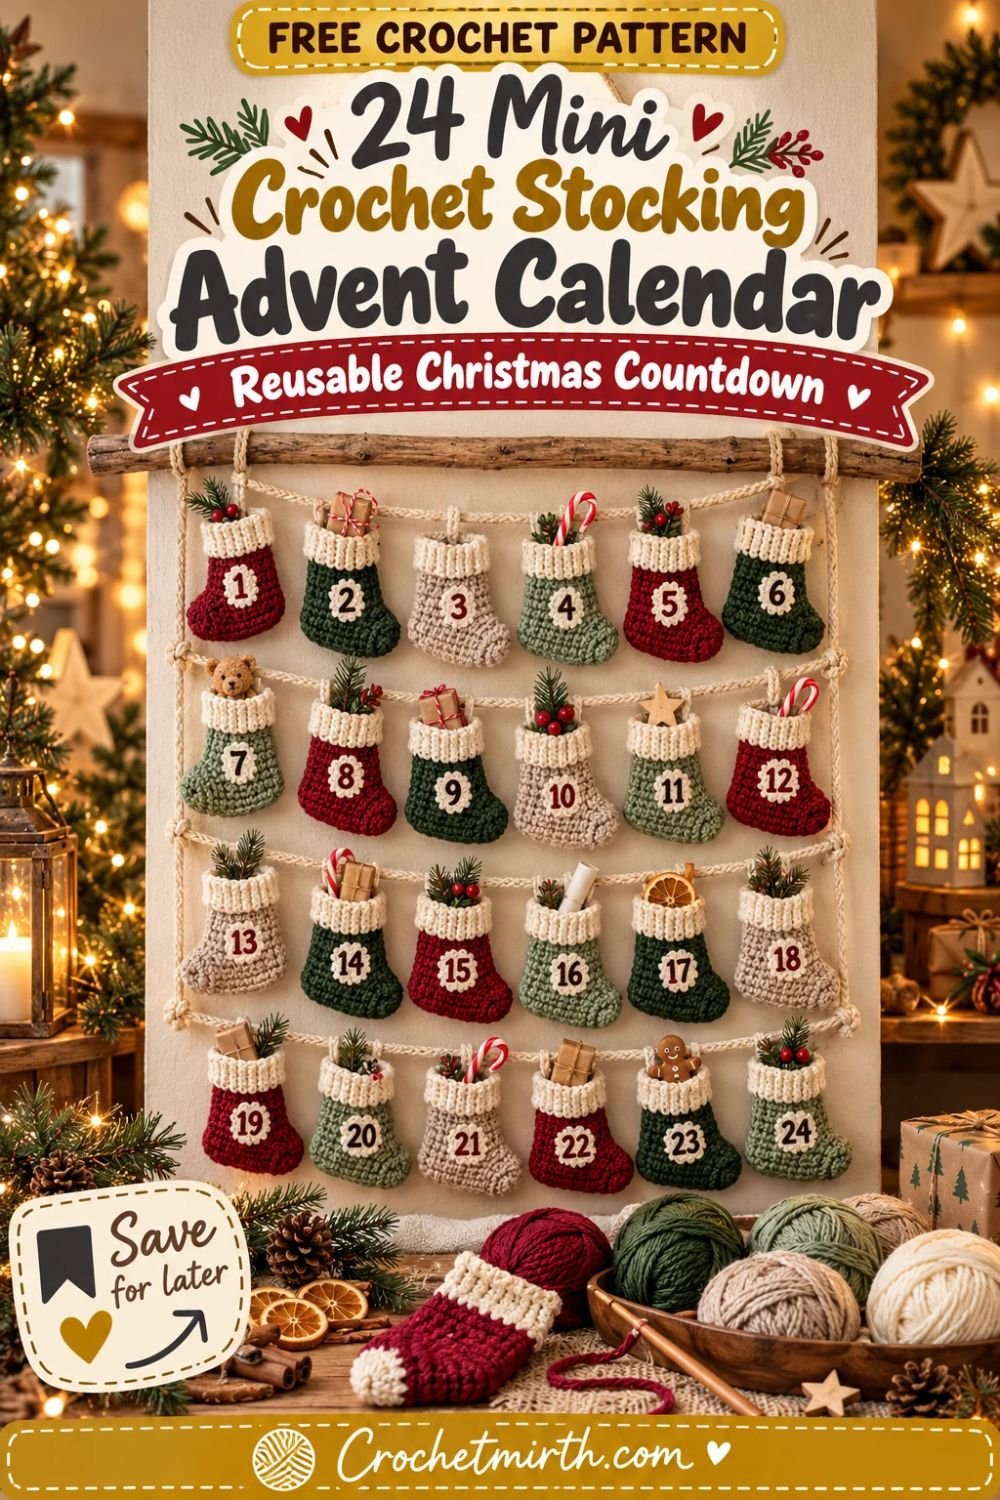
This crochet stocking Advent calendar pattern uses 24 miniature Christmas stockings to create a reusable countdown you can bring out year after year.
Each stocking is large enough for a small treat, folded note, Christmas activity, or tiny surprise, but small enough that crocheting 24 of them remains manageable.
Instead of using complicated sock construction, each stocking is made from two simple flat panels.
You’ll crochet the front and back, add a contrasting cream cuff, embroider a number from 1 to 24, and join the panels around the sides and bottom.
There’s no heel turning.
No short rows.
And no complicated toe shaping.
Once all 24 stockings are finished, you’ll hang them in four rows of six to create a beautiful handmade Christmas countdown.
Why You’ll Love This Crochet Advent Calendar
This project is:
- Reusable every Christmas
- Beginner-friendly
- Made from simple flat pieces
- Easy to batch-crochet
- Functional for small treats
- Customizable in any Christmas palette
- Perfect for scrap yarn
- Easy to personalize
- Beautiful as wall or mantel decor
- A handmade family tradition you can use year after year
Current mini-stocking Advent designs also focus on making the individual stockings functional enough for candy, notes and small surprises while keeping the repeated construction manageable. Etsy
Skill Level
Beginner / Advanced Beginner
You should know how to:
- Chain
- Single crochet
- Work in rows
- Change yarn colors
- Slip stitch
- Sew or crochet pieces together
- Embroider simple numbers
- Fasten off
- Weave in yarn ends
There are no complicated sock techniques in this Crochetmirth version.
Materials
Use Category 4 worsted-weight yarn.
For the full calendar, plan on approximately:
1,000–1,200 yards total
depending on your gauge, colors, hanging cords, and number embroidery.
A practical color plan is:
- 250–300 yards cranberry
- 250–300 yards forest green
- 150–200 yards oatmeal
- 150–200 yards sage
- 250–300 yards warm cream
You may need less if you’re heavily using scraps.
A classic 24-stocking Advent calendar on Ravelry uses approximately five 219-yard skeins of worsted yarn for its complete set, which puts a roughly 1,000-yard total in a realistic range. Ravelry
Crochet Hook
Use a:
4.0 mm crochet hook
The slightly firm gauge helps the stockings hold small treats without stretching excessively.
Other Supplies
You’ll also need:
- Yarn needle
- Scissors
- Measuring tape
- Stitch markers
- Wooden dowel or natural branch, optional
- Small removable treats or notes
No buttons or plastic hardware are required.
Finished Stocking Size
Each mini stocking measures approximately:
5½–6 inches tall
with an approximate:
4–4½ inch toe-to-heel width
and a usable upper opening around:
3–3¼ inches wide
depending on your tension.
This size is very close to current functional Advent stockings, which commonly finish around 5–6¼ inches tall. Etsy
What Fits Inside?
These stockings are designed for small lightweight items such as:
- Wrapped candy
- Chocolate
- Folded notes
- Christmas activity slips
- Stickers
- Tiny ornaments
- Small toys
- Coins
- Hair accessories
- Mini craft supplies
Avoid heavy items because crochet fabric can stretch.
Gauge
Approximately:
16 sc = 4 inches
and:
18 rows = 4 inches
Exact gauge isn’t critical, but consistency matters because you’ll be making 24 matching pieces.
Make one complete test stocking first before starting the other 23.
That is especially important for an Advent calendar because small gauge differences become very obvious when many pieces are displayed together.
Construction Overview
Each stocking consists of:
- Front stocking panel
- Back stocking panel
- Contrast cuff
- Number embroidery
- Joining border
- Hanging loop
The basic shape is an easy L-shaped panel.
The lower section creates the foot and toe.
The narrower upper section creates the leg.
No separate heel piece is required.
MINI STOCKING PATTERN
You will make:
48 stocking panels total
because each of the 24 stockings needs:
1 front + 1 back
Don’t worry.
Once you memorize the shape, the panels become very repetitive.
PART 1: Crochet the Front Panel
Using your chosen stocking color:
Ch 18.
Row 1
Sc in the second chain from the hook and across.
17 sts
Ch 1 and turn.
Rows 2–6
Sc across.
17 sts
Ch 1 and turn.
You now have a short rectangular section.
This becomes the foot.
PART 2: Shape the Leg
Row 7
Sc in the first:
13 sts
Leave the final:
4 sts unworked
Ch 1 and turn.
The four unworked stitches create the toe extension.
Rows 8–24
Sc across the:
13 sts
Ch 1 and turn after each row.
Keep:
13 sts
in every row.
You now have a simple L-shaped stocking panel.
PART 3: Add the Cream Cuff
Change to warm-cream yarn.
Rows 25–27
Sc across.
13 sts
Ch 1 and turn after Rows 25 and 26.
Fasten off after Row 27.
Your front panel is complete.
Check the Shape
Lay the panel flat.
You should clearly see:
- Long rectangular leg
- Wider foot at the bottom
- Small toe extension
- Cream cuff at the top
Don’t worry that it looks very flat.
Once two panels are joined, it becomes a functional mini stocking pouch.
PART 4: Make the Back Panel
Repeat the entire pattern.
You now have:
2 matching panels
for one stocking.
Important Batch-Making Tip
Instead of finishing one complete stocking at a time, I recommend making them in groups.
For example:
Crochet 6 cranberry front panels.
Then crochet 6 cranberry back panels.
Move to the next color.
Batch work becomes much faster when you’re producing 24 stockings.
PART 5: Number the Front Panel
Before joining the panels, embroider the stocking number.
This is much easier while the piece is still flat.
Use warm cream on dark stockings.
For oatmeal or cream stockings, use:
- Cranberry
- Forest green
- Dark brown
for stronger contrast.
Number Placement
Position the number approximately:
1–1½ inches below the cuff
and center it across the leg.
Keep every number at approximately the same height.
Consistency makes the completed Advent calendar look much more polished.
How to Embroider the Numbers
Use simple:
backstitch
or:
surface running stitch
with a yarn needle.
You don’t need elaborate typography.
The numbers only need to be clearly readable.
Single-Digit Numbers
For:
1–9
make each number approximately:
¾–1 inch tall
Double-Digit Numbers
For:
10–24
keep the digits narrower so both fit comfortably across the stocking.
Use the same height as the single digits.
Alternative Number Tags
Don’t want to embroider directly onto crochet?
Make or purchase small reusable tags numbered:
1–24
and attach one to each hanging loop.
Kraft-paper tags create a particularly nice rustic Christmas look.
Crochet Number Tags
For an entirely yarn-based calendar, crochet 24 tiny cream squares.
Tag
Ch 5.
Sc in second chain and across.
4 sts
Work:
4 rows total
Fasten off.
Embroider the number onto the tiny square.
Sew or tie it to the front of the stocking.
This option adds more work, so direct embroidery is faster.
PART 6: Join the Two Panels
Place the front and back panels together.
Keep the numbered panel facing outward.
Join your main stocking color at the upper side, directly below the cuff.
Single crochet through both layers.
Work down the side.
Continue around:
- Heel area
- Bottom
- Toe
- Opposite side
Stop when you reach the other side of the cuff.
Leave the Top Open
Do not crochet across the top edge.
The entire cuff opening must remain functional so you can place treats inside.
Cream Cuff Edge
If desired, switch to cream when you reach the cuff portion of the side seam.
This makes the joining border match the cuff.
It’s optional.
Check the Pocket
Slide two fingers inside.
The stocking should open easily.
The seams should feel secure.
PART 7: Add the Hanging Loop
Join cream yarn at the upper back corner.
Ch:
14–18
depending on how large you want the loop.
Slip stitch back into the same corner.
Fasten off.
Weave in the ends securely.
The loop should be strong enough to support the stocking and one small treat.
First Stocking Finished
Now repeat until you have:
24 mini stockings
Suggested Color Plan
For a balanced classic Christmas set, make:
8 cranberry
8 forest green
4 oatmeal
4 sage
Use cream cuffs on all 24.
Alternative Four-Color Plan
Make:
6 cranberry
6 forest green
6 cream
6 sage
For the cream stockings, use:
forest-green or cranberry cuffs
so the edge remains visible.
Heirloom Neutral Palette
Try:
- Oatmeal
- Warm cream
- Taupe
- Sage
- Muted cranberry
This creates a softer farmhouse Advent calendar.
Traditional Christmas Palette
Use:
- Bright red
- Forest green
- White
Make:
12 red
and:
12 green
with white cuffs.
Scandinavian Palette
Try:
- Warm cream
- Brick red
- Oatmeal
- Charcoal
Keep the decorations minimal.
PART 8: Make the Four Hanging Cords
For the most manageable display, we’ll arrange the calendar as:
4 rows × 6 stockings
Using warm-cream yarn:
Ch approximately:
120–140
or until the cord measures roughly:
32–38 inches
depending on your desired spacing.
Slip stitch back along the chain if you want a thicker, more stable cord.
Make:
4 identical cords
Why Four Rows?
Putting all 24 stockings on one cord would create a very long garland.
Four rows of six:
- Fit better on a wall
- Keep all numbers visible
- Look balanced in photographs
- Make each day’s stocking easier to reach
Attach Six Stockings Per Row
Lay one cord flat.
Arrange:
6 stockings
underneath.
Space them approximately:
4–5 inches apart
Tie or slip stitch each hanging loop onto the cord.
Repeat for the remaining three cords.
Number Arrangement
You can arrange them chronologically:
Row 1
1 – 2 – 3 – 4 – 5 – 6
Row 2
7 – 8 – 9 – 10 – 11 – 12
Row 3
13 – 14 – 15 – 16 – 17 – 18
Row 4
19 – 20 – 21 – 22 – 23 – 24
This is easiest for children to follow.
Mixed Number Layout
For a more playful Advent calendar, mix the numbers.
Then each morning becomes a small search activity.
For example:
12 – 3 – 18 – 1 – 22 – 7
Just make sure every number from 1 to 24 appears exactly once.
PART 9: Attach the Rows to a Wooden Dowel
Use a natural wooden dowel approximately:
30–36 inches wide
Tie the first cord near the top.
Hang the second row approximately:
7 inches lower.
Repeat for the third and fourth.
Use additional vertical cream yarn strands at both sides to suspend the rows if desired.
Natural Branch Display
Instead of a dowel, use a clean dry decorative branch.
Tie all four rows from the branch at different heights.
This works beautifully with rustic and farmhouse Christmas styling.
Mantel Display
Don’t want a wall hanging?
Use two rows of 12 across a mantel.
Make longer cords and distribute the stockings evenly.
One Long Garland
You can also put all 24 stockings onto one extremely long cord.
This works well for:
- Staircases
- Long railings
- Large windows
Expect the finished garland to require considerable space.
Tree-Shaped Advent Display
Another option is to create rows containing:
2, 4, 6, and 12 stockings
or another graduated arrangement.
Hang the shortest row at the top and widest row at the bottom to suggest a Christmas-tree silhouette.
Filling the Advent Calendar
Each stocking can hold a different type of surprise.
You don’t need 24 expensive gifts.
Mix physical treats with experiences.
Candy Ideas
Use individually wrapped:
- Chocolate
- Candy cane
- Caramel
- Small cookies
Avoid anything that can melt or stain the yarn.
Christmas Activity Notes
Write small notes such as:
- Watch a Christmas movie
- Make hot chocolate
- Bake cookies
- Decorate gingerbread
- Drive to see Christmas lights
- Make a paper snowflake
- Read a Christmas story
Fold each note and tuck it inside.
Kindness Advent Calendar
Fill the stockings with simple acts such as:
- Call someone you love
- Donate a toy
- Help prepare dinner
- Write a thank-you note
- Give someone a compliment
Crochet Advent Calendar
For a crochet lover, place tiny craft surprises inside selected stockings:
- Stitch markers
- Yarn needle
- Small yarn scraps
- Buttons
Keep sharp tools safely packaged.
Add a Special December 24 Stocking
Make Stocking 24 slightly larger.
You could begin with:
Ch 22
and scale the rest of the piece proportionally.
Or simply use the standard stocking but decorate it with:
- Crochet bow
- Snowflake
- Gold edging
This makes Christmas Eve stand out.
Some established stocking Advent designs also use a different or larger final stocking to mark the last day of the countdown. Ravelry
Decorate Selected Stockings
You don’t need to decorate all 24.
Add occasional:
- Crochet bow
- Tiny star
- Snowflake
- Bell
- Simple stripe
Keeping most stockings simple prevents the display from becoming visually busy.
Add Crochet Bows
Use tiny versions of your Crochet Bow Gift Topper Pattern.
Attach one to stockings:
6, 12, 18, and 24
for a repeating design.
Add Stars
Use mini versions of your Rustic Crochet Star Ornament.
Place them on a few plain stockings.
Add Snowflakes
Cream snowflakes look especially beautiful against cranberry or forest-green stockings.
Striped Stockings
Change colors every:
2–3 rows
on selected pieces.
Keep the cuff cream for consistency.
Toe Contrast
Make the first six rows in one color.
Change to the main stocking color for the leg.
This creates a contrast toe without changing the basic pattern.
Cuff Variations
You can keep every stocking unique while still using the same construction.
Try:
- Cream cuff
- Striped cuff
- Ribbed-looking BLO cuff
- Contrast-colored cuff
Why Repeat One Basic Stocking Shape?
When you’re making 24 pieces, consistency matters more than complicated individual construction.
Using one basic mini stocking means:
- Faster batch-making
- More even sizes
- Easier assembly
- Easier repairs
- Less pattern checking
You can create variety with color rather than structure.
This same principle appears in established Advent calendars where one stocking pattern is repeated 24 times and colors, stripes or decorative details make each piece unique. Ravelry
How Long Will 24 Stockings Take?
This isn’t a one-evening project.
Once you’ve memorized the construction, one stocking becomes much faster.
A current flat-panel Advent pattern estimates roughly 40 minutes per stocking and approximately 15–16 hours for the complete 24-piece project. Etsy
Beginners should allow more time.
The easiest approach is to make:
2–3 stockings per evening
rather than trying to finish the entire calendar at once.
Seven-Day Crochet Plan
Day 1
Make Stockings 1–4.
Day 2
Make Stockings 5–8.
Day 3
Make Stockings 9–12.
Day 4
Make Stockings 13–16.
Day 5
Make Stockings 17–20.
Day 6
Make Stockings 21–24.
Day 7
Numbers, loops, cords, and assembly.
Batch-Making Strategy
For even faster progress:
Stage 1
Crochet all 48 body panels.
Stage 2
Add all cream cuffs.
Stage 3
Embroider numbers 1–24.
Stage 4
Join every pair.
Stage 5
Add all loops.
Stage 6
Make display cords.
Stage 7
Assemble.
This minimizes constant switching between techniques.
Keep a Production Checklist
With 24 stockings, it’s easy to lose track.
Create a checklist containing:
1 through 24
Mark each stocking when you’ve completed:
- Front
- Back
- Number
- Seam
- Loop
This prevents accidentally making two number 17s and forgetting number 18.
Best Yarn for an Advent Calendar
Acrylic
Worsted acrylic is a practical choice because it is:
- Affordable
- Lightweight
- Available in many colors
- Easy to wash
- Suitable for large batches
Cotton
Cotton provides:
- Strong structure
- Crisp stitches
- Less stretching
It works particularly well if the stockings will hold treats.
Wool Blend
A wool blend creates a beautiful heirloom appearance.
It may be more expensive when you’re making 24 pieces.
Use Your Yarn Scraps
You don’t have to buy five completely new colors.
An Advent calendar is a perfect place to combine leftover:
- Red
- Burgundy
- Green
- Cream
- Beige
- Sage
- Mustard
As long as all yarns are approximately the same weight, the collection can still look intentional.
Keep the Gauge Consistent
Don’t switch between very thin worsted and very heavy Aran yarn without checking size.
A row of 24 stockings makes differences much more noticeable than a single ornament.
Can the Stockings Hold Gift Cards?
The written size is primarily intended for:
- Candy
- Notes
- Tiny surprises
A standard gift card may be tight depending on your gauge.
If you specifically want gift-card-sized stockings, increase the width by several stitches.
Your separate Mini Crochet Stocking Gift Card Holder pattern is better suited to that purpose.
Make Smaller Advent Stockings
Use:
DK yarn + 3.5 mm hook
This creates a lighter calendar.
Current Advent designs also commonly use DK yarn for 24 flat mini stockings. Etsy
Make Larger Stockings
Increase the foundation chain and number of rows proportionally.
Remember that making every stocking even one inch larger can significantly increase total yarn usage across 24 pieces.
Common Beginner Problems
Stockings Are Different Sizes
Use the same hook, yarn weight and row count for every piece.
Toe Points in Different Directions
Make all front and back panels using the same orientation.
Check the toe direction before joining.
Number Is Crooked
Embroider while the panel is flat and use crochet rows as horizontal guides.
Stocking Opening Too Tight
Don’t join across the top.
Keep the cuff completely open.
Treat Falls Out
Choose smaller treats or make the leg one or two rows taller.
Hanging Loop Stretches
Use a firm chain or slip stitch back along the loop for extra strength.
Stockings Tilt on the Cord
Attach each loop at the upper back corner and keep the contents lightweight.
Four Rows Aren’t Even
Measure your cord positions before securing them permanently to the dowel.
Blocking
Light blocking helps 24 stockings look more consistent.
Before joining the panels, you can lightly block them to the same measurements.
Alternatively, shape each completed stocking by hand.
Don’t stretch the opening excessively.
Washing
Empty every stocking first.
Remove:
- Candy
- Paper notes
- Tags
- Decorations that aren’t washable
Follow your yarn manufacturer’s care instructions.
Reshape while damp and dry completely before storing.
Storage After Christmas
Remove all remaining treats.
Lay the stockings flat.
Fold the four cords loosely.
Store the entire calendar in a clean box.
Avoid tightly compressing the embroidered numbers or decorative appliqués.
Make It a Family Tradition
One of the best parts of a reusable Advent calendar is that the contents can change every year while the handmade calendar stays the same.
One December might contain candy.
The next could focus on family activities.
Another year could combine notes, tiny gifts and acts of kindness.
The crochet becomes the tradition rather than the disposable packaging.
Frequently Asked Questions
How many stockings do I need?
Exactly 24 for a December 1–24 countdown.
How large is each stocking?
Approximately 5½–6 inches tall.
What yarn weight is used?
Category 4 worsted-weight yarn.
What hook size is used?
4.0 mm.
How much yarn will the full calendar require?
Plan on approximately 1,000–1,200 yards total, depending on colors and assembly.
Are the stockings worked in the round?
No. Each stocking is made from two flat panels.
Do I have to turn a heel?
No.
Can beginners make this?
Yes. The repeated stocking is intentionally simple.
Are the pockets functional?
Yes. Leave the upper edge open and they can hold small treats or notes.
How are the numbers added?
The written version uses simple yarn embroidery.
Do all stockings need to be different?
No. Repeating one shape and changing colors is much faster.
Can I make one long garland instead of four rows?
Absolutely.
Final Thoughts
An Advent calendar is more than a Christmas decoration.
It’s something that becomes part of December every year.
This crochet stocking Advent calendar pattern keeps the construction simple enough that making 24 pieces is realistic: two flat stocking panels, a contrast cuff, one embroidered number, a simple joining border, and a hanging loop.
Make yours in cranberry and forest green for classic Christmas color.
Add oatmeal and sage for a softer heirloom palette.
Fill each little stocking with candy, a note, an activity, or a tiny surprise.
Then pack it away after Christmas and bring the same handmade countdown back next December.
Save this 24-mini-stocking crochet Advent calendar pattern and start early enough to enjoy making it!