Crochet Star Ornament Pattern – Rustic Farmhouse Christmas Star
A handmade star is one of the simplest decorations you can add to a Christmas tree, but it can completely change the feel of your holiday decor.

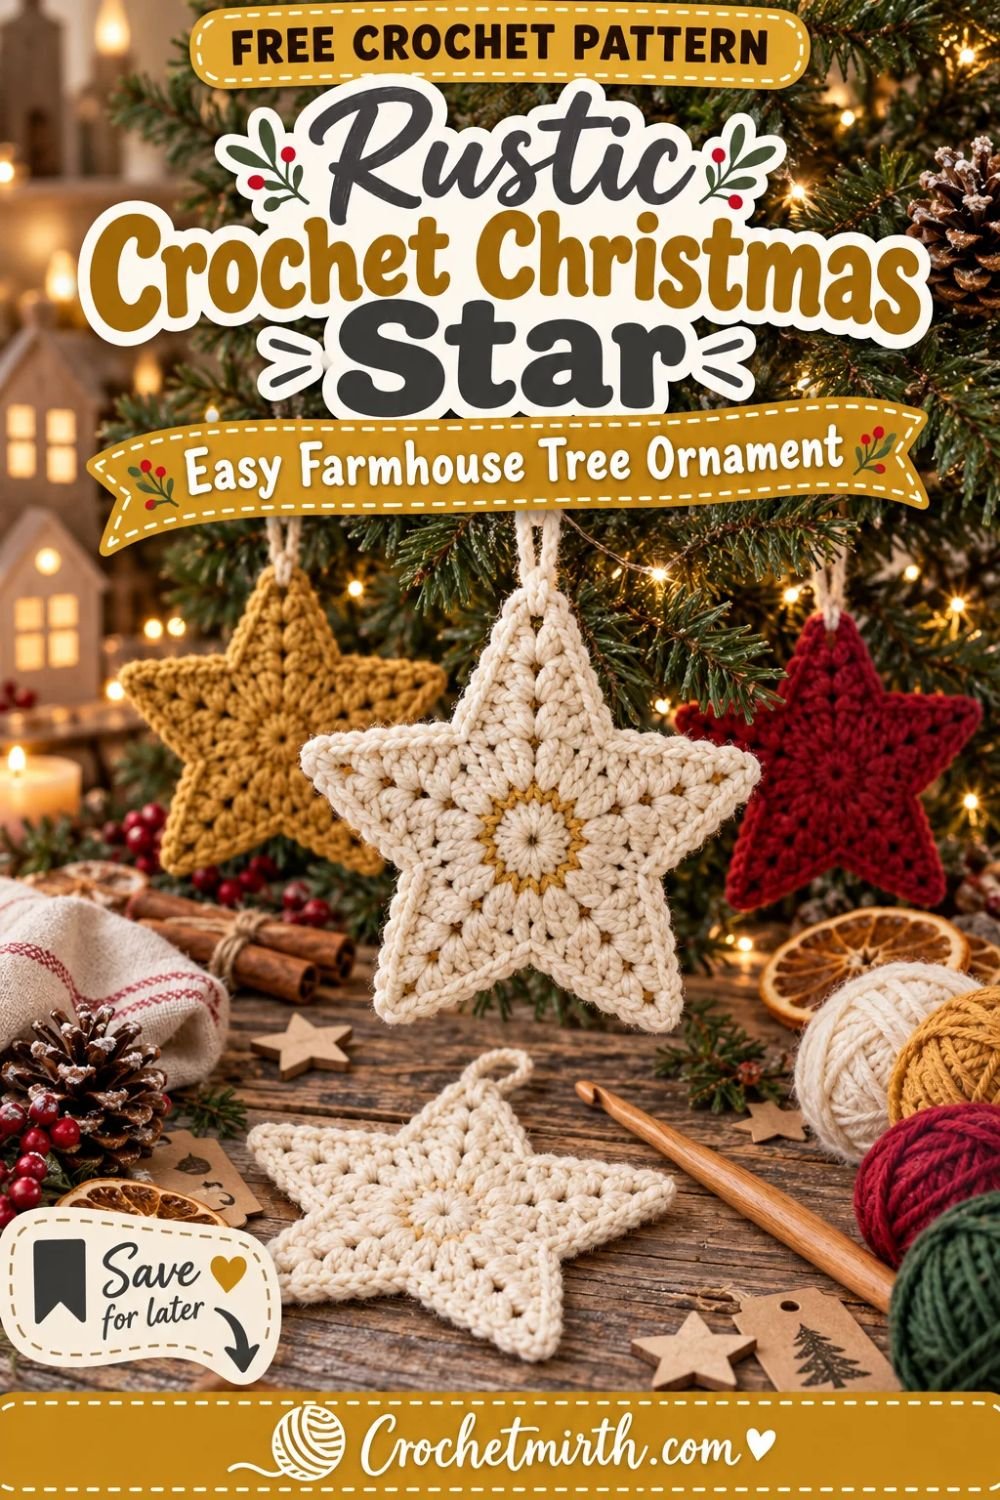
This crochet star ornament pattern creates a classic five-point star with clean points, deep valleys, a textured center, and a simple crochet hanging loop.
The star is worked from the center outward, so there are no separate pieces to sew together.
And because each ornament requires only a small amount of yarn, it’s an ideal Christmas scrap-yarn project.
Make yours in warm cream for rustic farmhouse decor, muted mustard for a soft golden look, cranberry for traditional Christmas color, or forest green for a woodland-inspired tree.
The finished stars can be used for much more than the Christmas tree too.
They work beautifully for garlands, wreaths, gift wrapping, table settings, wall decor, and handmade ornament sets.
Why You’ll Love This Crochet Christmas Star
This project is:
- Quick to crochet
- Made in one piece
- Beginner-friendly
- Great for scrap yarn
- Lightweight for Christmas trees
- Easy to block into a crisp star
- Customizable in almost any yarn color
- Perfect for farmhouse Christmas decor
- Easy to batch-make
- Useful as both ornament and gift topper
The pattern uses different stitch heights to form each point naturally.
That means you don’t need to crochet five separate triangles and sew them together.
Skill Level
Easy / Advanced Beginner
You’ll use:
- Magic ring
- Chain
- Slip stitch
- Single crochet
- Half double crochet
- Double crochet
- Treble crochet
- Simple picot
The main shaping occurs in only a few rounds.
Materials
Use approximately 20–30 yards of Category 4 worsted-weight yarn for one star.
For the farmhouse sample, I recommend:
Warm cream or oatmeal
You’ll also need a 4.0 mm crochet hook, yarn needle, scissors, blocking mat and rust-resistant pins.
Optional fabric stiffener can be useful if you want a very crisp decorative star.
A comparable worsted star ornament listed on Ravelry uses about 20–25 yards, a 4 mm hook and finishes at roughly 3½–4½ inches, which is a useful size range for this style of tree decoration. Ravelry
Finished Size
Using worsted yarn and a 4 mm hook:
Approximately 4–4½ inches across
excluding the hanging loop.
Changing the yarn weight or hook size will change the finished dimensions.
Crochet Abbreviations
This pattern uses US crochet terminology.
MR – magic ring
ch – chain
sc – single crochet
hdc – half double crochet
dc – double crochet
tr – treble crochet
sl st – slip stitch
st / sts – stitch / stitches
sp – space
Special Stitch: Picot
Ch 3, then sl st into the first chain of those 3 chains.
The picot creates the sharp tip of each star point.
Construction Overview
The star begins with ten stitches around a magic ring.
Those ten stitches create the foundation for five points.
Each point uses one stitch as the valley and the next stitch as the location for a sequence of progressively taller stitches.
The sequence rises from:
sc → hdc → dc → tr
then reaches the picot point before reversing:
tr → dc → hdc → sc
That produces one symmetrical star arm.
Repeat the same construction five times.
PART 1: Crochet the Center
Using warm-cream yarn:
Make a magic ring.
Round 1
Ch 1.
Work:
10 sc
into the magic ring.
Pull the ring tightly closed.
Join with a sl st to the first sc.
You should have:
10 sts
Count carefully before continuing.
Five of these stitches will become valleys.
The alternating five stitches will become star points.
PART 2: Make the First Star Point
Sl st into the next stitch.
This stitch becomes the valley between two points.
In the following stitch, work:
sc, hdc, dc, tr
Then:
picot
Then work into the same stitch:
tr, dc, hdc, sc
You have created one complete point.
PART 3: Make the Remaining Four Points
Sl st into the next stitch.
In the following stitch work:
sc, hdc, dc, tr, picot, tr, dc, hdc, sc
Repeat this sequence around until you have:
5 points
and:
5 valleys
Finish with a sl st near the beginning of the round.
Fasten off.
Check the Shape
Your star should now have exactly:
5 long points
If you have four or six, check your Round 1 stitch count.
The ornament may look slightly soft or curled immediately after crocheting.
That’s normal.
Blocking will make a major difference.
PART 4: Add a Hanging Loop
Choose one point to become the top of the star.
Join warm-cream yarn near the tip.
Ch approximately:
18–22
depending on how large you want the hanging loop.
Join securely back near the same point with a sl st.
Fasten off.
Weave the yarn ends securely into the back.
Alternative Integrated Loop
Instead of adding the loop afterward, you can replace the picot of one star point with a longer chain loop.
However, making the hanging loop separately gives you more control over its size and keeps all five star points visually consistent.
PART 5: Block the Star
Blocking is one of the most important finishing steps for this ornament.
Lightly dampen the star according to your yarn’s care instructions.
Place it on a blocking mat.
Pin the center first.
Then pin all five points outward.
Make sure the points are spaced evenly.
Next, place pins gently into the valleys between the points.
This deepens the star silhouette.
Allow it to dry completely before removing the pins.
Why Blocking Matters
Without blocking, crochet stars can look:
- Rounded
- Curled
- Uneven
- Slightly flower-like
Blocking creates:
- Sharper points
- Deeper valleys
- Better symmetry
- Flatter fabric
This is particularly important for rustic farmhouse ornaments, where the simple silhouette needs to look clean.
Optional Light Stiffening
For an ornament that holds its shape more firmly, apply a small amount of suitable fabric stiffener after testing it on your yarn.
Another option is diluted craft starch.
Current quick star ornament patterns also commonly recommend stiffening or blocking to create a sharper finished shape. Etsy
For soft ornaments or gift toppers, you can skip stiffener completely.
Warm-Cream Farmhouse Star
Warm cream is the main Crochetmirth version.
It works beautifully with:
- Evergreen
- Pinecones
- Natural wood
- Kraft paper
- Dried orange
- Warm-white Christmas lights
The neutral yarn also makes the crochet texture especially easy to see.
Oatmeal Star
Use a lightly heathered oatmeal yarn for an even more rustic appearance.
The subtle flecks can make a very simple ornament look more handmade.
Mustard-Gold Star
Muted mustard produces a soft handmade interpretation of a traditional gold Christmas star.
Pair it with:
- Cream
- Cranberry
- Forest green
Cranberry Star
Deep muted cranberry adds classic Christmas color without being overly bright.
It works particularly well alongside cream stars.
Forest-Green Star
A forest-green star creates a subtle tonal look against natural evergreen.
For more contrast, use a cream hanging loop.
Five-Star Farmhouse Set
Make:
2 warm-cream stars
1 oatmeal star
1 mustard-gold star
1 cranberry star
Use cream loops on all five.
This creates a coordinated ornament set without every star looking identical.
Add a Contrast Center
Using a small amount of mustard or brown yarn, add a few tiny surface stitches around the center ring.
Keep this detail subtle.
The ornament should still feel rustic rather than ornate.
Embroidered Star Center
You can also add:
- Small cross stitch
- Tiny snowflake
- Simple French knot
at the center.
Use only a small amount of contrast yarn.
Add a Wooden Bead
Thread one lightweight natural wooden bead onto the hanging loop.
Keep it small enough that it doesn’t overpower the ornament.
The written pattern itself remains bead-free, so this is completely optional.
Add a Tiny Bell
A lightweight jingle bell can be tied to the hanging loop for a more traditional Christmas version.
Again, this is optional.
The crochet star works perfectly by itself.
Add a Crochet Bow
Attach a very small cranberry crochet bow near the top point.
This can visually connect the ornament with your existing Christmas bow content.
Keep the bow around:
1–1½ inches wide.
Crochet Star Garland
Make:
7–10 stars
in several coordinated colors.
Instead of adding individual hanging loops, attach them to a long crochet chain.
Try spacing them about:
7–10 inches apart.
A cream chain works particularly well with mixed-color stars.
Farmhouse-style star motifs are also currently used for bunting and garlands, not only individual tree ornaments. Ravelry
Mantel Garland
Drape the star garland across a mantel.
Combine it with:
- Evergreen
- Warm lights
- Wooden beads
- Pinecones
for simple farmhouse Christmas decor.
Gift Topper
Instead of a long hanging loop, attach a short yarn tie.
Tie the star onto a kraft-paper package.
After the gift is opened, the recipient can transfer it to the Christmas tree.
Recent star patterns also specifically promote the motif as a quick handmade ornament and gift-wrapping decoration. Etsy
Christmas Place Setting
Place one cream star on each folded napkin.
Add a small kraft name tag.
Guests can take the ornaments home after dinner.
Wreath Decoration
Make three or five stars in different sizes.
Attach them around an evergreen wreath.
A grouping of:
cream + mustard + cranberry
works particularly well.
Rustic Wall Hanging
Attach several stars to lengths of cream yarn hanging from a natural wooden branch.
Vary the heights.
Add wooden beads between some of the stars.
Christmas Window Decoration
Suspend several stars from a curtain rod or window frame.
Use different hanging-loop lengths so they don’t all sit on one horizontal line.
Scrap-Yarn Project
One of the biggest advantages of this ornament is how little yarn it uses.
A comparable worsted star ornament uses only about 20–25 yards, while a rustic DK/worsted star motif may use roughly 5–10 grams per star. Ravelry
That makes stars particularly useful for leftovers from:
- Beanies
- Scarves
- Gift bags
- Stockings
- Mittens
- Christmas bows
Make a Smaller Star
Use:
DK yarn + 3–3.5 mm hook
The same basic pattern will produce a smaller ornament.
This works well for:
- Mini Christmas trees
- Gift toppers
- Garlands
Make a Tiny Star
Use sport-weight yarn or crochet thread.
Tiny stars are useful for:
- Cards
- Gift tags
- Small wreaths
- Table decor
Make a Larger Star
Use bulky yarn and a larger hook.
The finished star can become:
- Wreath accent
- Mantel decoration
- Wall ornament
For a normal Christmas tree, worsted weight provides a better balance between visibility and weight.
Make a Two-Layer Star
Crochet two identical stars.
Place them wrong sides together.
Single crochet around the edges.
You can leave them unstuffed for a firmer flat ornament or add a tiny amount of stuffing for a softer dimensional version.
A current Christmas star ornament pattern also uses two layers to create a 3D version, with sizes around 3½ and 4½ inches in Aran-weight yarn. Ravelry
Flat vs Stuffed Star
For the rustic farmhouse version, I recommend leaving the star flat.
This gives you:
- Cleaner silhouette
- Sharper points
- Less weight
- Easier blocking
- Simpler construction
Use the lightly stuffed version only when you specifically want a softer ornament.
Best Yarn for Crochet Stars
Cotton
Cotton provides excellent stitch definition and very crisp points.
It’s one of the best options if you want the ornament to block firmly.
Acrylic
Acrylic is inexpensive, lightweight and available in almost every Christmas color.
Light steam or wet blocking may help the star maintain its shape, depending on the yarn.
Wool
Wool provides beautiful natural texture and suits rustic farmhouse decor particularly well.
Wool/Acrylic Blend
A blend provides a useful balance between structure, softness and easy care.
Avoid Very Fuzzy Yarn
Extremely fuzzy yarn can hide:
- Point definition
- Valleys
- Center texture
Choose a relatively smooth yarn so the five-point silhouette remains clear.
Batch-Making Stars
For a set of ornaments:
First crochet every center.
Then complete all point rounds.
Weave in all ends.
Add all hanging loops.
Finally block the entire batch together.
This is much faster than blocking one star at a time.
Make 12 Stars for a Christmas Tree
A simple palette could be:
4 cream
3 cranberry
2 mustard
2 forest green
1 oatmeal
Spread the colors evenly throughout the tree.
Common Beginner Problems
Star Looks Like a Flower
The points may not be long enough or the valleys aren’t deep enough.
Make sure each point reaches the treble crochet and picot before descending again.
Blocking will also improve the shape dramatically.
Star Has Six Points
Round 1 should contain exactly:
10 stitches
The pattern creates one point for every two foundation stitches.
Points Curl
This is common before blocking.
Pin each point outward while damp.
Center Is Too Loose
Pull the magic ring firmly closed before weaving in the beginning tail.
Point Tips Look Rounded
Make sure each point contains the picot.
Pin the picot outward during blocking.
Hanging Loop Pulls the Point Out of Shape
Attach the loop through a sturdy section slightly below the very end of the picot rather than pulling directly on a delicate chain.
Blocking for Farmhouse Stars
For the cleanest rustic look, don’t stretch the ornament excessively.
The aim isn’t to create a thin lace star.
You want:
- Dense center
- Substantial points
- Clean valleys
- Natural yarn texture
Shape gently and allow the yarn to retain some thickness.
Storage After Christmas
Store the stars flat in a shallow box.
Place tissue or clean fabric between layers if necessary.
Avoid folding the points.
If a star becomes slightly distorted during storage, light re-blocking can restore the shape quickly.
Frequently Asked Questions
How many points does the star have?
Exactly five.
What yarn weight is used?
Category 4 worsted-weight yarn.
What hook size is used?
4.0 mm.
How large is the finished star?
Approximately 4–4½ inches across after blocking.
How much yarn is needed?
Approximately 20–30 yards.
Is the star stuffed?
No. The farmhouse version is flat.
Is blocking necessary?
Strongly recommended for sharp, symmetrical points.
Can beginners make it?
Yes. A confident beginner who knows the basic stitch heights can make it.
Can I use scrap yarn?
Absolutely.
Can I make a garland?
Yes. Multiple flat stars are ideal for garlands.
Can it be used as a gift topper?
Yes. Replace the hanging loop with a short yarn tie.
Final Thoughts
A crochet Christmas star doesn’t need complicated lace or elaborate decoration to look beautiful.
This crochet star ornament pattern uses basic stitch heights to build five defined points around a simple center.
Once blocked, the ornament becomes crisp, lightweight and perfect for rustic farmhouse Christmas decor.
Make it in warm cream for a classic handmade look.
Add mustard stars for a soft golden accent.
Mix in cranberry and forest green for traditional Christmas color.
Or turn your leftover yarn into an entire star garland.
Because the pattern requires very little yarn and only a few rounds, it’s also an excellent project when you need several handmade ornaments without committing to a large crochet project.
Save this rustic farmhouse crochet Christmas star pattern for your holiday project list!