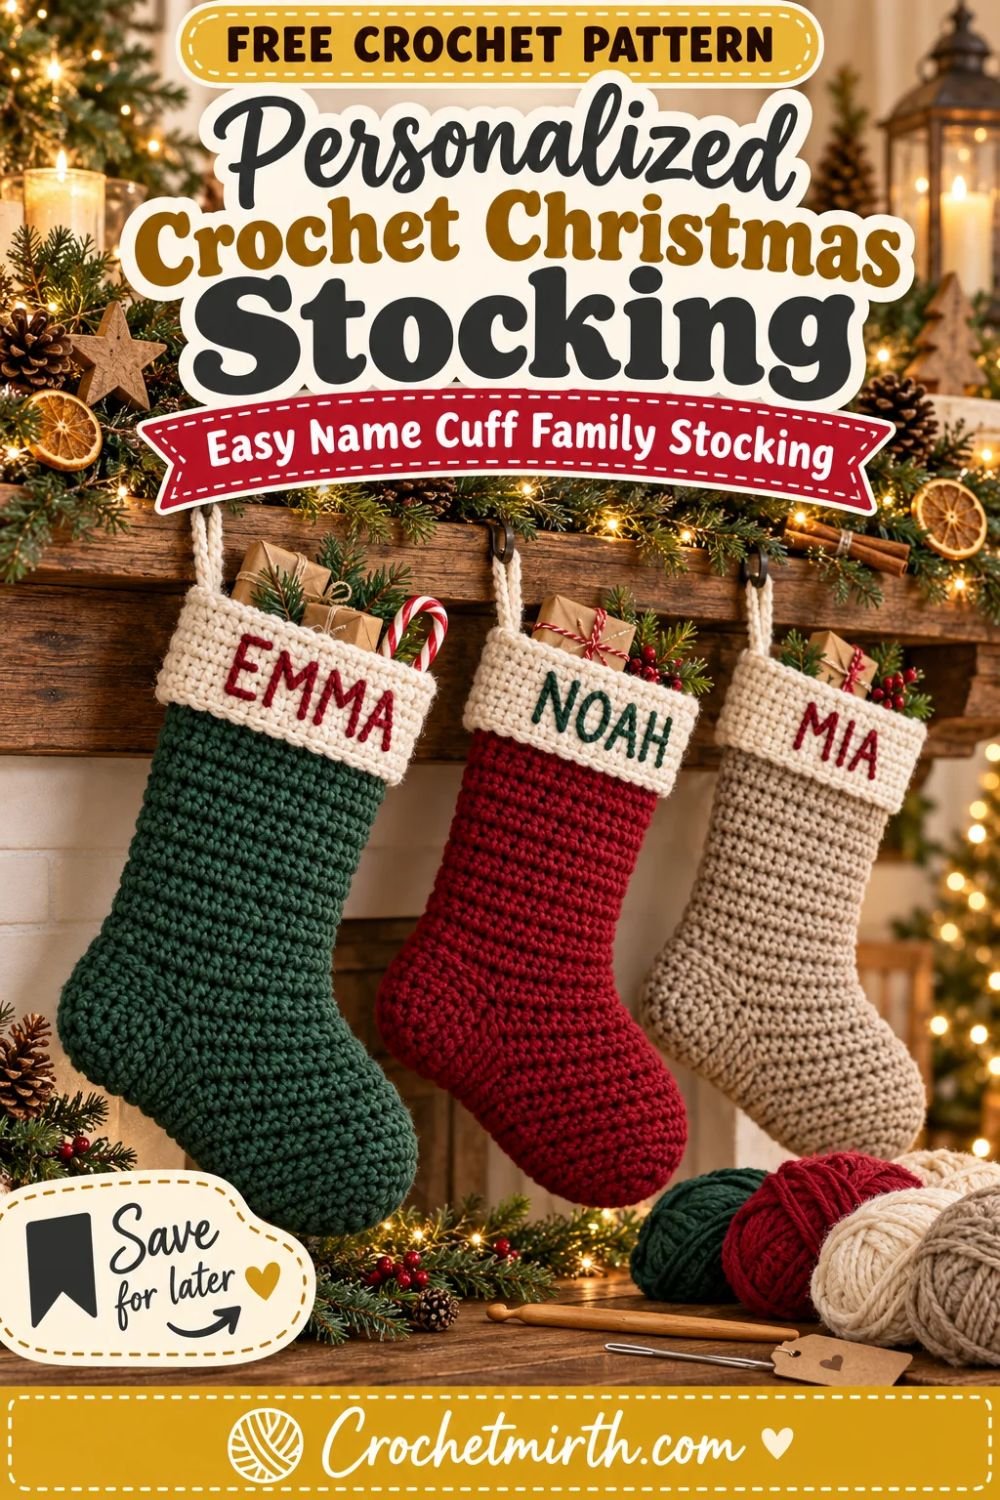
Personalized Crochet Christmas Stocking Pattern – Easy Name Cuff Stocking
Matching Christmas stockings are beautiful.
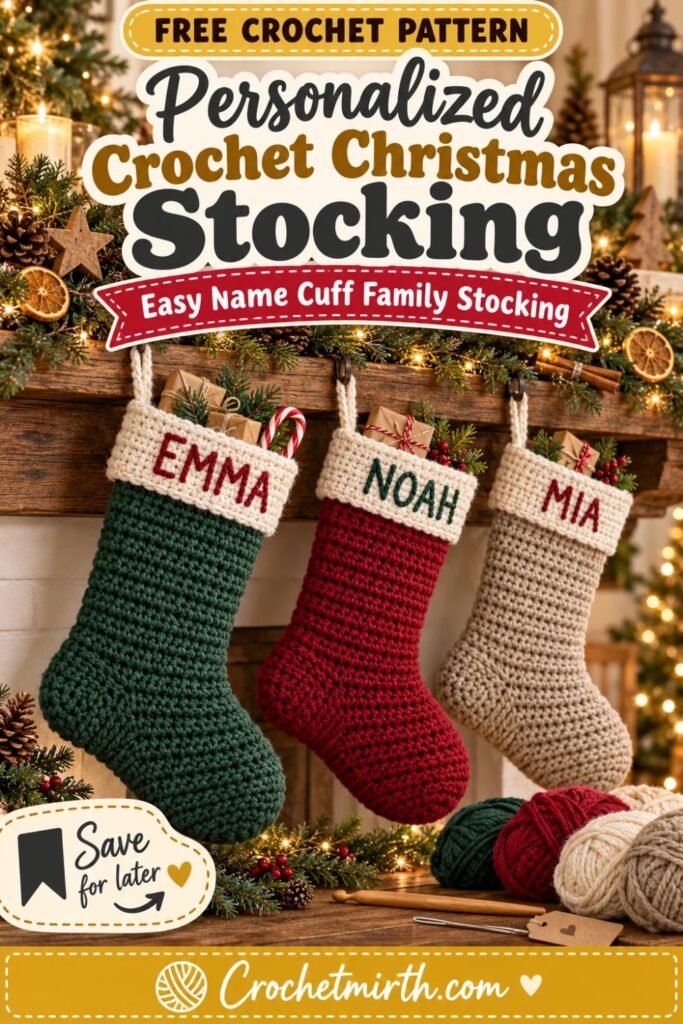
But matching stockings with everyone’s name on them feel like they truly belong to the family.
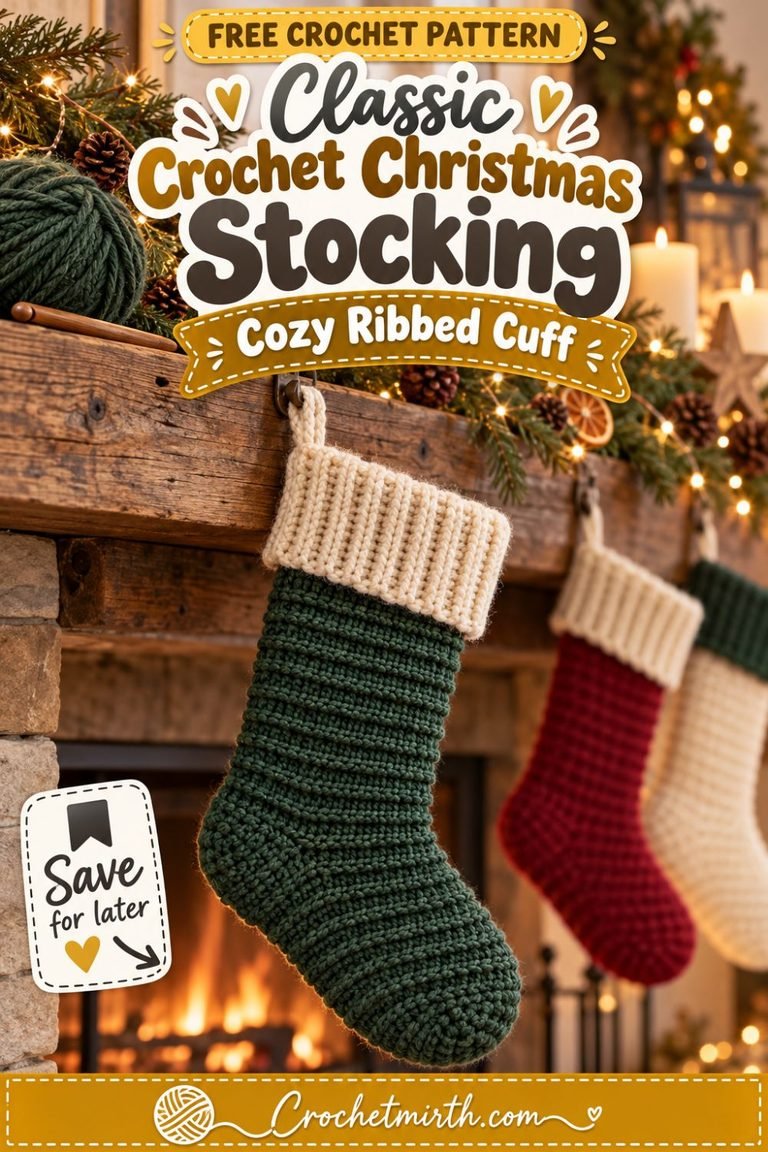
This personalized crochet Christmas stocking pattern creates a full-size holiday stocking with a rounded toe, shaped heel, roomy leg, wide contrast cuff, strong hanging loop, and a large smooth section specifically designed for adding a name.
Instead of trying to embroider across deep ribbing, the cuff is worked in simple dense single crochet.
That gives you a much cleaner surface for yarn lettering.
Make one in cranberry.
Make another in forest green.
Add cream, oatmeal, or sage for the rest of the family.
Then personalize every cuff with a name or initials to create a coordinated set you can bring out every December.
Why You’ll Love This Personalized Stocking
This design combines a traditional stocking shape with a deliberately simple personalized cuff.
The body is worked from the toe upward in joined rounds, so there are no large side seams.
An easy opening is left for an afterthought heel.
Once the leg is complete, a wide cream cuff is crocheted directly onto the top.
The name is embroidered only after the stocking has been blocked, allowing you to center the letters accurately.
The result is ideal for:
- Family Christmas stockings
- Kids’ personalized stockings
- Baby’s first Christmas
- Couples
- Grandchildren
- Matching mantel sets
- Personalized handmade gifts
Skill Level
Advanced Beginner
You should know how to:
- Make a magic ring
- Half double crochet
- Single crochet
- Increase
- Decrease
- Chain
- Slip stitch
- Work in joined rounds
- Pick up stitches around an opening
- Make simple yarn embroidery
The personalization is easier than it looks because the letters can be added with basic backstitch or chain stitch.
Materials
For one standard-size stocking, use approximately:
300–380 yards of Category 4 worsted-weight yarn
A practical color breakdown is approximately:
230–280 yards main color
70–90 yards warm cream for cuff and hanging loop
5–10 yards contrast yarn for the name
For the sample:
Main: deep forest green
Cuff: warm cream
Name: cranberry red
Hook Sizes
Use:
5.0 mm hook for the stocking body.
Switch to:
4.5 mm hook for the cuff and hanging loop if you want a slightly firmer finish.
Other Supplies
You’ll need:
- Yarn needle
- Scissors
- Measuring tape
- Stitch markers
- Blocking mat or towel
- Rust-resistant pins, optional
- Paper and pencil for planning the name, optional
A fabric lining is optional if the stocking will regularly hold many small gifts.
Finished Measurements
The standard stocking measures approximately:
17 inches from cuff to toe
with a flat leg width around:
6–6½ inches
and a cuff approximately:
3 inches deep.
The foot measures about:
9½–10 inches from heel to toe.
Small variations are normal because Christmas stockings don’t need garment-level sizing precision.
Gauge
Using the 5 mm hook:
14 hdc = approximately 4 inches
11 hdc rounds = approximately 4 inches
Check your gauge if you’re making several matching family stockings.
Consistency matters more when four or five stockings will hang beside one another.
Crochet Abbreviations
This pattern uses US terminology.
MR – magic ring
ch – chain
sc – single crochet
hdc – half double crochet
inc – 2 stitches in one stitch
hdc2tog – half double crochet two together
sl st – slip stitch
st / sts – stitch / stitches
rnd – round
Construction
The stocking has five main sections:
- Rounded toe
- Straight foot
- Afterthought heel opening
- Long leg
- Wide personalized cuff
The heel is finished after the leg, which keeps the main body straightforward.
PART 1: Crochet the Toe
Using your main stocking color:
Make a magic ring.
Round 1
Ch 1.
Work:
8 hdc
into the magic ring.
Join with a sl st.
8 sts
Round 2
Work:
2 hdc in every stitch
around.
Join.
16 sts
Round 3
Repeat:
hdc in next st, 2 hdc in next st
around.
Join.
24 sts
Round 4
Repeat:
hdc in next 2 sts, 2 hdc in next st
around.
Join.
32 sts
Round 5
Repeat:
hdc in next 3 sts, 2 hdc in next st
around.
Join.
40 sts
You now have the full stocking circumference.
PART 2: Work the Foot
Rounds 6–23
Hdc in every stitch around.
Join after each round.
Maintain:
40 sts
The foot should measure approximately 8–9 inches from the toe center at this stage.
If your gauge is shorter, add one or two extra rounds before the heel opening.
PART 3: Create the Heel Opening
Round 24
Hdc in the first:
10 sts
Then:
ch 20
Skip the next:
20 sts
Hdc in the final:
10 sts
Join.
You have now created a large opening across the back half of the stocking.
We’ll return to this opening later and crochet the heel.
PART 4: Resume the Leg
Round 25
Hdc in each of the first 10 hdc.
Work:
1 hdc into each of the 20 chains
Hdc in each of the final 10 sts.
Join.
40 sts
Rounds 26–47
Hdc in every stitch around.
Join after every round.
40 sts
Measure from the heel opening upward.
The leg should now be approximately 8–9 inches tall before the cuff.
For a longer stocking, simply add more straight rounds here.
PART 5: Add the Wide Name Cuff
Switch to warm-cream yarn.
If desired, switch to your 4.5 mm hook.
Unlike a traditional ribbed cuff, this cuff is intentionally smooth because we’re going to embroider a name across it.
Cuff Round 1
Ch 1.
Sc in each stitch around.
Join.
40 sts
Cuff Rounds 2–12
Sc in every stitch around.
Join after each round.
Maintain:
40 sts
The cuff should measure approximately:
2¾–3 inches deep.
Fasten off.
Why Use a Smooth Cuff?
Deep crochet ribbing is beautiful, but it can distort embroidered lettering.
A smooth single-crochet cuff gives the name:
- Better readability
- More even letter spacing
- Cleaner curves
- Easier placement
- Stronger visual contrast
It also lets you use either surface chain stitch or ordinary yarn embroidery.
PART 6: Crochet the Heel
Return to the heel opening.
Join the main-color yarn at one corner.
You’ll work around both sides of the opening.
Pick up approximately:
20 stitches along the lower edge
and:
20 stitches along the chain edge
for a total of:
40 sts
If a corner looks loose, you can pick up one extra stitch there and decrease it on the following round.
Heel Round 1
Hdc around.
40 sts
Heel Round 2
Repeat:
hdc in next 3 sts, hdc2tog
around.
32 sts
Heel Round 3
Hdc around.
32 sts
Heel Round 4
Repeat:
hdc in next 2 sts, hdc2tog
around.
24 sts
Heel Round 5
Hdc around.
24 sts
Heel Round 6
Repeat:
hdc in next st, hdc2tog
around.
16 sts
Heel Round 7
Hdc2tog around.
8 sts
Fasten off, leaving a long tail.
Thread the tail through the front loops of the remaining 8 stitches.
Pull firmly closed.
Secure and weave in the end.
Shape the Heel
Use your fingers to round the heel gently.
If the corners where the heel joins the foot look slightly open, use the yarn tail to close them with one or two small invisible stitches.
PART 7: Block Before Adding the Name
Before embroidering, lightly block the stocking.
Lay it flat.
Align:
- Toe
- Heel
- Leg
- Upper cuff
Make sure the cuff lies straight.
Let the stocking dry completely.
This gives you a much more accurate surface for centering the name.
PART 8: Choose the Front of the Stocking
Lay the stocking in the direction you’d like it to hang.
Most stockings look best with the toe pointing outward from the center of the mantel.
Mark the middle of the visible front cuff with a stitch marker.
This becomes the center point for your name.
PART 9: Plan the Name
Before putting yarn through the cuff, write the name on paper.
Count the letters.
Short names such as:
MIA
LEO
EMMA
NOAH
can use larger letters.
Longer names will need narrower lettering.
Aim for letter heights around:
1–1½ inches.
Keep at least:
½ inch of empty space
at either side of the cuff.
PART 10: Embroider the Name
Use a yarn needle and contrasting worsted or DK yarn.
For the forest-green sample, use:
cranberry red
Begin near the center of the first letter.
Work simple:
backstitch
following the crochet rows as guides.
Or use a chain-stitch-style embroidery for thicker handwritten-looking letters.
Avoid pulling the yarn too tightly.
The cuff should stay flat.
Easy Block-Letter Method
For beginners, use simple uppercase letters.
Think of the crochet stitches as a grid.
Vertical strokes travel up and down between rows.
Horizontal strokes follow one crochet row.
Diagonal strokes cross gradually between neighboring stitches.
Simple block letters are much easier than cursive for a first personalized stocking.
Surface Crochet Name
You can also use surface slip stitch with a small crochet hook.
Insert the hook from front to back.
Catch your contrast yarn behind the cuff.
Pull up a loop.
Move to the next point in the letter and repeat.
This produces a raised chain-like line across the surface.
Which Method Is Best?
For maximum control:
Backstitch embroidery
For thicker decorative letters:
Surface chain stitch
For very long names:
Thinner DK embroidery yarn
PART 11: Add the Hanging Loop
Using cream yarn and the 4.5 mm hook:
Ch 32.
Starting in the second chain from your hook:
Sl st back through every chain.
Fasten off, leaving two long sewing tails.
Fold the cord in half.
Position it on the inside back of the stocking approximately:
1 inch below the cuff edge.
Sew both ends securely through several stitches.
For a stronger attachment, sew in a small square and then diagonally across that square.
The loop should support a lightly filled stocking.
Important Hanging Tip
Don’t fill a crochet stocking with heavy objects and rely only on the hanging loop.
Crochet stretches.
If you’re adding several gifts, support the bottom of the stocking or use an optional fabric lining.
Your Personalized Stocking Is Finished
You should now have:
- Rounded toe
- Defined heel
- Roomy leg
- Wide cream cuff
- Embroidered name
- Strong hanging loop
Classic Forest Green Version
Use:
Forest-green body
Cream cuff
Cranberry name
This version looks particularly strong against a wooden or white mantel.
Cranberry Version
Use:
Deep cranberry body
Cream cuff
Forest-green name
Make both versions from the same yarn line so a family set looks coordinated.
Oatmeal Stocking
Use:
Warm oatmeal body
Cream cuff
Cranberry name
This gives a softer farmhouse look.
Sage Stocking
Use:
Muted sage body
Warm-cream cuff
Dark forest-green name
This works beautifully in neutral Christmas interiors.
Mustard Accent Stocking
Keep the stocking cream or forest green and embroider the name in muted mustard-gold.
This gives the cuff a subtle golden appearance without metallic yarn.
Matching Family Set
One easy palette for a family of four is:
Forest green + cream + cranberry name
Cranberry + cream + forest-green name
Oatmeal + cream + cranberry name
Sage + cream + forest-green name
Because the construction stays identical, the different body colors create variety without making the mantel look mismatched.
Personalized Kids’ Stockings
For children, you can add one small flat applique below the name.
Try:
- Star
- Snowflake
- Gingerbread man
- Christmas tree
Keep it small enough that the name stays dominant.
Baby’s First Christmas
Make the body in:
cream, oatmeal, or sage
Add the baby’s first name across the cuff.
Below it, embroider the year in smaller stitches if desired.
For example:
EMMA
2026
Keep the year significantly smaller than the name.
Couple Stockings
Make two stockings in complementary colors.
Use identical cream cuffs and the same embroidery style.
For example:
Cranberry + cream
and:
Forest green + cream
This creates a matching pair without making them identical.
Pet Stocking
Use the same pattern but embroider the pet’s name.
Add a small paw-print motif below the cuff if desired.
Initial Instead of a Full Name
A large initial works particularly well when:
- The name is very long
- You prefer minimalist decor
- Several family members have distinctive initials
Center one letter on the cuff and make it around:
1¾ inches tall.
Monogram Version
Use:
First initial + last initial
with a tiny decorative star between them.
Long Names
If the recipient has a long name:
Use DK-weight yarn for embroidery.
Reduce letter width.
Keep approximately one crochet stitch between letters.
Don’t force the name all the way to the edges.
Very Long Names
Use an initial on the cuff and embroider the full name vertically along the leg.
Or add a small crochet name tag.
The written design is optimized for names of approximately:
3–8 letters.
Add a Crochet Bow
Attach a small cranberry bow beneath one side of the cuff.
Don’t place it directly over the embroidered name.
Add a Star
A small cream or mustard crochet star can be sewn onto the leg.
This pairs naturally with your Rustic Crochet Star Ornament Pattern.
Add a Snowflake
Cream snowflakes stand out beautifully on:
- Cranberry
- Forest green
- Sage
Use a small flat motif so the stocking remains easy to store.
Add Simple Stripes
Work selected leg rounds in a contrast color.
For example:
2 cream rounds every 5 green rounds
Keep the cuff solid cream so the name remains readable.
Contrast Toe and Heel
For a stronger classic-stockings look, make the toe and heel in cream.
To do this, work the first five toe rounds in cream, change to the main color for the foot, and use cream again when returning to crochet the heel.
All-Neutral Stocking
Try:
Oatmeal body + cream cuff + camel name
This produces a subtle Scandinavian/farmhouse result.
Name Color Ideas
For a cream cuff:
- Cranberry
- Forest green
- Mustard
- Camel
- Charcoal
Avoid extremely pale embroidery colors because the name may disappear in Pinterest photos.
Optional Fabric Lining
If the stocking will be filled every Christmas, a lining is a useful addition.
It helps prevent:
- Stretching
- Small gifts pushing through stitches
- Heavy objects distorting the heel
Trace the finished stocking onto folded cotton fabric.
Add approximately:
½ inch seam allowance
around the sides and bottom.
Sew the fabric pieces together.
Insert the lining into the crochet stocking.
Fold the upper raw edge inward.
Hand-sew it just below the cuff so your personalized name remains untouched.
Personalized Stocking as a Gift
You can crochet the stocking first and embroider the recipient’s name at the end.
Fill it with small handmade gifts such as:
- Crochet ornament
- Ear warmer
- Gloves
- Candy
- Gift card
- Mini toiletries
The stocking becomes part of the gift.
Matching Stockings Every Year
One major advantage of keeping the base pattern consistent is that you can add new family stockings later.
Save:
- Yarn brand
- Color names
- Hook size
- Gauge
- Letter style
If the family grows, you can create a new stocking that still matches the original set.
Make a Smaller Child-Size Version
Use DK yarn and a 4 mm hook with the same general stitch counts.
Shorten the foot and leg by several rounds.
The stocking will naturally come out smaller.
Make an Oversized Version
Use bulky Category 5 yarn and a 6–6.5 mm hook.
Keep the same general construction.
Expect a significantly larger stocking.
For oversized versions, consider adding a lining because heavy gifts create more stretch.
Why Worsted Yarn Works Well
Worsted yarn provides a useful balance between:
- Good stitch definition
- Reasonable crochet speed
- Enough body for embroidery
- Easy availability
- Strong Christmas color selection
Full-size contemporary stocking patterns commonly use worsted #4 with approximately 5 mm hooks and finish near 17 inches.
Why Personalize After Blocking?
If you embroider first and then heavily reshape the cuff, letters may distort.
Blocking first allows you to:
- Find the true center
- See the final cuff width
- Place the name level
- Keep letter spacing consistent
Common Beginner Problems
Name Looks Off-Center
Find the center of both the cuff and written name first.
Work outward from the middle rather than starting blindly at one edge.
Letters Pucker the Cuff
Your embroidery is too tight.
Pull the yarn only until it rests on the surface.
Letters Are Difficult to Read
Use simpler uppercase shapes or a more contrasting yarn color.
Heel Has Small Holes
Pick up one extra stitch at each heel corner.
Decrease those extra stitches on the next round.
Foot Twists
Keep the joined-round seam aligned toward the lower or back side of the stocking.
Cuff Narrows
Your single crochet tension may be much tighter than your HDC body tension.
Use the larger hook for the cuff if necessary.
Hanging Loop Stretches
Slip stitching back along the chain makes the loop much stronger than a plain chain.
Stocking Sags When Filled
Use lighter contents or add a fabric lining.
Blocking
Light blocking improves the final presentation.
Shape:
- Toe
- Heel
- Cuff
- Leg
Make sure the cuff is rectangular and level before embroidering.
Care
Follow your yarn manufacturer’s instructions.
Remove:
- Gifts
- Paper
- Natural greenery
before washing.
Lay the stocking flat and reshape while damp.
Storage
Don’t sharply fold across the embroidered name.
Lay stockings flat or fold loosely along the leg.
Place clean tissue between personalized cuffs if stacking several family stockings together.
Frequently Asked Questions
How large is the stocking?
Approximately 17 inches from cuff to toe.
What yarn weight is used?
Category 4 worsted-weight yarn.
What hook size is used?
5 mm for the body and optionally 4.5 mm for the cuff.
How much yarn do I need?
Approximately 300–380 yards total.
Is the cuff ribbed?
No. It’s intentionally smooth to make name embroidery easier to read.
How is the name added?
Use backstitch, chain-stitch embroidery, or surface crochet.
Can I use a long name?
Yes, but use narrower letters or thinner yarn.
Can beginners make it?
A confident advanced beginner should be comfortable with the pattern.
Does it have a real heel?
Yes. An afterthought heel is worked into a dedicated opening.
Can I make matching family stockings?
Absolutely. That’s one of the main purposes of this design.
Can I add a lining?
Yes, especially if the stocking will hold heavier gifts.
Final Thoughts
A personalized Christmas stocking is more than holiday decor.
It can become part of the family’s Christmas tradition.
This personalized crochet Christmas stocking pattern gives you a classic handmade stocking with enough room for treats and small gifts, while the wide cream cuff provides a clean surface for adding the recipient’s name.
Keep every family stocking the same shape.
Change the body colors.
Embroider each name in a coordinating shade.
Then hang them together every December.
Over time, you can add new stockings for babies, partners, grandchildren, or even pets while keeping the whole set visually connected.
Save this personalized name-cuff stocking pattern for your handmade family Christmas collection!