Men’s Crochet Mittens Pattern – Warm Ribbed Winter Mittens
Cold-weather crochet doesn’t need complicated colorwork or decorative details to look good.
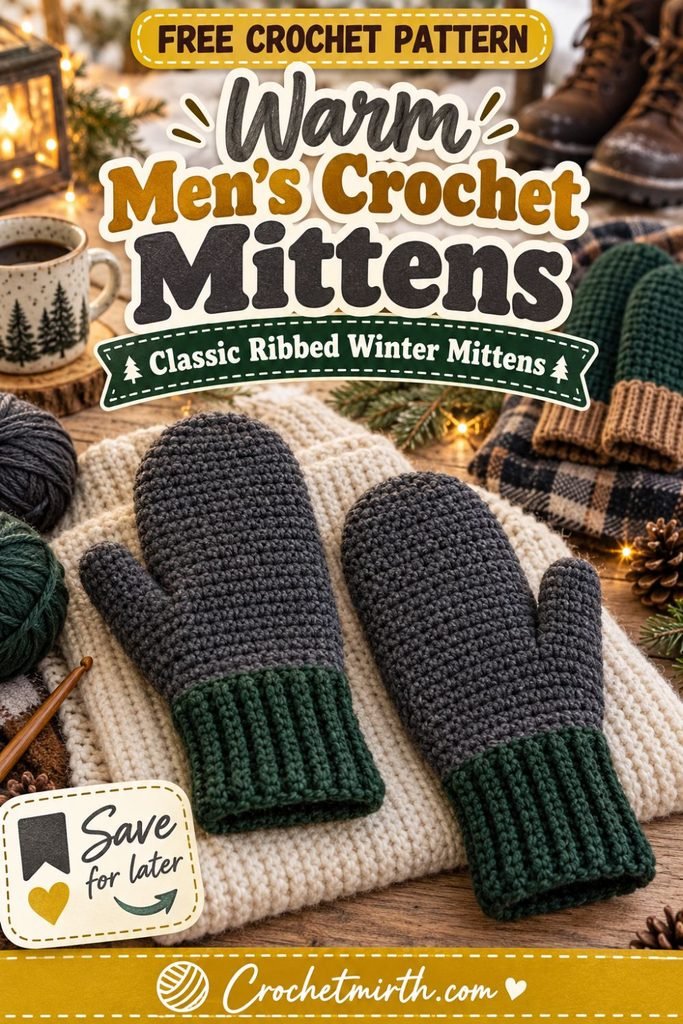
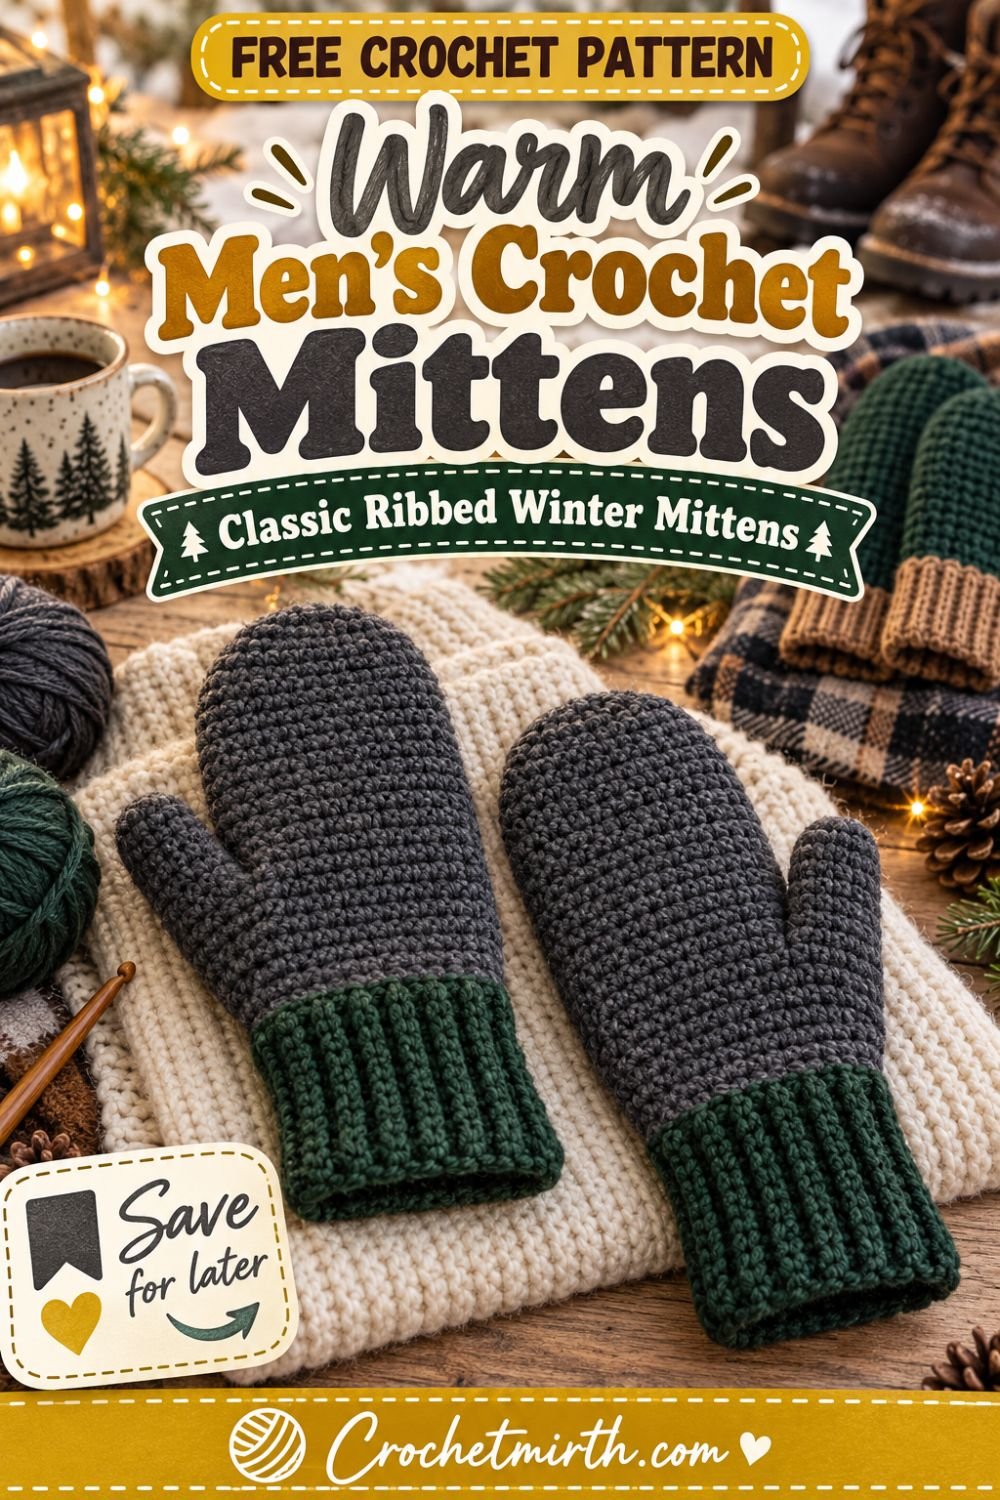
This men’s crochet mittens pattern focuses on the things a winter mitten actually needs: a warm dense hand, comfortable thumb placement, rounded fingertips, and a long stretchy ribbed cuff.
The mittens are worked from the fingertips down.
Once the rounded upper hand is complete, you’ll crochet straight toward the thumb, create a simple opening, continue to the wrist, and add the thumb afterward.
A separate ribbed cuff is then attached around the wrist.
The result is a classic pair of winter mittens designed for an adult man’s hand without excessive bulk or decoration.
Why You’ll Love These Men’s Crochet Mittens
This pattern features:
- Adult men’s sizing
- Dense worsted-weight fabric
- Rounded fingertips
- Mirrored thumb placement
- Separate fitted thumbs
- Long stretchy ribbed cuffs
- Mostly seamless construction
- Simple solid-color styling
- Easy length adjustments
- Excellent handmade-gift potential
The charcoal-and-forest-green sample creates a neutral masculine look, but the pattern works equally well in navy, camel, brown, olive, or one solid color.
Skill Level
Advanced Beginner
You should know how to:
- Make a magic ring
- Half double crochet
- Single crochet
- Increase
- Decrease
- Chain
- Skip stitches
- Work in rounds
- Work in back loops
- Pick up stitches around an opening
- Sew a ribbed cuff to a mitten
Materials
Use approximately:
240–300 yards of Category 4 worsted-weight yarn
for one adult men’s pair.
For the sample:
Main color: charcoal gray
Cuff color: deep forest green
Approximate amounts:
180–220 yards charcoal
60–80 yards forest green
You’ll also need:
- 4.5 mm crochet hook for the hand
- 4.0 mm crochet hook for the cuff
- Yarn needle
- Scissors
- Flexible measuring tape
- Stitch markers
Finished Size
The written pattern is designed for approximately:
8–9 inch hand circumference
measured around the knuckles with fingers together and thumb excluded.
Approximate finished dimensions:
Hand circumference: 8½–9 inches
Fingertip to wrist: 8–8½ inches
Cuff depth: approximately 3 inches
Thumb length: approximately 2¾–3 inches
Because crochet stretches, the mitten should fit close to the hand without compressing it.
Gauge
With the 4.5 mm hook:
Approximately:
15 hdc = 4 inches
and:
11 rounds = 4 inches.
Gauge matters for mittens.
If 32 stitches measure much more than 9 inches around, use a smaller hook.
If your fabric is very stiff or too narrow, increase your hook size slightly.
Crochet Abbreviations
This pattern uses US terminology.
MR – magic ring
ch – chain
sc – single crochet
hdc – half double crochet
inc – 2 stitches in one stitch
sc2tog – single crochet two together
sl st – slip stitch
st / sts – stitch / stitches
BLO – back loop only
rnd – round
Construction Overview
Each mitten has four sections:
- Rounded fingertip
- Straight hand
- Thumb opening and wrist
- Separate ribbed cuff
You’ll make the right and left mitten almost identically.
Only the position of the thumb opening changes.
PART 1: Begin the Rounded Fingertip
Using charcoal yarn and the 4.5 mm hook:
Make a magic ring.
Round 1
Work:
8 hdc
into the magic ring.
Pull closed.
Join with a sl st.
8 sts
Round 2
Work:
2 hdc in every stitch
around.
16 sts
Round 3
Repeat:
hdc in next st, 2 hdc in next st
around.
24 sts
Round 4
Repeat:
hdc in next 2 sts, 2 hdc in next st
around.
32 sts
You now have the full hand circumference.
Check the Fingertip Shape
The upper mitten should form a softly rounded cup.
If it looks extremely flat, your increases may be too loose.
If it begins curling tightly, check your gauge.
PART 2: Crochet the Upper Hand
Rounds 5–13
Hdc in every stitch around.
32 sts
Join after every round.
The mitten should now cover approximately from the fingertips toward the base of the thumb.
Try it over the hand if possible.
The thumb opening should begin when the mitten reaches the natural crease between the thumb and index finger.
If necessary, add or remove one plain round.
PART 3: Right Mitten Thumb Opening
For the right mitten:
Round 14
Hdc in first:
6 sts
Ch:
6
Skip the next:
6 sts
Hdc in final:
20 sts
Join.
The chain section creates the thumb opening.
You still have the equivalent of:
32 stitch positions.
PART 4: Restore the Hand Round
Round 15
Hdc in first 6 sts.
Work:
6 hdc across the ch-6 space
Hdc in the final 20 sts.
Join.
32 sts
PART 5: Continue to the Wrist
Rounds 16–20
Hdc around.
32 sts
After Round 20, measure from the fingertip to the lower edge.
Aim for approximately:
8–8½ inches.
If the hand is longer, add another plain round.
If it’s shorter, remove one.
Fasten off the charcoal yarn.
PART 6: Make the Left Mitten
Repeat Rounds 1–13 exactly.
For the left mitten, mirror the thumb opening.
Left Mitten Round 14
Hdc in first:
20 sts
Ch 6.
Skip next:
6 sts
Hdc in final:
6 sts
Join.
Continue Round 15 and the wrist rounds exactly as for the right mitten.
This places the thumb openings on opposite sides.
PART 7: Crochet the Thumb
Return to one thumb opening.
Using charcoal yarn and the 4.5 mm hook, join at one lower corner.
Pick up approximately:
14 sc evenly around the opening.
This includes the six skipped stitches, six chain-edge stitches, and approximately one stitch at each corner.
Thumb Round 1
Sc around.
14 sts
Thumb Round 2
Work one decrease near each side corner:
Sc around while decreasing:
14 → 12 sts
Distribute the two decreases evenly.
Thumb Rounds 3–5
Sc around.
12 sts
Try the mitten on.
The thumb should now reach close to the thumb tip.
Add one extra plain round if necessary.
PART 8: Shape the Thumb Tip
Thumb Round 6
Repeat:
sc in next st, sc2tog
around.
8 sts
Thumb Round 7
Sc2tog around.
4 sts
Fasten off, leaving a long yarn tail.
Thread the tail through the remaining stitches.
Pull closed.
Secure and weave in the end.
Repeat for the second mitten.
Close Any Thumb Corner Gaps
Small holes can appear where the thumb joins the hand.
Use the beginning or ending yarn tail to make one or two small invisible stitches across each gap.
Don’t pull so tightly that the thumb opening becomes uncomfortable.
PART 9: Make the Ribbed Cuff
Using forest-green yarn and the:
4.0 mm hook
Ch:
13
Cuff Row 1
Sc in the second chain from the hook and across.
12 sts
Ch 1 and turn.
Cuff Row 2
Working in the:
back loop only
Sc across.
12 sts
Ch 1 and turn.
Continue
Repeat Row 2 until the cuff strip measures approximately:
8 inches long
without stretching.
Depending on your gauge, this may require approximately:
30–34 rows.
The strip should measure approximately:
3 inches wide.
Test the Cuff
Wrap the ribbing around the wrist.
It should feel comfortably snug.
Don’t make it as tight as a hat brim.
You need enough stretch to pass over the hand.
PART 10: Join the Cuff into a Ring
Bring the two short ends together.
Slip stitch or sew them together.
You now have one ribbed cuff ring.
Do not fasten off if you’d like to crochet it directly to the mitten.
PART 11: Attach the Cuff
Turn the mitten so the wrist opening faces you.
Position the cuff seam at the inner wrist.
Place the cuff around the outside of the mitten wrist.
Align the cuff edge with the 32-stitch wrist opening.
Using forest-green yarn, work approximately:
32 sc evenly around
through both the mitten wrist and cuff edge.
Because the cuff has more rows than the mitten has stitches, you’ll occasionally combine or skip a rib row while attaching.
Distribute everything evenly.
Join.
Fasten off.
Fold or Leave the Cuff Long
The written cuff is approximately:
3 inches deep.
You can wear it completely extended for maximum wrist coverage.
Or fold the lower inch upward for a shorter double-layer edge.
For a men’s winter mitten, I recommend leaving most of the cuff extended so it sits comfortably underneath a jacket sleeve.
Your Men’s Crochet Mittens Are Finished
Check that:
- Thumbs point in opposite directions
- Both mittens have equal length
- Cuffs match
- Fingertips are rounded
- Thumb tips are closed securely
Try the pair on before trimming any difficult-to-replace yarn tails.
Charcoal + Forest Green Version
The main Crochetmirth sample uses:
Charcoal-gray hands
with:
deep forest-green ribbed cuffs.
This gives the pair a practical, understated winter appearance.
All-Charcoal Mittens
Use one color for the entire pair.
The ribbed cuff still creates enough visual contrast through texture.
Navy Men’s Mittens
Deep navy is an excellent everyday option.
Pair it with:
charcoal or oatmeal cuffs.
Olive Green Version
Use muted olive or dark forest green for the whole mitten.
This works particularly well with tan, brown, navy, and black winter coats.
Warm Camel Mittens
Camel or medium brown creates a more rustic handmade look.
Use darker chocolate-brown cuffs for subtle contrast.
Black Mittens
Black creates a classic pair, although the crochet texture may be harder to see in photos.
For Pinterest images, charcoal often photographs better.
Add Simple Stripes
Want a little more color without making the design busy?
Add:
2 contrast rounds
across the upper hand.
For example:
Charcoal + forest green
or:
Navy + camel.
Keep the thumb and cuff solid.
Contrast Thumb
Make the main mitten charcoal.
Use forest green for:
- Thumb
- Cuff
This adds subtle color blocking.
Make the Cuff Longer
For extra protection under a winter jacket:
Start with:
Ch 17
instead of Ch 13.
Work:
16 sc BLO
per row.
The cuff will become approximately:
4 inches deep.
Make the Cuff Shorter
Start with:
Ch 9
for an approximately:
2-inch ribbed cuff.
This uses less yarn and creates a lighter everyday mitten.
Men’s Sizing Guide
Hand sizing matters more than labels such as Medium or Large.
Measure around the knuckles with fingers together and thumb excluded.
Men’s Small
Hand circumference:
7½–8 inches
Aim for approximately:
30 body stitches.
Men’s Medium
Hand circumference:
8–9 inches
Use the written:
32 stitches.
Men’s Large
Hand circumference:
9–9½ inches
Increase to approximately:
34–36 stitches.
Work increases evenly during the fingertip section.
For all sizes, adjust straight rounds according to actual fingertip-to-wrist length.
Measuring Hand Length
Measure from:
tip of middle finger → wrist crease.
Many adult men’s hands fall around:
7½–8½ inches
through this section.
Always prioritize the recipient’s actual measurement if possible.
Thumb Sizing
Measure around the widest part of the thumb.
If the written 12-stitch thumb feels tight:
Work:
13–14 stitches
after the corner decrease round.
If it feels loose:
Reduce to:
10–11 stitches.
The thumb should fit comfortably without squeezing.
Why Work Top Down?
Top-down construction makes length adjustment easy.
You can try the mitten on as you go and decide exactly where the thumb opening should begin.
It also creates a smooth rounded fingertip without a seam across the fingers.
Why Use Worsted Yarn?
Worsted yarn provides a practical balance of:
- Warmth
- Flexibility
- Stitch definition
- Reasonable bulk
It also fits easily under coat sleeves compared with very thick super-bulky mittens.
Best Fibers for Winter Mittens
Wool
Wool provides excellent cold-weather warmth and remains useful even when slightly damp.
Wool Blend
A wool/acrylic blend offers warmth with easier washing.
Acrylic
Acrylic is affordable, durable, and easy to care for.
For a general everyday pair, choose a soft acrylic rather than a very stiff craft yarn.
Wind Resistance
Crochet naturally has small spaces between stitches.
A firm gauge helps reduce airflow.
For particularly cold or windy climates, you can add a lightweight fleece lining.
Optional Fleece Lining
Trace each mitten onto folded lightweight fleece.
Cut slightly smaller than the crochet shell.
Sew the fleece into a simple mitten-shaped liner.
Insert it inside.
Hand sew around the wrist edge before attaching or just inside the ribbed cuff.
Keep the thumb flexible.
Don’t Over-Line the Thumb
A very thick thumb lining can reduce movement.
Use thin fleece or skip lining inside the thumb entirely if dexterity becomes uncomfortable.
Matching Men’s Winter Set
Pair these mittens with your:
Men’s Crochet Scarf Pattern
and:
Crochet Beanie Pattern for Men
Use the same charcoal, forest-green, navy, or camel palette.
This creates a coordinated three-piece handmade winter gift.
Handmade Christmas Gift
Men’s mittens work well as practical handmade gifts because they don’t depend heavily on fashion trends.
If you know the recipient’s hand circumference and favorite coat color, you can customize the pair easily.
Common Beginner Problems
Mitten Too Tight Around Knuckles
Your gauge may be tighter than the sample.
Use a larger hook or increase the hand stitch count.
Mitten Too Wide
Move down a hook size.
A winter mitten should fit fairly close to retain warmth.
Thumb Opening Too High
The opening should begin near the natural thumb webbing.
Remove one upper-hand round.
Thumb Opening Too Low
Add another plain round before creating it.
Thumb Has Holes at the Base
Pick up one extra stitch at each corner, then decrease those extras on the next round.
Left and Right Mittens Match Instead of Mirror
Make sure the thumb opening begins after 6 stitches on one mitten and after 20 stitches on the other.
Cuff Is Too Tight
Add several ribbing rows before joining it into a ring.
Cuff Flares
Shorten the ribbing strip or use the smaller hook.
Make Both Mittens Match
After completing Mitten 1, write down:
- Number of plain hand rounds
- Exact thumb position
- Number of wrist rounds
- Thumb length
- Cuff rows
Use those exact measurements for Mitten 2.
This matters more than relying only on visual comparison.
Blocking
Heavy blocking isn’t usually necessary.
Lightly dampen the finished mittens if needed.
Shape:
- Fingertips
- Thumbs
- Cuffs
Allow them to dry naturally.
Don’t stretch them larger than the intended hand size.
Washing
Follow your yarn manufacturer’s care instructions.
If you’ve added a fleece lining, make sure both materials have compatible washing requirements.
Reshape the mittens while damp.
Storage
Wash and dry thoroughly before storing for the warmer months.
Lay them together rather than tightly folding the thumbs inward.
Frequently Asked Questions
What yarn weight is used?
Category 4 worsted-weight yarn.
What hook size is used?
4.5 mm for the hand and 4 mm for the ribbed cuff.
What hand size does the written pattern fit?
Approximately 8–9 inches around the knuckles.
How much yarn is required?
Approximately 240–300 yards for the pair.
Are the mittens worked top down?
Yes.
Is the thumb separate?
Yes. A thumb opening is created in the hand and the thumb is added afterward.
Are the cuffs ribbed?
Yes. They’re worked separately in SC BLO and attached to the wrist.
Are the left and right mittens different?
Only the thumb-opening placement is mirrored.
Can I make them larger?
Yes. Increase the hand circumference and adjust length to actual measurements.
Can they be lined?
Yes. Thin fleece is a useful option for colder climates.
Final Thoughts
A good men’s mitten pattern doesn’t need elaborate decoration.
Fit, warmth, and comfort matter more.
This men’s crochet mittens pattern combines a dense worsted-weight hand with a rounded fingertip, separate fitted thumb, and long ribbed cuff that sits comfortably under a winter coat.
Use charcoal and forest green for the Crochetmirth version.
Try navy for a classic everyday pair.
Choose camel or brown for a rustic winter look.
Or crochet the entire pair in one neutral shade for a simple handmade gift.
Save these warm ribbed men’s crochet mittens for your winter project list!