Braided Crochet Ear Warmer Pattern – Thick Winter Headband
A simple crochet headband can keep your ears warm.

A thick braided crochet headband does that while adding enough texture to become the main feature of your winter outfit.
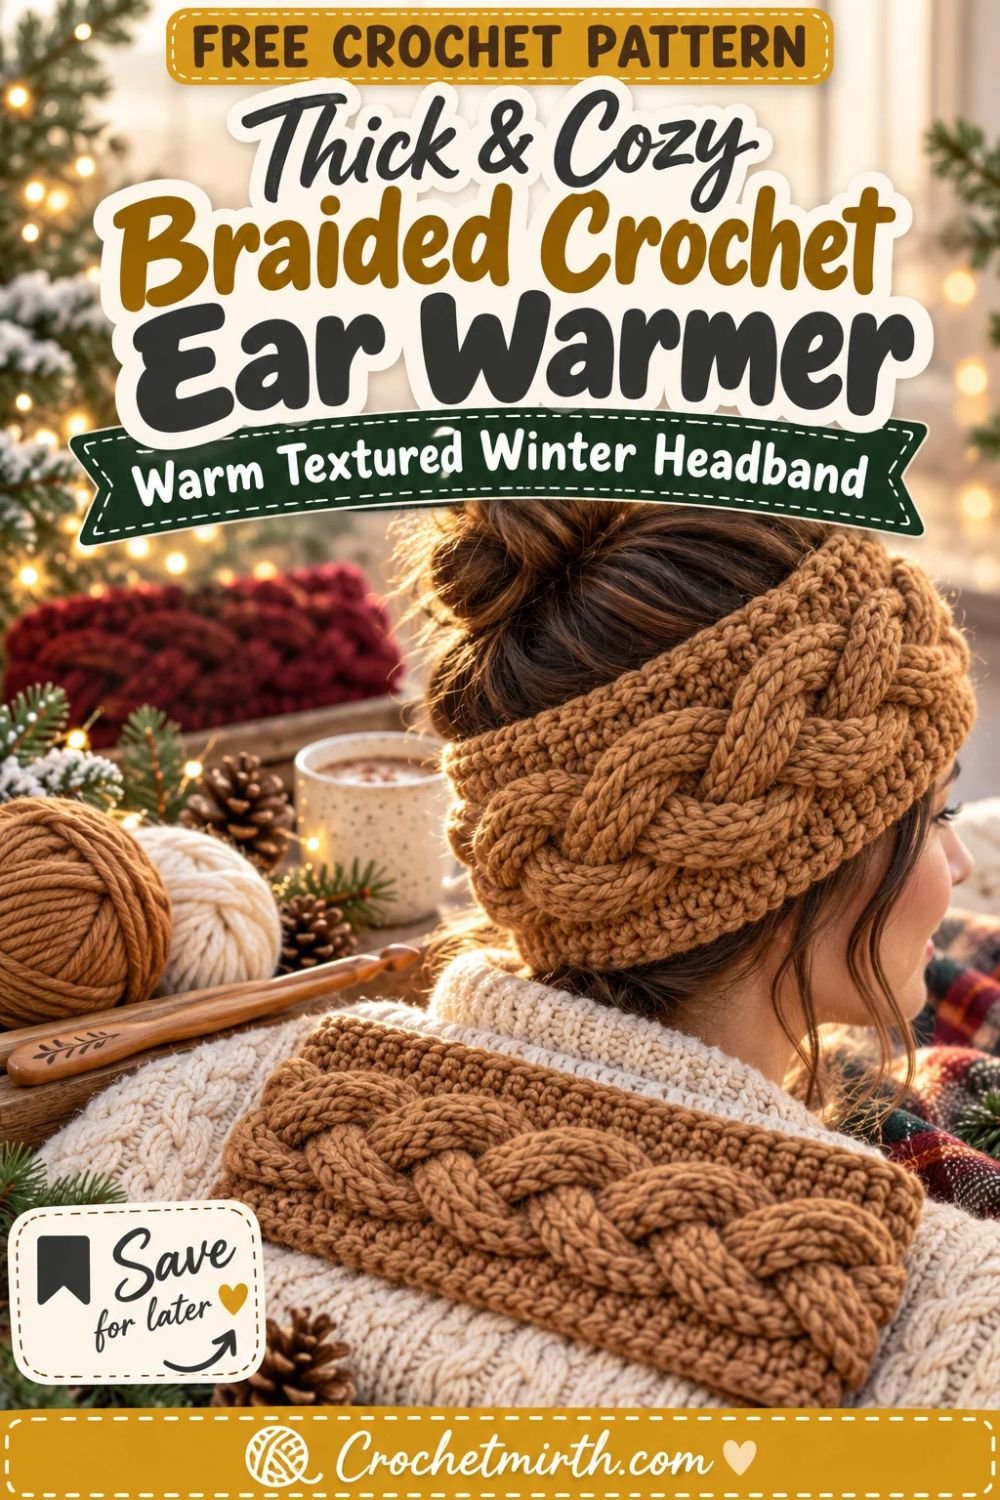
This braided crochet ear warmer pattern uses raised post stitches to create one large cable running through the center of a solid headband.
Unlike a twisted headband, the braided effect doesn’t come from folding the finished rectangle at the seam.
The braid is actually crocheted into the fabric.
Six raised cable stitches cross over each other repeatedly, creating a thick rope-like texture surrounded by flatter stitches along both edges.
The entire piece is worked flat.
Once it reaches the correct length, the short ends are sewn together at the back.
That makes sizing very easy to customize.
Why You’ll Love This Braided Ear Warmer
This pattern features:
- True crochet cable texture
- Thick bulky-weight yarn
- Wide ear coverage
- One large center braid
- Simple flat construction
- Adjustable length
- Invisible back seam
- No buttons
- No front twist
- No separate braid pieces
- Excellent handmade-gift potential
The finished headband looks much more complicated than its construction actually is.
Once you understand the cable crossing, the same repeat continues for the entire length.
Skill Level
Intermediate
A confident advanced beginner can also make this after practicing front-post stitches.
You’ll need to know:
- Chain
- Half double crochet
- Front post double crochet
- Back post double crochet
- Front post treble crochet
- Slip stitch
- Working around stitch posts
- Skipping and crossing post stitches
- Simple seaming
Cable crochet requires more concentration than an ordinary ribbed ear warmer, but the pattern becomes repetitive after the first cable section.
Materials
Use approximately:
90–120 yards of Category 5 bulky-weight yarn
for an adult headband.
For the sample:
Warm caramel / camel
You’ll also need:
- 6.0 mm crochet hook
- Yarn needle
- Scissors
- Measuring tape
- Stitch markers, optional
Choose a smooth bulky yarn with clear stitch definition.
Very fuzzy yarn can hide the braid.
Finished Size
The adult sample measures approximately:
4½–5 inches wide
and approximately:
19–20 inches long before seaming.
It is designed for an adult head measuring roughly:
21–23 inches around.
The crochet fabric stretches after seaming, so the finished band should be slightly smaller than the actual head circumference.
Gauge
In the cable pattern:
Approximately:
11 stitches = 4 inches
and:
6–7 rows = 4 inches
Exact row gauge is less important because you’ll simply repeat until the ear warmer reaches the required length.
The width should remain close to:
4½–5 inches.
Abbreviations
This pattern uses US crochet terminology.
ch – chain
hdc – half double crochet
FPdc – front post double crochet
BPdc – back post double crochet
FPtr – front post treble crochet
sl st – slip stitch
st / sts – stitch / stitches
RS – right side
WS – wrong side
Special Stitch: Front Post Double Crochet
Yarn over.
Insert the hook from front to back and then back to front around the post of the indicated stitch.
Yarn over and pull up a loop.
Complete the double crochet normally.
Special Stitch: Back Post Double Crochet
Yarn over.
Insert the hook from back to front and then front to back around the post.
Complete the double crochet normally.
This pushes the stitch toward the back and helps maintain the raised braid on the right side.
Special Stitch: Front Post Treble Crochet
Yarn over twice.
Insert the hook around the indicated stitch post from front to back to front.
Yarn over and pull up a loop.
Complete the treble crochet normally.
The extra height allows the cable stitches to cross without pulling the fabric too tightly.
Cable Structure
The headband contains:
14 stitches
across.
These are divided into:
4 edge stitches + 6 cable stitches + 4 edge stitches
The six center stitches form the braid.
The outer eight stitches create solid fabric along the sides.
PART 1: Foundation Row
Using bulky yarn:
Ch 15.
Row 1 – WS
Hdc in the second chain from the hook and across.
14 sts
Ch 1 and turn.
PART 2: Establish the Cable Columns
Row 2 – RS
Hdc in first:
4 sts
Work:
FPdc around each of the next 6 stitch posts
Work hdc in final:
4 sts
You should have:
14 sts
Ch 1 and turn.
The six raised stitches in the center are the foundation of the braided cable.
Row 3 – WS
Hdc in first:
4 sts
Work:
BPdc around the next 6 raised posts
Hdc in final:
4 sts
Ch 1 and turn.
The back-post stitches keep the center cable raised toward the front.
PART 3: Make the First Cable Crossing
Row 4 – RS
Hdc in first:
4 sts
Now you’ll cross the six center stitches.
Step 1
Skip the first:
3 cable posts
Step 2
Work:
1 FPtr around each of the next 3 cable posts
You now have three long raised stitches leaning across the skipped section.
Step 3
Working in front of the three stitches you just made, go back to the three skipped cable posts.
Work:
1 FPtr around each of those 3 skipped posts
Keep the stitches in their original order.
This creates one large cable crossing.
Finally:
Hdc in final:
4 sts
Ch 1 and turn.
You should still have the equivalent of:
14 stitches.
Cable Tip
Don’t pull the treble stitches tightly.
They need enough height to cross the other three posts without distorting the headband.
After finishing the row, gently separate the two groups of three stitches with your fingers.
The cable should puff forward.
Row 5 – WS
Hdc in first:
4 sts
BPdc around each of the:
6 cable posts
Hdc in final:
4 sts
Ch 1 and turn.
PART 4: Give the Cable Space
Cable crossings look better when they aren’t made on every row.
Row 6 – RS
Hdc in first:
4 sts
FPdc around each of the next:
6 cable posts
Hdc in final:
4 sts
Ch 1 and turn.
Row 7 – WS
Hdc in first:
4 sts
BPdc around next:
6 cable posts
Hdc in final:
4 sts
Ch 1 and turn.
PART 5: Repeat the Braid
Row 8 – RS
Repeat the cable crossing from Row 4:
Hdc 4.
Skip first 3 cable posts.
FPtr around next 3 posts.
Working in front of those stitches, FPtr around the 3 skipped posts.
Hdc 4.
Ch 1 and turn.
Row 9
Repeat Row 5.
From here, continue repeating:
Rows 6–9
until your headband reaches the desired length.
In simple terms, the repeat is:
- Straight raised-post row
- Back-post support row
- Cable-cross row
- Back-post support row
Then repeat.
How Long Should You Crochet?
For an average adult head measuring:
21–23 inches
stop when the piece measures approximately:
19–20 inches long without stretching.
For very stretchy yarn, you may want it slightly shorter.
For firm wool or low-stretch yarn, you may need it slightly longer.
Always test before seaming.
Test the Fit
Wrap the unfinished strip around the head with the cable facing outward.
Overlap the ends slightly.
The fit should be:
snug but comfortable.
You should not have to pull aggressively to make the ends meet.
PART 6: Finish on a Support Row
For the cleanest seam, try to finish after a:
wrong-side BPdc support row
rather than directly after a cable crossing.
This leaves flatter fabric at the seam.
Fasten off, leaving approximately:
18 inches of yarn tail.
PART 7: Seam the Ends
Lay the headband flat with:
RS facing inward.
Bring the short foundation edge and final edge together.
Thread the long yarn tail through your yarn needle.
Whip stitch through both edges.
Keep the seam firm but flexible.
Don’t pull so tightly that the back of the headband becomes narrower.
Secure and weave in the yarn tail.
Turn Right Side Out
Turn the ear warmer so the braid faces outward.
The seam should now sit at the back of the head.
Use your fingers to shape the cable.
The braid should run continuously from the front toward the back seam.
Optional Edge Border
If your outer edges look uneven, join yarn at the back seam.
Work:
1 loose round of single crochet
along one long edge.
Fasten off.
Repeat on the opposite edge.
Be careful not to tighten the edge because the headband needs to stretch.
Why the Cable Looks Braided
The center contains two groups of three post stitches.
During each cable row, one group crosses over the other.
Repeating that crossing throughout the length creates the visual effect of a thick braid or rope.
Front-post treble stitches are tall enough to cross without compressing the fabric excessively.
Caramel Braided Headband
The Crochetmirth sample uses:
warm caramel / camel bulky yarn.
This medium-light color makes the shadows between the cable strands especially easy to see.
Cream Version
Warm cream creates a very classic winter headband.
The cable shadows provide enough contrast even without multiple yarn colors.
Deep Cranberry Version
Cranberry produces a richer statement accessory.
It pairs beautifully with:
- Cream coat
- Camel scarf
- Neutral knitwear
Forest Green Version
Deep forest green creates a woodland winter look.
Choose a smooth yarn so the cable doesn’t disappear into the dark shade.
Charcoal Version
Charcoal gray gives the pattern a classic unisex appearance.
It also pairs well with black, gray, camel, and cream winter coats.
Mustard-Gold Version
Muted mustard is especially attractive for a textured accessory because every raised cable catches the light.
One-Skein Project
Many Category 5 bulky yarn skeins contain enough yardage for one headband.
Because the written design requires roughly:
90–120 yards
it’s a useful small project for partial bulky skeins.
Make It Narrower
Prefer a lighter headband?
Reduce the outer borders.
Instead of:
4 edge stitches on each side
use:
3 on each side.
That gives:
12 total stitches
while keeping the same six-stitch center cable.
The finished width will be closer to:
4 inches.
Make It Wider
For maximum ear coverage, increase the side borders to:
5 hdc on each side.
You’ll have:
16 total stitches.
Aim for approximately:
5½ inches wide.
The six center cable stitches stay unchanged.
Adult Size Guide
Small Adult
Head:
20–21 inches
Finished strip before seaming:
18–18½ inches
Adult Medium
Head:
21–23 inches
Finished strip:
19–20 inches
Large Adult
Head:
23–24 inches
Finished strip:
20½–21½ inches
These are starting points.
Your yarn’s stretch matters more than the exact chart.
Child Version
Use:
worsted #4 yarn
with approximately:
5 mm hook.
Keep the same basic cable structure but reduce the overall length to fit the child’s head.
You can also reduce each outer border by one stitch.
Worsted-Weight Version
If bulky yarn feels too thick, use Category 4 worsted yarn and a:
5–5.5 mm hook.
Current braided cable ear warmer designs commonly use worsted/Aran with hooks around this size.
Expect the finished headband to be slightly lighter and less chunky.
Extra-Chunky Version
Use Category 6 super bulky yarn with:
8–9 mm hook.
Reduce the outer edge stitches and work to measurement.
Because very thick yarn enlarges the cable dramatically, a six-post cable may create a headband over 6 inches wide unless adjusted.
Why Use Bulky Yarn?
Bulky yarn emphasizes:
- Cable depth
- Raised shadows
- Warmth
- Quick progress
The cable itself already creates extra thickness because post stitches overlap.
Using bulky rather than thin yarn makes the finished band feel substantial without requiring a lining.
Is a Cable Ear Warmer Warm?
The solid hdc borders cover the edges of the ears while the overlapping cable adds extra yarn thickness across the center.
Cable patterns can create small openings at the crossing points.
For most everyday winter use, these are minor.
For very windy climates, an optional lining can provide additional protection.
Optional Fleece Lining
Cut a strip of lightweight fleece approximately:
½ inch narrower than the finished headband.
Join its short ends.
Place it inside the crochet headband.
Hand-sew around the upper and lower edges with small hidden stitches.
Keep the lining slightly stretchy.
A lining is optional and isn’t part of the main crochet pattern.
Cable Practice Swatch
If you’ve never crocheted cables, make a small practice strip first.
Work:
14 stitches
and repeat the first nine rows.
This lets you learn:
- FPdc
- BPdc
- FPtr
- Cable crossing
before committing to the full headband.
Finding the Correct Post
During a cable row, you’re working around the raised vertical posts, not through the top loops.
Count the six center posts before beginning the crossing:
1 – 2 – 3 – 4 – 5 – 6
Skip:
1 – 2 – 3
Work:
4 – 5 – 6
Then return and work:
1 – 2 – 3.
This is much easier than trying to identify the stitches after you’ve already begun crossing them.
Don’t Twist the Cable Stitches
When going back to work the skipped posts, keep their original order.
Do not accidentally work:
3 – 2 – 1.
That can create crossed or tangled-looking posts.
Common Beginner Problems
Cable Looks Flat
Make sure you’re working around the posts, not through the top loops.
Cable Is Extremely Tight
Your FPtr stitches need more height.
Relax your tension and pull up the first loop slightly.
Headband Narrows in the Cable Rows
The cable stitches are probably too tight.
Use a 6.5 mm hook just for the FPtr stitches if needed.
Large Holes Appear
Some space around cable crossings is normal.
If the openings are excessive, use a slightly smaller hook or firmer yarn.
Cable Is Off-Center
You should always have equal outer borders on both sides.
For the written version:
4 stitches + cable + 4 stitches.
Headband Is Too Loose
Undo the seam and remove one cable repeat.
Headband Is Too Tight
Add another straight/cable repeat before seaming.
Seam Feels Bulky
Finish the pattern on a flatter support row and use mattress stitch instead of thick whip stitches.
Blocking
Light blocking can improve the overall shape.
Do not aggressively flatten the center braid.
Instead:
- Straighten outer edges
- Smooth the seam
- Arrange each cable crossing
- Let the braid remain raised
Allow the ear warmer to dry flat.
Washing
Follow your yarn manufacturer’s instructions.
After washing, reshape the cable with your fingers before drying.
Avoid pressing or ironing the braid because this can flatten the texture.
Matching Winter Set
The same cable motif could later be used for:
- Braided cable beanie
- Cable scarf
- Cable cowl
- Wrist warmers
Using the same camel yarn would create a coordinated textured winter set.
Handmade Gift Idea
A braided ear warmer works especially well as a handmade winter gift because sizing is more forgiving than a fitted hat.
Make several in:
- Caramel
- Cream
- Cranberry
- Forest green
- Charcoal
for an easy winter gift collection.
Frequently Asked Questions
What yarn weight is used?
Category 5 bulky yarn.
What hook size is used?
6 mm.
How much yarn do I need?
Approximately 90–120 yards.
How wide is the finished headband?
Approximately 4½–5 inches.
What head size does it fit?
The written length is designed for approximately 21–23 inch adult heads.
Is this a simple twist headband?
No. The braided appearance comes from actual crossing post stitches.
Is the braid a separate piece?
No. It’s crocheted directly into the solid headband.
What stitches create the cable?
FPdc, BPdc, and front-post treble crochet.
Can a beginner make it?
A confident beginner who practices post stitches first can, but the pattern is best classified as intermediate.
Can I use worsted yarn?
Yes. Use a smaller hook and work to finished measurements.
Can I add a lining?
Yes, especially for very cold or windy weather.
Final Thoughts
A cable can turn a basic crochet ear warmer into something that looks far more elaborate than the actual construction.
This braided crochet ear warmer pattern uses six raised post stitches to create one thick repeating braid down the center of a solid winter headband.
The camel bulky yarn highlights every cable crossing.
The wide side sections keep the ears covered.
And because the whole piece is worked flat, adjusting the size is as simple as adding or removing pattern repeats before seaming.
Choose caramel for a warm neutral accessory, cranberry for rich winter color, forest green for a woodland look, or cream for a classic cable headband.
Save this thick braided crochet ear warmer pattern for your winter project list!