Chunky Crochet Ear Warmer with Button – Easy Winter Headband
Sometimes you want warm ears without wearing a full winter hat.

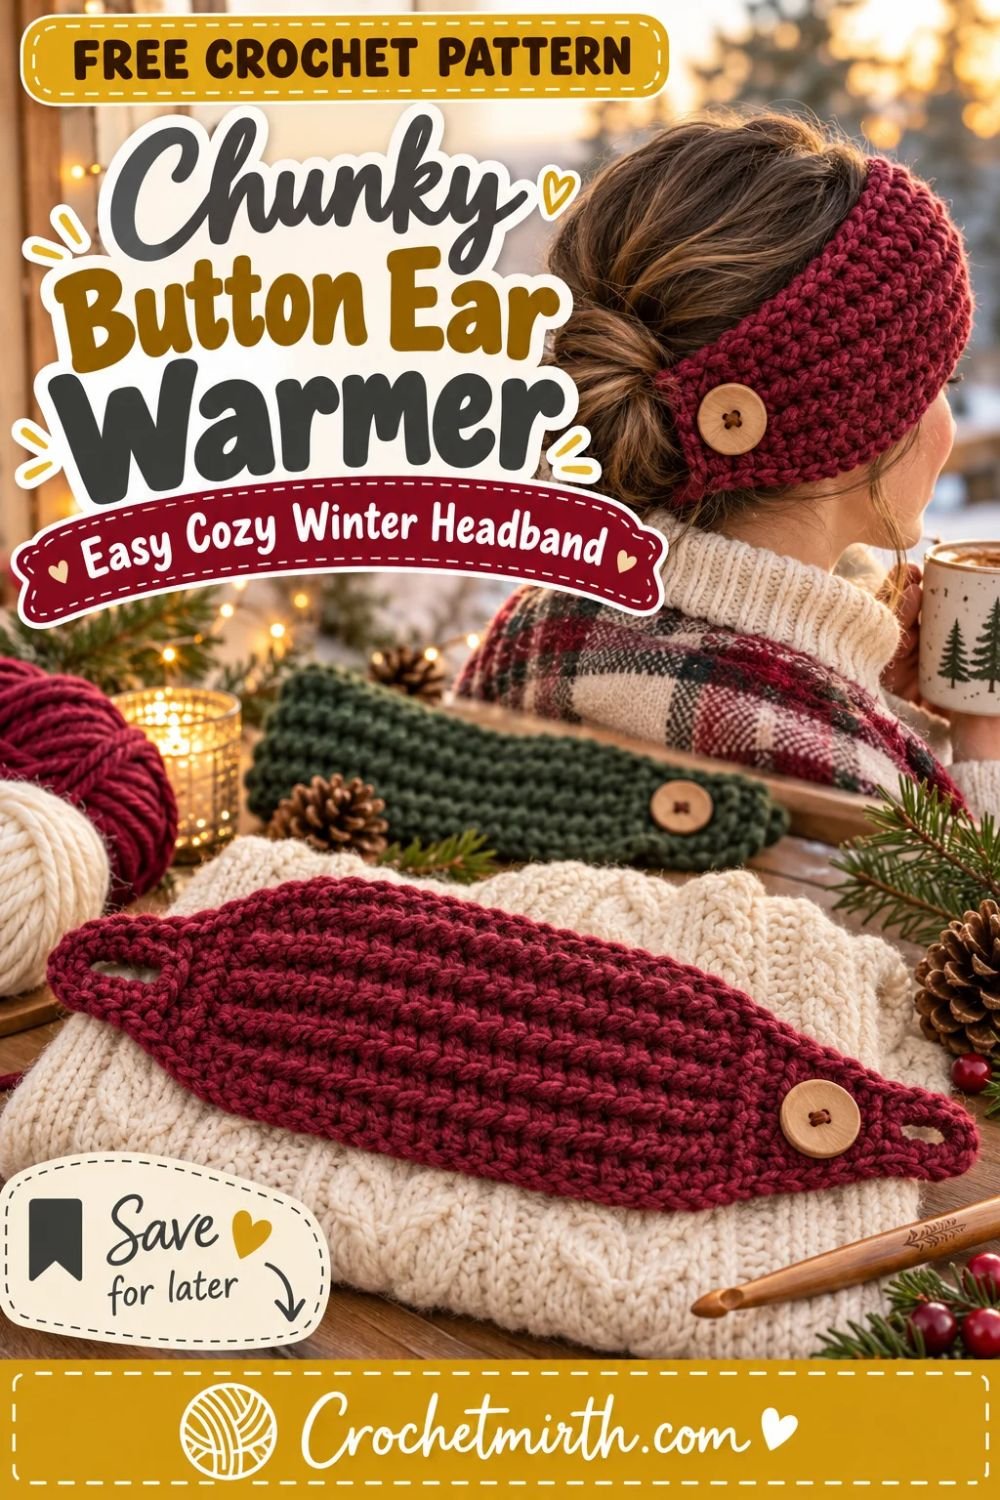
This chunky crochet ear warmer with button gives you the warmth of thick bulky yarn while leaving your hair free.
The design is worked flat from one narrow end to the other.
It gradually widens into a cozy section that covers the ears, stays wide through most of the headband, then tapers again toward the opposite end.
A functional wooden button and crochet buttonhole create a simple adjustable closure.
There is no twist to sew.
No center knot.
And no complicated cable pattern.
The texture comes from working half double crochet through the back loop, creating thick raised ridges that look especially good in chunky yarn.
Why You’ll Love This Ear Warmer
This pattern is:
- Quick to crochet
- Beginner-friendly
- Made with bulky yarn
- Warm without being a full hat
- Adjustable with a button
- Worked completely flat
- Easy to resize
- Great for one-skein leftovers
- Perfect for winter gifts
- Easy to batch-make
The button also means you don’t have to pull the headband over a finished hairstyle.
Simply wrap it around your head and fasten it at the side.
Skill Level
Easy / Advanced Beginner
You should know how to:
- Chain
- Half double crochet
- Half double crochet in the back loop
- Work two stitches in one stitch
- Half double crochet two together
- Make a chain-space buttonhole
- Sew on a button
- Weave in yarn ends
Materials
Use approximately:
70–100 yards of Category 5 bulky yarn
for an adult ear warmer.
For the sample:
Deep cranberry / mulberry
You’ll also need:
- 6.5 mm crochet hook
- One 1¼-inch wooden button
- Yarn needle
- Smaller sewing needle if necessary for the button
- Strong matching thread or yarn for attaching the button
- Scissors
- Measuring tape
- Stitch markers, optional
A chunky ear warmer published in February 2026 uses Category 5 chunky yarn and approximately 44–87 yards, so this is a realistic yarn range for a thick adult headband of this size.
Finished Size
The adult sample measures approximately:
4½–5 inches wide
through the main ear-covering section.
Total flat length before fastening:
approximately 20–21 inches
Once the button ends overlap, the effective circumference becomes smaller.
This creates the negative ease needed for a comfortable fit.
Designed for approximately:
21–23 inch adult head circumference.
Gauge
Approximately:
9 hdc = 4 inches
and:
7 rows = 4 inches
in HDC BLO.
Gauge doesn’t need to be perfect, because the length is easy to customize.
However, the finished fabric should be:
- Thick
- Flexible
- Stretchy
- Not board-stiff
Abbreviations
This pattern uses US crochet terminology.
ch – chain
hdc – half double crochet
hdc BLO – half double crochet in back loop only
hdc2tog – half double crochet two together
sl st – slip stitch
st / sts – stitch / stitches
Construction Overview
The entire headband is one flat piece.
You’ll work:
narrow tab → increases → wide body → decreases → buttonhole tab
The first narrow tab receives the button.
The opposite tab contains the buttonhole.
That means almost no assembly is required.
PART 1: Begin the First Button Tab
Using cranberry bulky yarn:
Ch 7.
Row 1
Hdc in the second chain from the hook and across.
6 sts
Ch 1 and turn.
PART 2: Increase to Full Width
Row 2
Work:
2 hdc in first st
Hdc in next 4 sts.
2 hdc in final st
8 sts
Ch 1 and turn.
Row 3
Working in the back loop only:
2 hdc in first st
Hdc BLO in next 6 sts.
2 hdc in final st
10 sts
Ch 1 and turn.
You have reached the full headband width.
At the written gauge, 10 stitches gives approximately:
4½–5 inches.
PART 3: Crochet the Wide Ear-Warmer Section
Row 4
Hdc BLO across.
10 sts
Ch 1 and turn.
Rows 5–31
Repeat Row 4.
Maintain:
10 sts.
The ridges should run across the width of the headband.
This gives the finished piece plenty of horizontal stretch.
Measure Before Tapering
At this stage, lay the work flat without stretching it.
The piece should be approximately:
17½–18 inches long.
Exact length depends on gauge.
Don’t worry if yours differs slightly.
The tapered end and buttonhole rows will add the final length.
PART 4: Taper the Second End
Row 32
Hdc2tog.
Hdc BLO in next:
6 sts
Hdc2tog.
8 sts
Ch 1 and turn.
Row 33
Hdc2tog.
Hdc BLO in next:
4 sts
Hdc2tog.
6 sts
Ch 1 and turn.
You now have another narrow fastening tab.
PART 5: Make the Functional Buttonhole
Row 34
Hdc BLO in first:
2 sts
Ch:
2
Skip the next:
2 sts
Hdc BLO in final:
2 sts
You still have the equivalent of:
6 stitch positions.
Ch 1 and turn.
Row 35
Hdc BLO in the first 2 sts.
Work:
2 hdc into the ch-2 space
Hdc BLO in the final 2 sts.
6 sts
Fasten off.
Check the Buttonhole
Before sewing on the button, test it through the hole.
The hole should stretch enough for the button to pass through without excessive force.
For a thicker 1½-inch button, use:
ch 3, skip 3
instead of ch 2, skip 2.
For a smaller button, the written ch-2 opening may be enough.
Always test your actual button before weaving in the final yarn end.
PART 6: Position the Button
Lay the headband flat.
Overlap the buttonhole tab over the beginning tab by approximately:
1½–2 inches.
Adjust until the full loop measures comfortably around your head.
Mark where the buttonhole falls over the beginning tab.
That’s where the button belongs.
PART 7: Sew On the Button
Using strong yarn or matching sewing thread:
Sew the wooden button securely onto the beginning tab.
Pass through the crochet fabric multiple times.
Do not attach the button with only one loose yarn loop.
The closure will experience repeated pulling whenever the headband is worn.
Secure firmly.
Test the Closure
Pass the button through the buttonhole.
The two ends should overlap neatly.
The closure should feel:
secure but not strained.
Try the headband on before weaving in every remaining yarn end.
Your Chunky Button Ear Warmer Is Finished
The wide section should cover the ears.
The tapered tabs should sit neatly near one side or slightly behind the ear.
The button shouldn’t press directly against the ear.
If necessary, rotate the headband slightly backward.
Why Use a Button Closure?
A button makes the ear warmer easier to put on without disturbing:
- Ponytails
- Buns
- Curly hair
- Styled hair
It also makes the fit slightly adjustable.
This is one of the biggest functional differences between this design and a permanently seamed headband.
Why the Ends Are Narrower
A full 5-inch-wide piece underneath the button would create an unnecessarily bulky overlap.
Tapering the final section reduces:
- Bulk
- Weight
- Pressure around the closure
while leaving the main area wide enough to cover the ears.
Deep Cranberry Version
The main Crochetmirth sample uses:
Deep cranberry / mulberry
with a:
natural wooden button.
This gives the headband a warm handmade winter appearance while showing the chunky texture clearly.
Forest Green Version
Use deep forest-green bulky yarn.
Pair it with a light natural wooden button.
This version coordinates beautifully with winter scarves and forest-green beanies.
Warm Camel Version
Camel brown creates a particularly cozy neutral headband.
Try a darker walnut-colored button for contrast.
Cream Version
Warm cream creates a soft winter look.
A medium-brown wooden button stands out clearly against the light yarn.
Charcoal Version
Charcoal gray is simple, practical, and unisex.
Use a matte black or natural wooden button.
Mustard Version
Muted mustard-gold makes a highly visible winter accessory.
It works especially well with neutral coats.
One Button or Two?
The written pattern uses:
one functional button.
For extra adjustment, you can sew a second button approximately:
1 inch beside the first.
Then the wearer can choose between two circumference settings.
This can be useful for:
- Gifting
- Changing hairstyles
- Slightly different head sizes
Decorative Second Button
You can also sew a second small button beside the functional button purely for appearance.
Make sure it doesn’t interfere with the closure.
Make It Without a Button
Prefer a permanent headband?
Skip Rows 34–35.
Sew the two narrow ends together.
This creates a simple closed-loop ear warmer.
But for this pattern, the button is one of the main design features.
Optional SC Border
If your side edges look uneven, join yarn near one corner.
Work a loose round of single crochet around the entire piece.
Place extra stitches around corners.
Be careful not to make the border too tight or you’ll reduce the stretch.
Adult Sizing
The easiest way to resize this pattern is through:
length, not width.
Teen / Small Adult
Head circumference:
20–21 inches
Aim for approximately:
18½–19½ inches total flat length
before fastening.
Adult Medium
Head circumference:
21–23 inches
Use the written:
20–21 inch length.
Adult Large
Head circumference:
23–24 inches
Add several full-width rows before tapering.
Aim for approximately:
21½–22½ inches flat length.
Remember that the button overlap shortens the effective circumference.
Child Size
Use the same general shape but:
- Reduce width to approximately 3½–4 inches
- Shorten the long middle section
- Use a smaller button
Always check button security carefully on children’s accessories.
For very young children, a button-free closure may be preferable.
Make It Wider
For maximum ear coverage:
Begin with:
Ch 8
and increase to approximately:
11–12 hdc.
Aim for about:
5½ inches wide.
Make It Narrower
For a lighter headband:
Use:
8–9 stitches
at the full width.
This creates approximately:
4 inches of coverage.
Why HDC BLO?
Half double crochet through the back loop creates:
- Strong horizontal ridges
- Flexible fabric
- Extra stretch
- Simple repeating texture
It’s also easy enough for advanced beginners.
Chunky vs Super Bulky Yarn
The written version uses:
Category 5 bulky yarn.
This gives a thick cozy result without making the button tabs overly massive.
If you use Category 6 super bulky yarn, you’ll need:
- Fewer stitches
- Fewer rows
- Larger hook
A 2025 super-bulky adult ear warmer pattern uses roughly 60–64 yards and finishes around 5 × 20 inches, showing how quickly Category 6 yarn reaches similar dimensions.
Super Bulky Variation
Use Category 6 yarn with a:
9–10 mm hook.
Aim for:
4½–5 inches wide
and approximately:
20 inches long.
Don’t follow the written stitch count directly.
Follow measurements instead.
Best Yarn for Ear Warmers
Wool Blend
Excellent for true cold-weather warmth.
Acrylic
Easy to wash, affordable, and widely available.
Merino Blend
Soft and warm against the forehead and ears.
Alpaca Blend
Very warm, though some blends may stretch more.
Choose yarn that feels comfortable directly against the skin.
Avoid Scratchy Yarn
An ear warmer touches:
- Forehead
- Temples
- Ears
Avoid yarn that feels irritating during a simple neck or wrist test.
One-Skein Winter Project
Most bulky skeins contain more than enough yarn for one ear warmer.
A contemporary chunky headband published in February 2026 uses about 50 g of chunky yarn for an adult version, making ear warmers useful small projects for partial skeins.
Quick Handmade Gift
This ear warmer makes a practical last-minute winter gift because it doesn’t require the sizing precision of:
- Sweater
- Gloves
- Socks
The button also gives a small amount of adjustment.
Matching Winter Set
Pair it with:
- Chunky scarf
- Fingerless gloves
- Slipper socks
- Crochet cowl
Use the same bulky yarn for a coordinated handmade gift set.
Button Choice
A 1¼-inch wooden button gives good proportions for the chunky sample.
Other good choices include:
- Coconut button
- Matte resin button
- Horn-look button
- Large vintage-style button
Avoid buttons with sharp edges that could catch the yarn.
Button Placement Tip
Don’t sew the button until the entire crochet piece is complete.
The correct button position depends on:
- Yarn stretch
- Actual head size
- Desired snugness
- Buttonhole size
Always test the overlap first.
How Tight Should It Fit?
An ear warmer should stay in place when you move your head, but it shouldn’t create pressure across the forehead.
If you’re between sizes, make the band slightly shorter because crochet fabric usually relaxes with wear.
Common Beginner Problems
Ear Warmer Is Too Loose
Increase the button overlap or move the button farther inward.
Ear Warmer Is Too Tight
Move the button closer to the edge or add additional body rows.
Buttonhole Is Too Small
Undo the buttonhole row and increase the chain space.
Buttonhole Stretches Too Much
Work one round of slip stitch around the opening with a smaller hook.
Headband Curls
HDC BLO naturally creates ridges but shouldn’t curl dramatically.
Check that your turning chain isn’t excessively tight.
One Edge Becomes Longer
Count your stitches every few rows.
The main body should remain:
10 stitches wide.
Taper Looks Uneven
Make sure both decreases happen at the beginning and end of the same row.
Blocking
Chunky ear warmers usually need minimal blocking.
If necessary:
Lightly dampen the finished piece.
Lay it flat.
Straighten the tapered ends.
Allow the ridges to remain dimensional.
Do not stretch it to the full head circumference.
Washing
Follow your yarn manufacturer’s instructions.
The button material may require special care.
Natural wooden buttons shouldn’t be soaked repeatedly for long periods.
If necessary, hand wash gently and dry flat.
Storage
Fasten the button before storing.
Lay the ear warmer flat or roll it loosely.
Avoid folding directly across the buttonhole for long periods.
Frequently Asked Questions
What yarn weight is used?
Category 5 bulky yarn.
What hook size is used?
6.5 mm.
How much yarn do I need?
Approximately 70–100 yards.
What adult head size does it fit?
Approximately 21–23 inches.
How wide is it?
Approximately 4½–5 inches through the main section.
Is the button functional?
Yes. The opposite end includes a real crochet buttonhole.
What size button is recommended?
Approximately 1¼ inches.
Is it worked in the round?
No. The entire ear warmer is crocheted flat.
Is this the same as the twisted ear warmer?
No. This design has tapered ends and a side button closure rather than a twisted center seam.
Can beginners make it?
Yes. The shaping uses only simple increases and decreases.
Can I use super bulky yarn?
Yes, but work to measurements rather than the written stitch counts.
Final Thoughts
A chunky ear warmer is one of the quickest ways to turn a small amount of yarn into something genuinely useful for winter.
This chunky crochet ear warmer with button combines thick HDC BLO ridges with a wide ear-covering middle and tapered fastening tabs.
The wooden button isn’t just decoration—it creates a functional closure that makes the headband easier to put on and gives you a little room to adjust the fit.
Make the cranberry version for a warm winter statement.
Try camel or cream for something neutral.
Use forest green for a woodland-inspired set.
Or add a second button to create an adjustable handmade gift.
Save this chunky button ear warmer pattern for your winter crochet list!