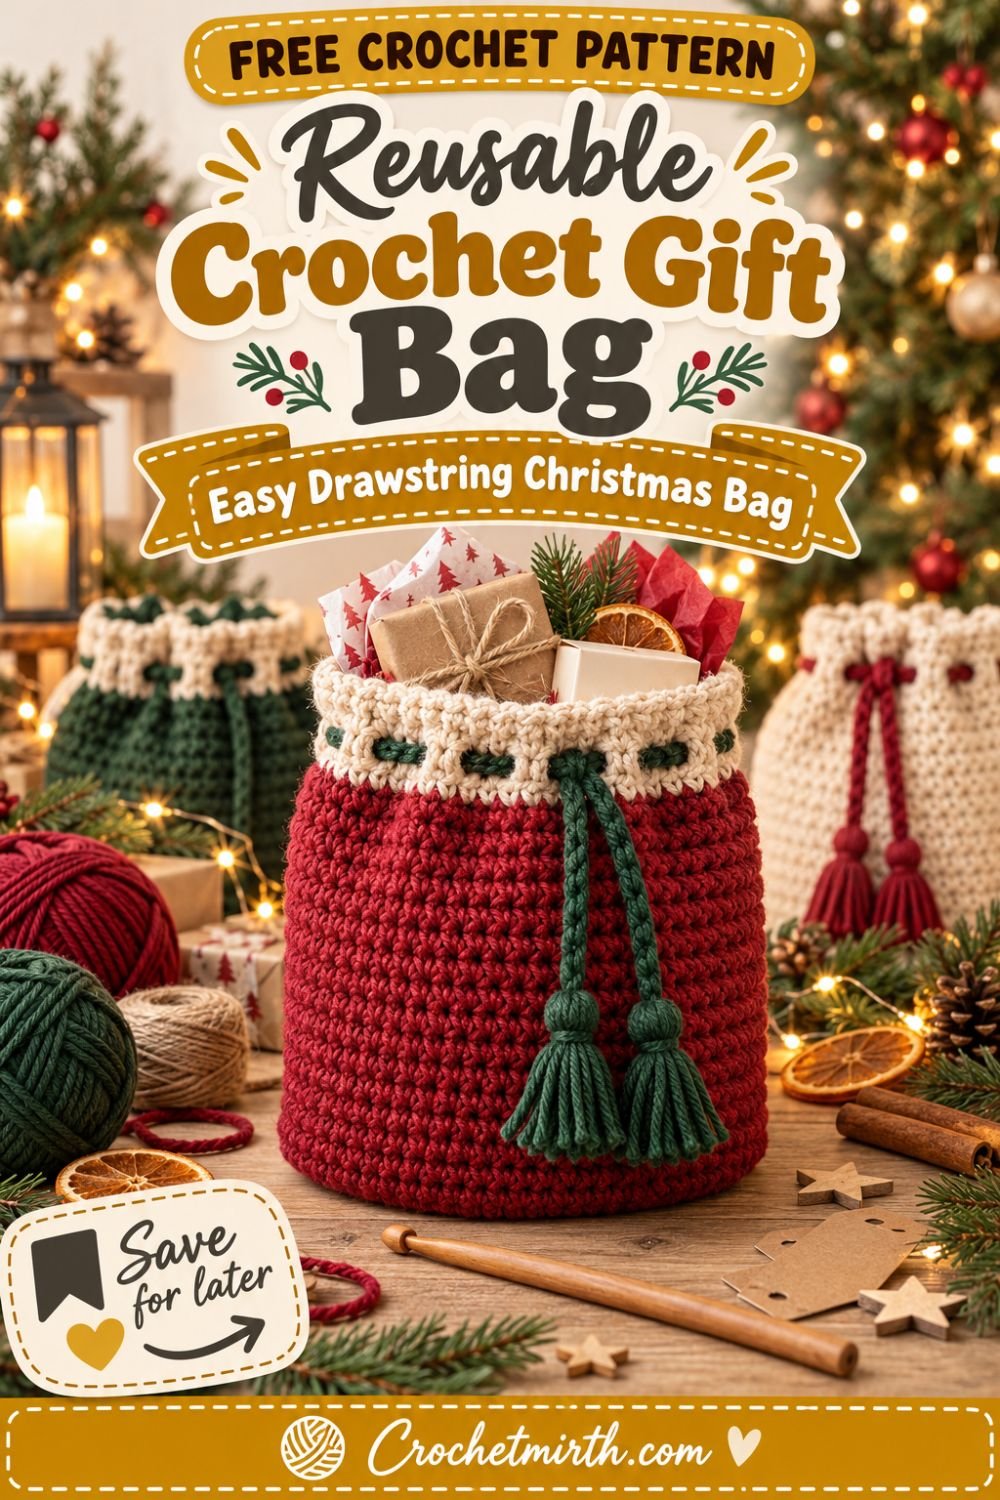
Crochet Christmas Gift Bag Pattern – Reusable Drawstring Gift Bag
Christmas wrapping can be beautiful without being disposable.
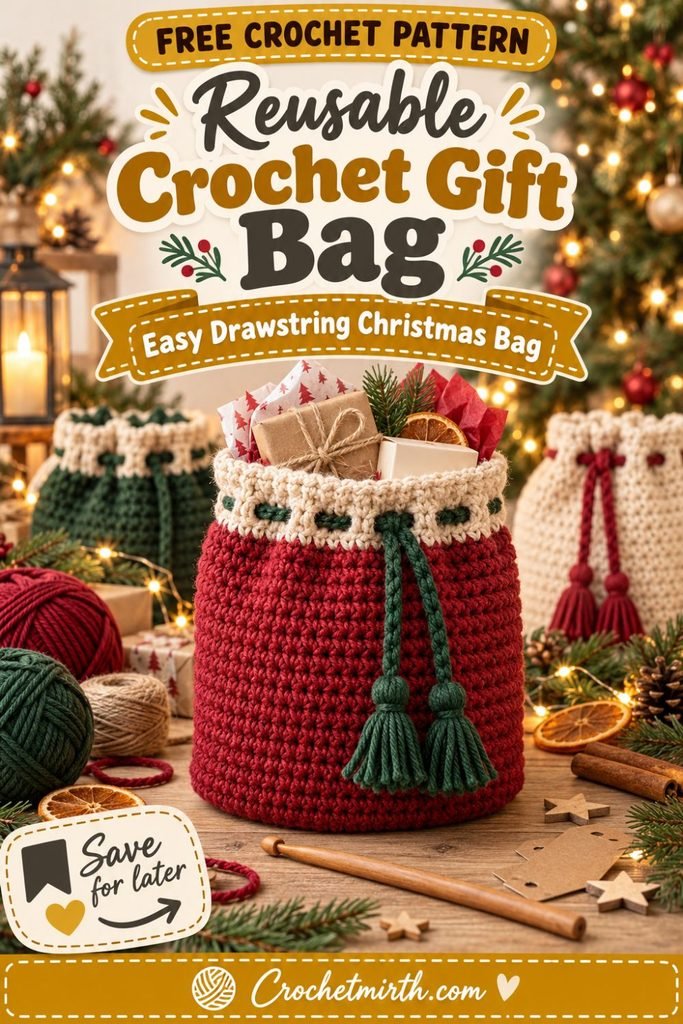
This crochet Christmas gift bag pattern creates a sturdy reusable drawstring bag that becomes part of the gift itself.
Instead of wrapping a small present in paper that’s immediately torn and thrown away, place it inside a handmade crochet bag, pull the drawstrings closed, and add a gift tag.
After Christmas, the recipient can reuse the bag for another present, seasonal storage, yarn, small accessories, or holiday decor.
The construction is also surprisingly simple.
You’ll crochet:
- One flat circular base
- A straight cylindrical body
- A contrast upper band
- One functional eyelet round
- Two crochet drawstrings
There are no separate panels to sew together.
Once the base is finished, the rest of the bag is worked upward in easy rounds.
Why You’ll Love This Crochet Gift Bag
This pattern is:
- Beginner-friendly
- Reusable
- Made with worsted-weight yarn
- Worked mostly in simple rounds
- Designed with a flat stable base
- Closed with functional drawstrings
- Easy to customize
- Great for Christmas gifts
- Useful for leftover yarn
- Easy to make in several sizes
It also looks polished enough that you don’t need additional gift wrapping.
Skill Level
Easy / Advanced Beginner
You should know how to:
- Make a magic ring
- Chain
- Single crochet
- Half double crochet
- Increase
- Slip stitch
- Work in joined rounds
- Work into chain spaces
- Fasten off
- Weave in yarn ends
There is no complicated shaping after the base.
Materials
Main Yarn
Use approximately:
180–220 yards of Category 4 worsted-weight yarn
for the medium bag.
Suggested main color:
Cranberry red
Contrast Yarn
Use approximately:
30–40 yards
in warm cream for the upper band.
Drawstring Yarn
You’ll need approximately:
20–30 yards
in forest green or another contrast color.
Crochet Hook
Use a:
4.5 mm crochet hook
A relatively firm fabric helps the bag stand upright and prevents small gifts from stretching through the stitches.
Other Supplies
- Yarn needle
- Scissors
- Measuring tape
- Stitch markers
Optional:
- Kraft gift tag
- Tissue paper
Crochet Abbreviations
This pattern uses US terminology.
ch – chain
sc – single crochet
hdc – half double crochet
sl st – slip stitch
st – stitch
sts – stitches
sp – space
rnd – round
Finished Size
The sample medium bag measures approximately:
8–9 inches tall
and:
5½–6 inches wide
when standing flat.
The circular base measures approximately:
5½–6 inches across
depending on gauge.
This size works well for small-to-medium Christmas gifts.
Gauge
Approximately:
16 sc = 4 inches
and:
18 sc rounds = 4 inches
Exact gauge isn’t critical, but it affects the final bag size.
A recent reusable Christmas bag pattern uses the same approximate 16 sc × 18 rounds per 4 inches gauge with worsted yarn and a 4 mm hook. crochetsprout.com
What Fits Inside?
The medium bag works well for gifts such as:
- Candle
- Small mug
- Hat
- Gloves
- Mini scarf
- Bath products
- Candy
- Small toys
- Yarn
- Handmade accessories
- Several smaller wrapped presents
Very heavy items may stretch crochet fabric, so keep the contents reasonably lightweight.
Construction Overview
The bag begins at the bottom.
First, you’ll increase evenly to create a flat circle.
Then you’ll stop increasing.
Working one stitch into every stitch causes the sides to grow vertically.
Near the top, you’ll change to a contrast color and create evenly spaced chain openings.
Finally, two cords are woven through those openings in opposite directions.
Pull both cords and the bag closes evenly.
PART 1: CROCHET THE FLAT BASE
Using cranberry-red yarn:
Make a:
Magic ring
Round 1
Ch 1.
Work:
8 sc
into the magic ring.
Pull the ring closed.
Join with a sl st.
8 sts
Round 2
Ch 1.
Work:
2 sc in every stitch
around.
Join.
16 sts
Round 3
Repeat:
sc in next st, 2 sc in next st
around.
Join.
24 sts
Round 4
Repeat:
sc in next 2 sts, 2 sc in next st
around.
Join.
32 sts
Round 5
Repeat:
sc in next 3 sts, 2 sc in next st
around.
Join.
40 sts
Round 6
Repeat:
sc in next 4 sts, 2 sc in next st
around.
Join.
48 sts
Round 7
Repeat:
sc in next 5 sts, 2 sc in next st
around.
Join.
56 sts
Round 8
Repeat:
sc in next 6 sts, 2 sc in next st
around.
Join.
64 sts
Check the Base
Lay the circle on a flat surface.
It should lie reasonably flat.
Aim for approximately:
5½–6 inches across
depending on your yarn and gauge.
What If the Base Ruffles?
A ruffled circle usually means you have:
- Too many increases
- Very loose tension
Check your stitch counts.
If needed, use a smaller hook.
What If the Base Cups?
If the circle begins turning into a bowl before you’re ready:
Your tension may be very tight.
Try a slightly larger hook.
PART 2: TURN THE BASE INTO THE BAG
Now stop increasing.
This causes the sides to grow upward.
Round 9
Ch 1.
Working in the back loop only:
Sc in every stitch around.
Join.
64 sts
Why BLO Here?
Working Round 9 through the back loop leaves a subtle ridge around the base.
That ridge visually separates the bottom from the side wall and helps the bag bend upward more neatly.
PART 3: CROCHET THE BODY
Round 10
Ch 1.
Hdc in every stitch around.
Join.
64 sts
Rounds 11–27
Repeat Round 10.
Keep:
64 sts
in every round.
Check the Height
Your bag should now measure approximately:
6½–7 inches
from the bottom.
If you want a taller gift bag, simply add more rounds before starting the contrast section.
Why Use HDC for the Body?
Half double crochet works faster than single crochet but still creates relatively dense fabric.
It’s a useful balance between:
- Speed
- Structure
- Flexibility
- Coverage
PART 4: ADD THE CONTRAST BAND
Switch to warm-cream yarn.
Contrast Round 1
Ch 1.
Sc in every stitch around.
Join.
64 sts
Contrast Round 2
Repeat.
64 sts
PART 5: MAKE THE DRAWSTRING EYELETS
This round creates the holes for the cords.
Eyelet Round
Ch 1.
Repeat around:
Sc in next 3 sts, ch 1, skip next st
You will repeat this sequence:
16 times
Join.
You now have:
16 evenly spaced eyelets
around the bag.
Check the Eyelets
The holes should be:
- Large enough for the drawstrings
- Evenly spaced
- Small enough to keep the upper edge structured
PART 6: FINISH THE TOP BAND
Next Round
Ch 1.
Sc in every sc.
Work:
1 sc into every ch-1 space
Join.
You should return to:
64 sts
Final Rounds
Work:
2 additional rounds of sc
around.
Join after each round.
Fasten off.
Weave in the ends.
Your Bag Body Is Finished
At this stage, your gift bag should:
- Stand upright
- Have a flat bottom
- Have straight sides
- Have a cream top band
- Have one row of eyelets
Now we’ll make the drawstrings.
PART 7: CROCHET THE FIRST DRAWSTRING
Using forest-green yarn:
Ch approximately:
85
or until the chain is approximately:
24–26 inches long
Strengthen the Cord
Starting in the second chain from the hook:
Work:
sl st in every chain
back to the beginning.
This creates a stronger, thicker drawstring than a simple chain.
Fasten off.
PART 8: MAKE THE SECOND DRAWSTRING
Repeat exactly.
You should have:
2 matching cords
PART 9: THREAD THE FIRST DRAWSTRING
Choose one side of the bag.
Thread Cord 1 through every eyelet around the bag.
When you return to the starting point, both ends should emerge through adjacent openings on the same side.
Thread the Second Drawstring
Begin on the opposite side.
Thread Cord 2 through all the same eyelets but starting from the opposite direction.
Both ends of this second cord should meet on the opposite side of the bag.
Why Use Two Drawstrings?
Two opposing cords allow the opening to cinch more evenly.
Pull:
both sides outward
and the entire top closes toward the center.
Tie the Cord Ends
You can simply knot the two ends of each cord together.
Or add small tassels.
OPTIONAL TASSELS
Cut several strands approximately:
5 inches long
Gather them.
Fold in half.
Attach securely at each drawstring end.
Trim evenly.
Keep tassels relatively small so they don’t overpower the bag.
Your Reusable Christmas Gift Bag Is Finished
Open the top.
Place your gift inside.
Pull both drawstrings.
The bag should cinch securely around the contents.
Classic Cranberry Version
Use:
Cranberry red body
Cream top band
Forest-green drawstrings
This creates a traditional but slightly muted Christmas palette.
Forest Green Version
Use:
Forest-green body
Cream band
Cranberry cords
This looks especially beautiful with kraft-paper gift tags.
Cream Version
Make the body in:
Warm cream
Use:
Forest-green band
and:
Cranberry drawstrings
for a softer Scandinavian-style look.
Sage Green Gift Bag
Sage with cream creates a modern neutral Christmas palette.
Pair with:
- Natural twine
- Dried orange
- Wooden gift tags
Candy Cane Version
Use alternating:
Cranberry + cream
body rounds.
Finish with a cream band and cranberry drawstrings.
Striped Gift Bag
Change colors every:
3–5 rounds
for broad festive stripes.
Try:
Red + cream
Green + cream
Sage + cranberry
Color-Block Bag
Crochet the bottom half in cranberry.
Change to forest green halfway up.
Finish with cream.
This gives a clean modern color-block look.
Add a Crochet Snowflake
Use your Crochet Snowflake Ornament Pattern.
Make a small cream snowflake.
Sew it securely onto the front of the gift bag.
This creates a beautiful coordinated Christmas collection.
Add a Crochet Bow
Use a miniature version of your Crochet Bow Pattern.
Attach one near the drawstring channel.
Keep the bow flat enough that the bag remains easy to store.
Add a Mini Wreath
A small flat wreath applique can turn a plain cream bag into a very festive gift container.
Add an Initial
Embroider a single large initial on the bag front.
This is particularly useful when several reusable gift bags are placed under the same Christmas tree.
Add a Name
Use surface crochet or simple embroidery to add a recipient’s name.
The bag can then become their reusable Christmas gift sack every year.
Why Reusable Gift Bags Are Useful
A handmade crochet bag can continue being used after the original present has been opened.
Contemporary Christmas crochet bag patterns specifically emphasize this reusable aspect, with one 2025 design describing the bag as part of the gift itself and suitable for repeated use instead of disposable paper wrapping. Banana Moon Studio
Small Gift Bag Version
For a smaller bag:
Stop the base after:
Round 6 – 48 sts
Then work the sides with:
48 sts
Aim for approximately:
6 inches tall
This size is useful for:
- Gift cards
- Jewelry box
- Candy
- Small candle
- Mini ornaments
Medium Gift Bag
Use the written version:
64-stitch base
and approximately:
8–9 inches total height
This is the most versatile size.
Large Gift Bag
Continue increasing the base beyond 64 stitches.
Round 9
Repeat:
sc in next 7 sts, 2 sc in next st
around.
72 sts
Then begin the vertical body.
Aim for approximately:
10–12 inches tall
This requires significantly more yarn.
Important Large-Bag Tip
The larger the bag becomes, the more likely crochet fabric is to stretch under weight.
For a large gift sack:
- Use cotton or sturdy acrylic
- Keep a firm gauge
- Consider adding a fabric lining
Optional Fabric Lining
A lining is not required for the written pattern.
But it’s useful when you want to place:
- Small loose items
- Heavier gifts
- Objects with corners
inside the bag.
How to Add a Simple Lining
Measure:
- Bag circumference
- Bag height
Cut fabric slightly larger than those measurements.
Sew the side and bottom.
Place the fabric liner inside the bag.
Fold its upper raw edge inward.
Hand-sew it below the drawstring channel.
Make sure the lining does not block the eyelets.
Best Yarn for a Gift Bag
Worsted Acrylic
Acrylic is:
- Affordable
- Durable
- Available in Christmas colors
- Easy to wash
- Lightweight
It works very well for reusable gift bags.
Worsted Cotton
Cotton creates:
- Stronger structure
- Crisp stitches
- Less stretch
- A sturdy bag
It’s an excellent choice if you expect the bag to be reused frequently.
Cotton/Acrylic Blend
This provides a useful balance between:
- Structure
- Lighter weight
- Softness
- Durability
Avoid Very Fuzzy Yarn
Fluffy yarn can make the drawstring eyelets harder to see and may catch on the cords.
For the main bag, choose a smooth yarn.
Can I Use Bulky Yarn?
Yes.
Category 5 bulky yarn will create:
- Larger bag
- Faster construction
- Thicker fabric
Use a larger hook and work according to finished measurements instead of the exact stitch counts.
Can I Use DK Yarn?
Yes.
You’ll need more stitches to reach the same finished dimensions.
DK works especially well for smaller gift pouches.
Use Leftover Yarn
The contrast band, drawstrings, tassels, stripes, and decorations all require relatively small amounts.
This makes the pattern useful for leftover:
- Red
- Green
- Cream
- Gold
- Sage
Christmas yarn.
Gift Bag for a Mug
Place a small mug inside.
Add:
- Tea
- Coffee
- Hot cocoa
- Candy cane
Pull the drawstrings closed.
The reusable crochet bag replaces additional wrapping.
Candle Gift Bag
The medium size can hold many small boxed or jar candles.
Make sure the candle is completely cool before placing it inside crochet fabric.
Crochet Gift Inside Crochet Gift
Fill the bag with:
- Crochet beanie
- Fingerless gloves
- Ear warmer
- Mini ornaments
The recipient gets both the handmade project and the handmade packaging.
Teacher Gift
Fill the bag with:
- Gift card
- Chocolate
- Small stationery items
Add a simple kraft tag.
Hostess Gift
Fill it with:
- Tea
- Coffee
- Packaged treats
- Small candle
The bag becomes part of the gift.
Yarn Lover Gift
Fill the crochet bag with:
- Skein of yarn
- Crochet hook
- Stitch markers
for an easy crafter’s gift.
Christmas Morning Storage
After gifts are opened, use the bag for:
- Small ornaments
- Gift tags
- Ribbons
- Holiday accessories
until next season.
Can It Be Used Outside Christmas?
Absolutely.
Change the colors and this same bag works for:
- Birthdays
- Baby showers
- Weddings
- Mother’s Day
- Easter
- Housewarming gifts
A current Christmas gift bag pattern also notes that changing the colors allows the bag to work for occasions beyond Christmas. My Crochet Space
Birthday Version
Use bright colors.
Skip the Christmas embellishments.
Add a simple bow.
Wedding Version
Try:
- Cream
- Beige
- Soft sage
Use a delicate matching cord.
Valentine’s Gift Bag
Use:
- Cranberry
- Blush
- Cream
Add a crochet heart.
Batch-Making Gift Bags
Making several bags?
Use an assembly-line approach.
Step 1
Crochet all bases.
Step 2
Complete all bodies.
Step 3
Add all contrast bands.
Step 4
Make every drawstring.
Step 5
Thread cords.
Step 6
Add tags or decorations.
This is especially useful if you’re replacing much of your Christmas wrapping with reusable crochet bags.
Quick Gift-Wrapping Strategy
Make:
- 2 small bags
- 3 medium bags
- 1 larger bag
in the same color palette.
Reuse them each year.
You don’t need a different handmade bag for every present under the tree.
Common Beginner Mistakes
Base Won’t Lie Flat
Check your increase sequence carefully.
Each increase round adds:
8 stitches
Losing Stitches in the Body
After the base, maintain:
64 stitches
around the medium bag.
Count every few rounds.
Accidentally Increasing the Sides
Once the base reaches the correct size:
Stop increasing.
Work only:
1 stitch in each stitch
Eyelets Don’t Line Up
The eyelet repeat is:
3 sc, ch 1, skip 1
Because 64 divides evenly by 4, you’ll get 16 eyelets.
Drawstring Too Short
Before finishing the second cord, test the first one through the bag.
It should still have enough length to tie comfortably when the bag is full.
Drawstring Too Thick
If your cord has trouble passing through the holes:
Use a simple chain instead of slip stitching back along it.
Or enlarge the eyelets to:
ch 2, skip 2
and adjust the surrounding stitch pattern accordingly.
Bag Too Floppy
Try:
- Smaller hook
- Firmer yarn
- Cotton
- Fabric lining
Bag Too Stiff
Move up a hook size.
You want enough structure to stand, but enough flexibility for the drawstring opening to close.
Blocking
Light blocking is optional.
If the base or body looks uneven:
Shape the bag gently according to your yarn’s care instructions.
Do not stretch the drawstring opening excessively.
Washing
Always follow your yarn manufacturer’s instructions.
Remove:
- Paper tags
- Tissue
- Gifts
before washing.
Reshape the base and let the bag dry completely before storage.
Storage
Store the bag flat or loosely folded.
Place the cords inside so they don’t become tangled.
Because there is no rigid hardware, the bag takes up very little storage space compared with boxes.
Frequently Asked Questions
Is this bag worked flat?
No. The base and body are worked in the round.
Does it have a flat bottom?
Yes. The base begins as a flat crochet circle.
What yarn weight is used?
Category 4 worsted-weight yarn.
What hook size is used?
4.5 mm.
How big is the medium bag?
Approximately 8–9 inches tall and 5½–6 inches wide.
How much yarn do I need?
Approximately 230–280 yards total across the main color, contrast band, and drawstrings.
Is the drawstring functional?
Yes. Two cords pass through the eyelets and cinch the opening closed.
Can beginners make it?
Yes. A confident beginner who understands simple increases and working in rounds should be comfortable with the pattern.
Can I make it bigger?
Yes. Add more increase rounds to the base and more straight rounds to the body.
Can I add a lining?
Yes.
Can I use it after Christmas?
Yes. Change the colors and it becomes a reusable gift bag for many occasions.
Final Thoughts
Gift wrapping doesn’t have to disappear the moment the present is opened.
This crochet Christmas gift bag pattern transforms simple worsted-weight yarn into reusable handmade packaging that can become part of the gift itself.
The round base lets the bag stand upright.
The dense body keeps small presents contained.
The contrast band adds a festive finish.
And the two functional drawstrings let you close everything neatly without tape or wrapping paper.
Make one in cranberry, forest green, and cream for classic Christmas decor.
Use sage and neutral shades for a softer holiday palette.
Or crochet several different sizes and reuse them every December.
Save this reusable crochet drawstring gift bag pattern for your handmade Christmas list!