Crochet Texting Gloves Pattern – Warm Fingerless Gloves for Winter
Cold hands and smartphones don’t always work well together.

Traditional mittens keep your fingers warm, but every time you need to answer a message, unlock your phone, take a photo, find your keys, or adjust something small, the mittens usually have to come off.
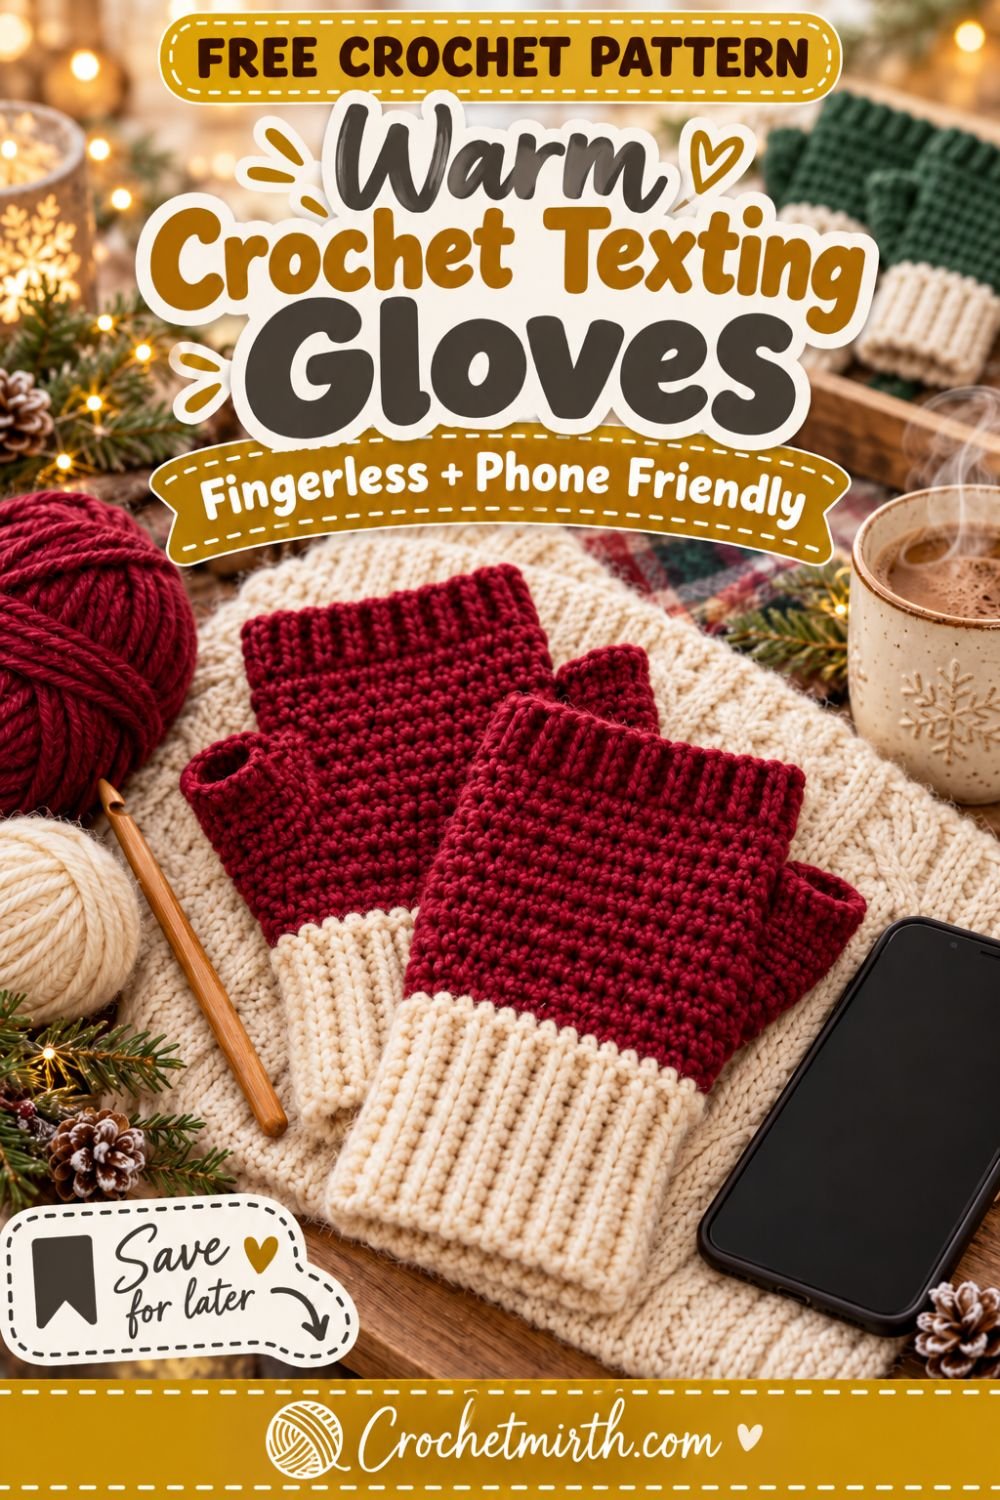
These crochet texting gloves solve that problem by keeping your wrists, palms, backs of the hands, and lower fingers covered while leaving the fingertips free.
They feature a long stretchy ribbed cuff, a comfortable fitted hand section, an open thumb, and a simple fingerless upper edge.
There are no individual finger tubes and no convertible flap.
That makes this pattern considerably simpler than full crochet gloves while still creating a useful winter accessory.
Fingerless crochet gloves are commonly designed specifically for activities such as texting and taking photographs while keeping most of the hand covered. A current 2026 pattern uses worsted-weight yarn for exactly this purpose, while other texting-glove patterns also commonly use #4 worsted yarn.
Why You’ll Love These Crochet Texting Gloves
This pattern is:
- Warm but finger-friendly
- Great for texting
- Easy to type in
- Made with worsted-weight yarn
- Finished with a stretchy ribbed cuff
- Designed with an open thumb
- Free of individual finger tubes
- Easier than full-finger gloves
- Customizable for different hand sizes
- Perfect for handmade winter gifts
They work especially well for commuting, driving, walking, taking photos, working at a computer, or simply holding a coffee cup on a cold morning.
Skill Level
Advanced Beginner
You should already know how to:
- Chain
- Single crochet
- Half double crochet
- Work in rounds
- Work in the back loop only
- Join rounds
- Create a chain opening
- Fasten off
- Weave in yarn ends
The construction is straightforward once you understand the thumb opening.
Materials
For one adult pair, use approximately:
160–200 yards of Category 4 worsted-weight yarn
The exact amount depends on your hand size, cuff length, gauge, and yarn.
You’ll also need:
- 5.0 mm crochet hook for the hand
- 4.0 mm crochet hook for the cuff
- Yarn needle
- Scissors
- Measuring tape
- Stitch markers
Current texting and fingerless glove patterns commonly use worsted yarn, with published adult versions ranging from roughly 120–180 yards upward depending on stitch pattern and glove length.
Recommended Yarn
Choose yarn that’s soft because the gloves will sit directly against your wrists and hands.
Good choices include:
- Merino wool
- Wool/acrylic blend
- Soft acrylic
- Washable wool
- Smooth alpaca blend
For cold weather, a wool blend gives an excellent combination of warmth, stretch, and durability.
Suggested Colors
For the sample:
Forest green hand + warm cream cuff
Other combinations:
Cranberry + cream
Charcoal + camel
Navy + light gray
Cream + forest green
Burgundy + oatmeal
You can also make the whole glove in one color.
Crochet Abbreviations
This pattern uses US crochet terminology.
ch – chain
sc – single crochet
hdc – half double crochet
sl st – slip stitch
st – stitch
sts – stitches
BLO – back loop only
Finished Adult Size
The sample is designed for an adult hand measuring approximately:
7½–8½ inches around the widest part of the palm
excluding the thumb.
Approximate finished length:
8½–9 inches
from the bottom of the cuff to the upper finger opening.
Cuff depth:
2½–3 inches
Because hands vary significantly, use the written measurements as a starting point and try the first glove on frequently.
Gauge
With the 5 mm hook:
approximately
16 sc = 4 inches
Your fabric should feel:
dense but flexible
Avoid extremely loose stitches because winter wind can pass through large gaps.
Construction Overview
Each glove is made in four parts.
First, crochet a small ribbed rectangle for the wrist cuff.
Join it to create a stretchy ring.
Then crochet around the top of the cuff to create the hand.
A chain opening forms the thumb hole.
Continue the hand until it reaches the lower knuckles.
Finally, return to the thumb opening and add a few short rounds.
The construction is:
Ribbed cuff → hand → thumb opening → fingerless edge → thumb
PART 1: CROCHET THE RIBBED CUFF
Using the warm-cream yarn and your 4 mm hook:
Ch 11.
Cuff Row 1
Sc in the second chain from your hook.
Sc in every chain across.
10 sts
Ch 1 and turn.
Cuff Row 2
Working through the:
back loop only
sc across.
10 sts
Ch 1 and turn.
Continue
Repeat Cuff Row 2 until the strip measures approximately:
7 inches long
without stretching.
Depending on your tension, this may be approximately:
27–30 rows
Do not rely only on the row number.
Wrap the cuff around your wrist.
It should feel snug but comfortable.
Join the Cuff
Bring the first and final rows together.
Slip stitch through corresponding stitches on both edges.
This forms a ribbed tube.
Fasten off the cream yarn if you’re changing colors.
Turn the seam toward the inside.
The cuff should now stretch comfortably over your hand.
Why SC BLO Works for the Cuff
Single crochet worked through the back loop creates flexible ribbing.
It stretches when you pull the glove over the widest part of the hand, then contracts again around the wrist.
That’s exactly what you want from a winter glove cuff.
PART 2: BEGIN THE HAND
Switch to:
5 mm hook
and forest-green yarn.
Join yarn along the upper edge of the cuff.
Ch 1.
Work:
30 sc evenly around
the cuff edge.
Join with a sl st.
You now have:
30 sts
Hand Round 2
Ch 1.
Sc in every stitch around.
Join.
30 sts
Rounds 3–5
Repeat Round 2.
You should now have a short fitted section extending above the wrist.
Try it on.
The fabric should sit close to the hand without feeling restrictive.
PART 3: CREATE THE THUMB OPENING
Thumb placement differs slightly between the left and right hand.
The easiest and most accurate method is to put the unfinished glove on and mark where the base of your thumb begins.
For the first glove, use the following as a starting point.
Thumb Opening Round
Ch 1.
Sc in the next:
6 sts
Then:
Ch 5
Skip the next:
5 sts
Sc in the remaining:
19 sts
Join.
You have created a five-stitch opening for the thumb.
Check the Thumb Opening
Try the glove on carefully.
Your thumb should fit through the opening without pulling hard against the stitches.
If it’s too tight:
Use:
Ch 6 and skip 6
If it’s too loose:
Try:
Ch 4 and skip 4
Hands vary, so adjusting here is completely normal.
Mirror the Second Glove
When making the second glove, position the thumb opening on the opposite side.
Don’t simply copy the placement blindly.
Put the unfinished second glove on the opposite hand and mark the natural thumb location.
This helps both gloves fit correctly.
PART 4: CLOSE THE THUMB CHAIN INTO THE HAND
On the next round:
Sc around normally.
When you reach the five thumb chains:
Work:
1 sc into each chain
You should return to:
30 sts
Join.
Continue the Hand
Work:
4 additional rounds of sc
around.
Maintain:
30 sts
Try the glove on after every few rounds.
The upper edge should gradually approach the base of your fingers.
PART 5: FINISH THE FINGERLESS SECTION
Continue until the glove reaches approximately the:
lower knuckles
The four fingers should remain completely free.
For many adult hands, you’ll need approximately:
9–11 hand rounds total after the cuff
including the thumb-opening rounds.
Use your hand rather than an exact number whenever possible.
Upper Ribbed Edge
For a clean finish, work:
1 round of sc BLO
around the upper opening.
Then work:
1 final round of loose slip stitches
Fasten off.
This creates a slightly firmer edge without restricting finger movement.
Check Finger Movement
Open and close your hand.
Pretend to type on your phone.
The glove should not:
- Dig into your knuckles
- Restrict your fingers
- Slide excessively down the hand
If the glove feels too long, remove the final round.
If it’s too short, add another round before the border.
PART 6: CROCHET THE THUMB
Join forest-green yarn at one corner of the thumb opening.
Ch 1.
Work sc evenly around the opening.
Aim for approximately:
12 sts
This usually includes:
- stitches from the skipped section,
- stitches along the chain edge,
- and one additional stitch at each corner.
Thumb Round 2
Sc around.
12 sts
Join.
Thumb Rounds 3–4
Repeat.
The thumb section should extend approximately:
1–1½ inches
while leaving the upper portion of the thumb free.
Finish the Thumb
Work one round of:
loose slip stitches
around.
Fasten off.
Weave in your ends.
Your First Texting Glove Is Finished
Try it on.
You should have:
- Long stretchy cuff
- Warm fitted palm
- Covered back of hand
- Short open thumb
- Four completely free fingertips
Now make the second glove with mirrored thumb placement.
Why the Thumb Stays Open
The open thumb provides more dexterity for:
- Phone screens
- Keys
- Camera controls
- Driving
- Typing
- Crafting
A completely enclosed thumb would reduce much of the benefit of a texting glove.
Make the Thumb Longer
Prefer more warmth?
Continue for:
1–2 additional rounds
before finishing.
Leave at least the thumb tip free if you want maximum touchscreen dexterity.
Make the Thumb Shorter
Work only:
2 rounds
after picking up stitches.
This provides maximum freedom.
Longer Wrist-Warmer Version
Instead of:
Ch 11
for the cuff, try:
Ch 15–17
This creates a cuff approximately:
4 inches deep
depending on gauge.
The longer cuff can tuck underneath a coat sleeve.
Extra-Long Gloves
For a wrist-warmer style extending farther up the forearm:
Make the ribbed cuff:
5–6 inches deep
Current fingerless glove designs also use longer wrist sections specifically for extra warmth while retaining finger freedom. Carroway Crochet
Short Cuff Version
For a lighter glove:
Use:
Ch 7–8
for the cuff.
This creates a smaller band around the wrist.
Forest Green + Cream
This is the sample combination.
It gives the gloves a classic woodland-winter look.
Cranberry + Cream
This color combination works beautifully for:
- Christmas gifts
- Holiday markets
- Winter photos
Charcoal + Camel
Charcoal hands with camel cuffs create a neutral modern accessory.
Navy + Gray
A practical option for an understated unisex look.
All-Black Texting Gloves
Use black yarn throughout for a simple everyday glove.
Choose yarn with good stitch definition so you can still see the stitches while crocheting.
One-Color Version
Use one color for:
- Cuff
- Hand
- Thumb
This eliminates yarn changes and makes the project even faster.
Two-Color Hand
Want more contrast?
Work the cuff in cream.
Work most of the hand in forest green.
Then use cream again for the final upper border.
This visually ties the top and bottom together.
Add Simple Stripes
Change color every:
2–3 rounds
after the cuff.
Try:
Charcoal + gray
Forest green + cream
Burgundy + blush
Keep the thumb in the main color for a cleaner finish.
Adult Small
For a palm circumference around:
6½–7 inches
try approximately:
26 stitches
around the hand.
Adult Medium
For approximately:
7–8 inches
try:
28 stitches
Adult Medium/Large
For approximately:
8–8½ inches
the written:
30 stitches
is a good starting point.
Adult Large
For approximately:
8½–9½ inches
try:
32–34 stitches
depending on gauge.
Important Sizing Rule
Do not make the glove exactly the same circumference as the hand if your crochet fabric stretches well.
A small amount of negative ease helps the glove remain fitted.
However, too much negative ease can make the thumb opening uncomfortable.
Fit is more important than following one stitch count exactly.
How to Resize the Cuff
Crochet the ribbed strip until it wraps comfortably around the actual wrist.
That means the cuff size automatically adjusts.
You don’t need a separate formula.
How to Resize the Hand
When working the first round above the cuff, distribute enough stitches to fit around the widest part of the palm.
Use an even stitch count if possible.
Then keep that same number through the hand.
Best Yarn for Texting Gloves
Wool Blend
A wool/acrylic blend provides:
- Warmth
- Stretch
- Durability
- Softness
This is one of the best all-purpose choices.
Merino Wool
Merino creates warm gloves without excessive bulk.
It’s especially pleasant against the skin.
Acrylic
Soft acrylic works well if you want:
- Easy washing
- Affordable yarn
- Lots of colors
Avoid Very Bulky Yarn
Very thick yarn can reduce hand flexibility.
Worsted #4 gives a better balance between warmth and dexterity for texting gloves.
This weight is common across current fingerless/texting glove patterns. Ravelry
Avoid Very Fuzzy Yarn for Your First Pair
Highly fuzzy yarn can make it difficult to see:
- Thumb chains
- Stitch tops
- Round joins
Choose smooth yarn until you’re comfortable with the construction.
Keep the Fabric Dense
Cold air can move through open crochet.
For a warmer pair:
- Use a firm gauge
- Avoid oversized hooks
- Choose wool or wool blend
- Use dense sc or hdc stitches
Use HDC Instead of SC
Want the gloves to work up more quickly?
You can use:
half double crochet
for the hand.
Because HDC stitches are taller, you’ll need fewer rounds.
The fabric may be slightly softer and more flexible.
Use HDC BLO for Texture
For stronger horizontal texture, work some hand rounds in:
HDC BLO
This gives a subtle ribbed effect.
Keep the thumb-opening construction unchanged.
Make Them More Textured
Alternating:
sc and dc
across rounds can create a lemon-peel texture.
However, the plain SC version is easier for beginners and creates a denser winter fabric.
Why These Are Easier Than Full Gloves
Traditional crochet gloves may require:
- Four separate finger tubes
- Individual finger sizing
- Many small rounds
- Numerous yarn ends
- More detailed shaping
These texting gloves avoid all of that.
You only need:
one hand opening + one thumb opening
Why They’re Different From Convertible Mittens
Convertible mittens include a large flap that covers all four fingers.
These gloves deliberately do not.
That means:
- Less yarn
- Less bulk
- Easier construction
- No buttons
- No flap to manage
- Fingertips always accessible
This keeps the two Crochetmirth patterns clearly separate.
Handmade Christmas Gift
Texting gloves make useful handmade gifts because they work for many everyday situations.
Choose:
- Forest green
- Charcoal
- Navy
- Burgundy
Make the pair.
Lay one glove slightly over the other.
Wrap them with a kraft-paper band.
Add a tag:
Stay Warm
Gift Set Idea
Pair the gloves with:
- Crochet beanie
- Ear warmer
- Ribbed scarf
- Coffee mug
for a complete winter gift.
Matching Ear Warmer
Use the same yarn as your Twisted Crochet Ear Warmer Pattern.
Matching cuffs and headband color can create a coordinated handmade set.
Matching Beanie
Forest-green texting gloves would pair perfectly with your:
Free Chunky Crochet Beanie
or:
Men’s Ribbed Crochet Beanie
depending on the recipient.
Great for Commuters
These gloves are particularly practical when you frequently move between:
- Outdoors
- Public transportation
- Car
- Office
- Phone
You don’t need to repeatedly remove the entire glove just to interact with a touchscreen.
Great for Photography
Free fingertips make it easier to operate:
- Camera buttons
- Phone camera
- Small controls
while keeping most of the hand covered.
Working at a Computer
Fingerless gloves can also be useful in a chilly home office.
The palm and wrist stay covered while the fingers remain completely free for typing.
Common Beginner Mistakes
Thumb Opening on the Wrong Side
Try the glove on before making the opening.
Mark the thumb location.
Mirror it for the second glove.
Thumb Hole Too Small
Don’t force your thumb through a tight opening.
Add another chain and skip another stitch if needed.
Glove Too Tight Across the Palm
Check fit immediately after your first hand rounds.
It’s easier to adjust before you’ve crocheted the entire glove.
Glove Too Loose
If the fabric slides around the hand, use:
- Smaller hook
- Fewer hand stitches
Unequal Gloves
Write down any adjustments you make to the first glove.
Repeat them exactly on the second.
Losing Stitches
Place a marker in the first stitch of each round if necessary.
Tight Upper Edge
Your fingers need to move freely.
Keep the final slip-stitch border loose.
Cuff Too Tight
The ribbed cuff must stretch over the widest part of your hand.
Test it before joining.
Blocking
Light blocking can improve the shape.
Arrange:
- Cuffs
- Thumb openings
- Hand edges
Do not stretch the gloves larger than necessary.
You want them to retain a fitted shape.
Washing
Always follow your yarn care instructions.
For wool blends:
- Use cool or lukewarm water when appropriate
- Avoid excessive agitation
- Reshape after washing
- Dry flat
Make sure the thumb openings and cuffs return to their intended shape.
Frequently Asked Questions
What are texting gloves?
They’re fingerless gloves that keep most of your hands covered while leaving your fingertips free to operate a smartphone or perform other small tasks.
Are these full-finger gloves?
No. All four fingertips remain uncovered.
Do they have a mitten flap?
No. This pattern intentionally has no flap.
What yarn weight is used?
Category 4 worsted-weight yarn.
What hook sizes are used?
4 mm for the ribbed cuff and 5 mm for the hand.
How much yarn is needed?
Approximately 160–200 yards for an adult pair.
Is the thumb covered?
The lower portion of the thumb is covered, while the tip remains open.
Can I make the thumb longer?
Yes. Add more rounds.
Can beginners make these?
A confident beginner who is comfortable working in rounds can make them.
Can I resize them?
Yes. Adjust both cuff length and hand stitch count according to actual measurements.
Can I use bulky yarn?
You can, but the gloves will be thicker and may offer less finger flexibility.
Are buttons required?
No buttons or other hardware are needed.
Final Thoughts
You don’t have to choose between warm hands and usable fingers.
This crochet texting gloves pattern keeps your wrists, palms, and most of your hands covered while leaving the fingertips free for everything you still need to do during winter.
The stretchy ribbed cuffs fit comfortably around the wrists.
The dense crochet body adds warmth.
The simple thumb opening gives your hand plenty of movement.
And because there are no individual finger tubes or convertible flaps, the construction stays approachable for confident beginners.
Make a forest-green and cream pair for a cozy winter look, cranberry for Christmas gifts, charcoal for everyday wear, or navy for a simple unisex style.
Save this warm fingerless texting gloves pattern for your winter crochet list!