Convertible Crochet Mittens Pattern – Fingerless Gloves with Mitten Flap
Some winter days require warm mittens.
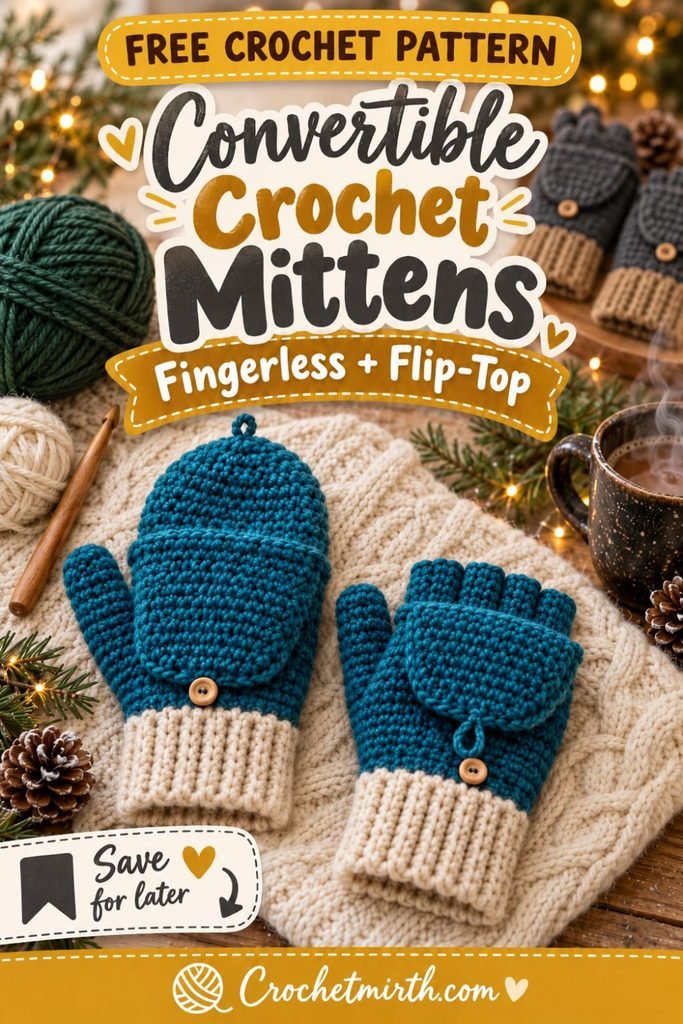
Other moments require your fingers.
These convertible crochet mittens give you both.
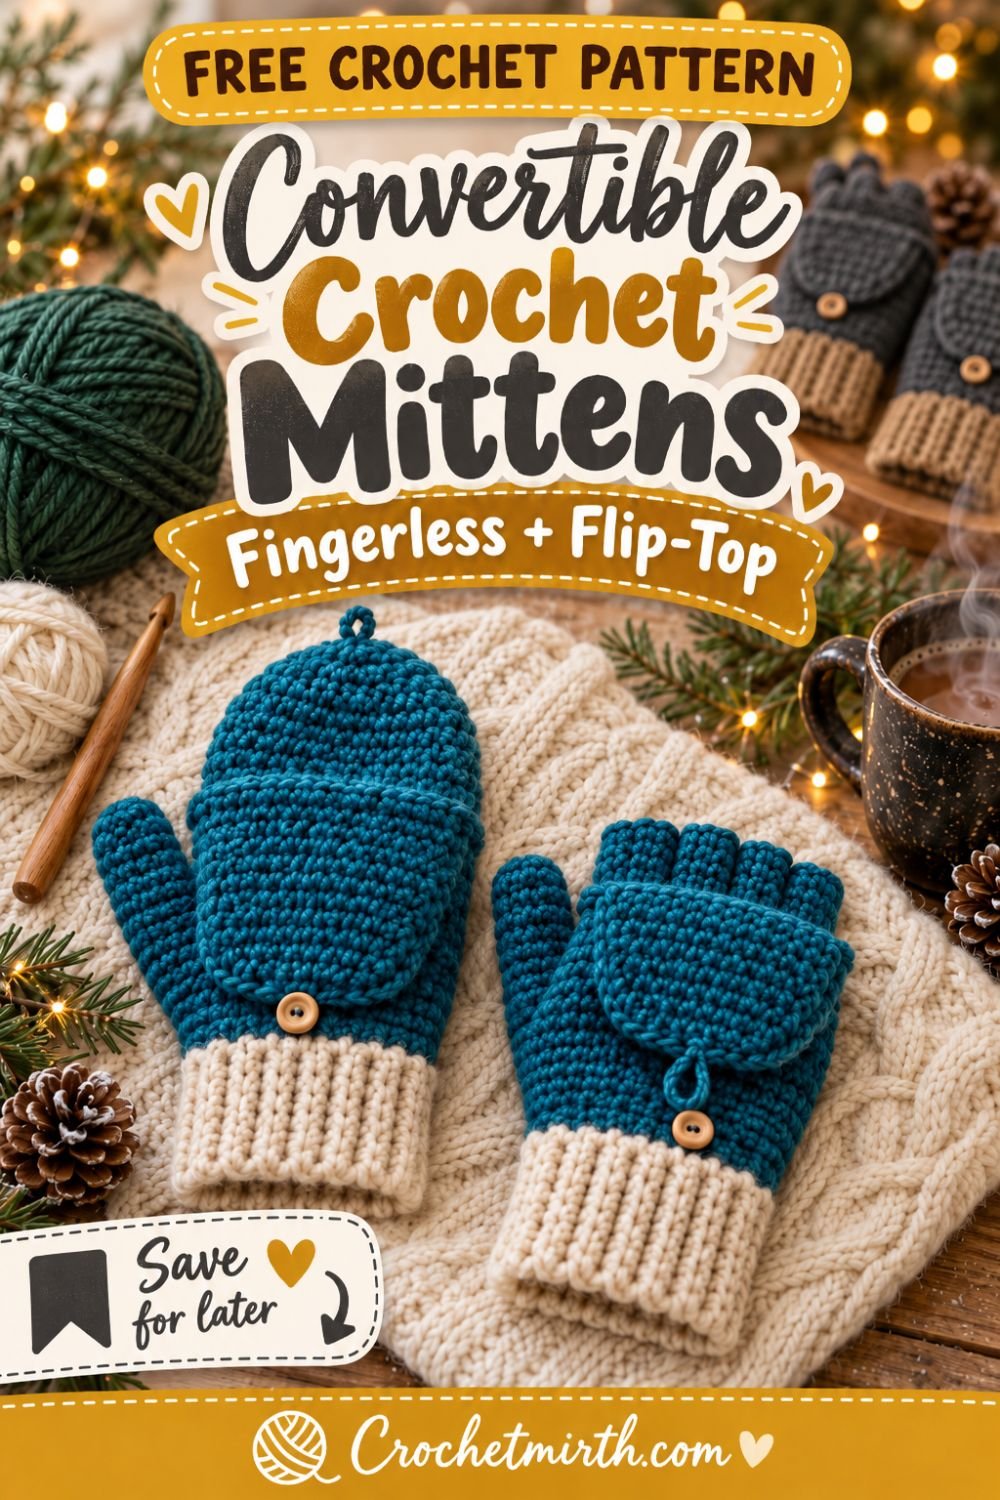
Wear them as comfortable fingerless gloves when you’re driving, using your phone, opening a bag, holding a coffee cup, or doing anything that requires fingertip dexterity.
When your hands get cold, simply pull the crochet flap forward and turn them into warm mittens.
The pattern combines a stretchy ribbed wrist cuff, fitted fingerless hand section, open thumb, and a flip-top mitten cover worked directly onto the back of the glove.
There’s no need to make individual fingers.
And because the main fabric uses worsted-weight yarn and simple stitches, the project is much more approachable than a traditional pair of crochet gloves.
Why You’ll Love These Convertible Mittens
- Two winter accessories in one: fingerless gloves and mittens
- Warm worsted-weight construction
- Stretchy ribbed cuffs
- No individual finger tubes
- Flip-top flap worked directly onto the glove
- Optional button closure keeps the flap folded back
- Easy to customize for different hand sizes
- Great for Christmas gifts
- Practical for driving, texting, walking, and outdoor activities
- Uses approximately one large skein of yarn
Skill Level
Advanced Beginner / Intermediate
The individual stitches are simple, but you’ll need to be comfortable working in rounds, creating a thumb opening, decreasing, and attaching the convertible flap.
Once you’ve completed the first mitten, the second one is much easier.
Materials
Use approximately 220–260 yards of Category 4 worsted-weight yarn for an adult pair.
A soft wool/acrylic blend is a particularly good choice because it combines warmth, stretch, durability, and comfortable texture.
You’ll also need a 5.0 mm crochet hook for the mitten body and a 4.0 mm hook for the ribbed cuffs.
Have a yarn needle, scissors, measuring tape, stitch markers, and two optional buttons approximately ¾ inch / 18–20 mm in diameter ready.
Recommended Yarn Colors
The Pinterest version uses deep forest green with warm cream cuffs.
Charcoal with camel, cranberry with cream, navy with gray, oatmeal with forest green, or burgundy with warm beige would also work beautifully.
Crochet Abbreviations
This pattern uses US terminology.
ch means chain, sc means single crochet, hdc means half double crochet, hdc2tog means half double crochet two together, sl st means slip stitch, st/sts means stitch/stitches, and BLO means back loop only.
Finished Adult Size
The sample is designed for an adult hand measuring approximately 7½–8½ inches around the widest part of the palm, excluding the thumb.
The finished mitten is approximately 7½ inches from wrist to fingerless edge, plus a convertible flap approximately 3½–4 inches long.
The ribbed cuff measures approximately 2 inches deep.
Because hand sizes vary significantly, try the first mitten on frequently.
Gauge
Aim for approximately:
16 sc = 4 inches
with the 5 mm hook.
The fabric should feel comfortably dense.
For winter mittens, avoid very open stitches because large gaps let cold air through.
Construction Overview
Each mitten is made from the wrist upward.
First, you’ll crochet a stretchy ribbed cuff.
Next, you’ll work the hand in rounds and create a small thumb opening.
Near the knuckles, you’ll leave a row of unused loops across the back of the hand.
Those loops become the anchor for the convertible mitten flap.
You’ll finish the fingerless portion, then return to the reserved loops and crochet the flip-top cover.
Finally, you’ll add a short open thumb and an optional button closure.
PART 1: CROCHET THE RIBBED CUFF
Using the 4 mm hook and your cuff color:
Ch 9.
Cuff Row 1
Sc in the second chain from the hook and in every chain across.
You should have:
8 sc
Ch 1 and turn.
Cuff Row 2
Working in the back loop only, sc across.
Ch 1 and turn.
Continue repeating Cuff Row 2 until the strip measures approximately:
7 inches long unstretched
For many crocheters, this will be around 27–30 rows.
Wrap the cuff around your wrist before joining.
It should feel snug without being uncomfortable.
Join the Cuff
Bring the first and final rows together.
Slip stitch through both layers across the short edge.
Do not cut the yarn if you’re using the same color for the mitten body.
If you’re changing from cream to forest green, fasten off now.
Turn the ribbed ring so the seam faces inside.
PART 2: BEGIN THE HAND
Switch to the 5 mm hook and main mitten color.
Join the yarn along the upper edge of the cuff.
Work 28 sc evenly around the cuff.
Join with a sl st.
You now have:
28 sts
For the remainder of the hand, keep your seam toward the palm side when possible.
Hand Rounds 2–4
Ch 1.
Sc in every stitch around.
Join.
28 sts
The fabric should begin extending comfortably over the lower palm.
PART 3: CREATE THE THUMB OPENING
The thumb opening will be positioned slightly differently on the right and left mittens, but the construction is the same.
For the first mitten, begin the next round and work:
Sc in 5 sts, ch 4, skip 4 sts, sc in remaining 19 sts.
Join.
You still have the equivalent of:
28 sts
around the hand.
On the second mitten, mirror the opening so it falls naturally beside the opposite thumb.
The easiest method is simply to try the mitten on before making the chain space and position the four skipped stitches beside the thumb.
Next Round
Sc in every stitch.
When you reach the ch-4 space, work:
4 sc into the chains
Continue around.
You should again have:
28 sts
PART 4: CONTINUE TO THE KNUCKLES
Work approximately:
4–5 additional rounds of sc
or until the mitten reaches the base of your fingers.
Do not cover the fingers yet.
The fingerless edge should eventually sit around the lower knuckles.
Try the mitten on frequently.
PART 5: CREATE THE FLAP ANCHOR
This is the key part of the convertible construction.
You need approximately half of the stitches across the back of the hand available later for the flip-top mitten.
Identify the 14 stitches centered across the back of the glove.
Place a stitch marker at the first and last of those stitches.
On the next round, work normally until you reach the marked section.
Across those 14 back-of-hand stitches, work only through the:
back loops
Then continue normally around the remainder of the hand.
Why?
Because the unused front loops will remain visible.
You’ll return to those loops later and use them to attach the mitten flap.
PART 6: FINISH THE FINGERLESS SECTION
Work another:
2–3 rounds of sc
around all 28 stitches.
Try the mitten on.
The upper edge should sit just below or around the main knuckles while leaving your fingers completely free.
For a neat finish, work one final round of slip stitches loosely around the top.
Fasten off.
PART 7: CROCHET THE THUMB
Join yarn at one corner of the thumb opening.
Work sc evenly around the opening.
Aim for approximately:
10 sts
including one additional stitch near each corner if needed to prevent gaps.
Join.
Work another:
3–4 rounds of sc
or until the thumb section reaches approximately halfway to the thumb tip.
Leave the thumb open.
This keeps the mittens genuinely useful for phones, keys, and other small tasks.
Fasten off.
Repeat on the second mitten.
PART 8: BEGIN THE CONVERTIBLE FLAP
Turn the mitten so the back of the hand faces you.
Find the 14 unused front loops that you reserved earlier.
Using your 5 mm hook, join yarn into the first reserved loop.
Sc across all:
14 loops
Now:
Ch 14
Bring this chain around the palm side of the mitten.
Be careful not to twist it.
Join with a sl st to the first sc.
You now have a new circular opening containing:
28 sts
The back half is attached directly to the glove.
The front half is formed by your chain.
This creates the base of the flip-top finger cover.
PART 9: BUILD THE MITTEN FLAP
Flap Round 1
Ch 1.
Hdc in each of the 14 attached stitches.
Then work:
14 hdc
across the chain.
Join.
28 sts
Flap Rounds 2–6
Hdc in every stitch around.
Join after each round.
Continue until the flap reaches approximately:
2½–3 inches
from its attachment point.
Try it over your fingers.
The flap should reach close to the fingertips before you begin shaping the rounded top.
PART 10: SHAPE THE MITTEN TOP
Decrease Round 1
Repeat:
Hdc in next 5 sts, hdc2tog
four times.
24 sts
Next Round
Hdc around.
24 sts
Decrease Round 2
Repeat:
Hdc in next 4 sts, hdc2tog
four times.
20 sts
Decrease Round 3
Repeat:
Hdc in next 3 sts, hdc2tog
four times.
16 sts
Decrease Round 4
Repeat:
Hdc in next 2 sts, hdc2tog
four times.
12 sts
Final Decrease
Hdc2tog around.
6 sts
Fasten off, leaving an approximately 8-inch tail.
PART 11: CLOSE THE FLAP
Thread the yarn tail through a yarn needle.
Pass it through the remaining six stitches.
Pull firmly.
The top will close into a softly rounded mitten shape.
Sew across the small opening several times for security.
Weave in the tail.
Turn the flap right side out if necessary.
Test the Convertible Action
Pull the flap forward.
It should cover all four fingers like a normal mitten.
Now flip it backward.
The flap should rest against the back of the hand while leaving the fingertips completely exposed.
That’s the convertible feature.
PART 12: OPTIONAL BUTTON CLOSURE
A small button can prevent the flap from falling forward when you’re using the mittens as fingerless gloves.
Fold the mitten flap backward.
Observe where the top of the flap naturally lands.
Sew one approximately 18–20 mm button to the back of the mitten below that point.
Do not place it where it will press uncomfortably against the hand.
Make the Button Loop
At the tip of the mitten flap, join yarn.
Chain approximately:
8–10
or enough to fit comfortably around your button.
Join back into the flap with a slip stitch.
Fasten off securely.
When the flap is folded backward, slip the loop over the button.
When you need warmth, release the loop and pull the mitten flap forward.
Button-Free Version
The buttons are completely optional.
If you prefer an all-yarn design, simply leave them off.
The flap will still work normally.
This is also the easiest version for beginners.
Forest Green + Cream Version
Use a cream cuff and deep forest-green hand and flap.
This creates a traditional outdoorsy winter look.
Charcoal + Camel Version
A charcoal mitten with warm camel cuff creates a more neutral everyday accessory.
Cranberry + Cream
This combination works especially well for handmade Christmas gifts.
Navy + Gray
Deep navy with soft gray ribbing gives the mittens a classic unisex style.
One-Color Version
For the simplest project, use one yarn color throughout.
The ribbed cuff and convertible flap still provide plenty of visual interest.
Make the Cuff Longer
For an extra-warm wrist:
Begin with:
Ch 13
instead of Ch 9.
This creates a deeper ribbed cuff that can extend underneath a coat sleeve.
Make the Cuff Fold Over
Crochet an even wider ribbed band, approximately:
4 inches deep
Then fold it upward after finishing.
Remember that a larger cuff requires additional yarn.
Make the Hand Larger
For hands larger than approximately 8½ inches around:
Use a 5.5 mm hook or increase the hand circumference to approximately 30–32 stitches.
When adjusting stitch count, reserve roughly half the stitches across the back of the hand for the flap anchor.
Make the Hand Smaller
Use a 4.5 mm hook or reduce the hand circumference slightly.
Always maintain enough room to slide the mitten comfortably over the widest part of the palm.
Adult Sizing Guide
| Hand circumference | Suggested body circumference |
|---|---|
| 6½–7 in | about 24–26 sts |
| 7–8 in | about 26–28 sts |
| 8–9 in | about 28–32 sts |
| 9–10 in | about 32–36 sts |
These are starting points only.
Your actual gauge matters.
Check the Fit as You Work
Gloves and mittens benefit from frequent fitting.
Before finishing each section, check the wrist cuff, thumb position, fingerless opening, and flap length.
Hands vary much more than scarves or hats.
Best Yarn for Convertible Mittens
Worsted-weight wool blends are excellent because they offer warmth while remaining thin enough for finger movement.
Soft acrylic works well for washable everyday mittens.
Merino provides more natural warmth and a premium feel.
Avoid extremely fuzzy yarn for your first pair because it makes the stitches and reserved loops harder to see.
Why Worsted Yarn Works Well
Current convertible crochet mitten patterns commonly use #4 worsted yarn because it provides enough warmth without creating extremely bulky fingers or flaps. One current flip-top design uses 220–255 yards with a 5 mm body hook, while an easier adult convertible pattern uses worsted yarn with a 5 mm hook and adjusts size using nearby hook sizes. Kirsten Holloway Designs
Make the Fabric Warmer
For colder climates, keep your gauge relatively dense.
A smaller hook creates fewer gaps.
Wool or wool-blend yarn also provides more insulation than a very loose acrylic fabric.
Add a Fleece Palm Lining
If you need more warmth, a thin fleece lining can be hand-sewn inside the wrist and palm section.
Do not line the convertible hinge too heavily or the flap may become difficult to fold.
Why Convertible Mittens Are Useful
With ordinary mittens, you often have to remove the entire glove to use your fingers.
Convertible mittens let you expose only the fingertips.
They’re particularly convenient for driving, texting, photography, handling keys, walking dogs, outdoor markets, commuting, and cold offices.
Handmade Christmas Gift
Convertible mittens are especially useful as handmade gifts because they feel more functional than a basic pair of fingerless gloves.
Use a neutral color such as forest green, charcoal, navy, or camel.
Fold the two mittens together with the flap of one open and the other closed so the recipient immediately sees how they work.
Wrap with a kraft-paper band and add a simple tag reading:
Stay Cozy
Matching Winter Set
Use the same yarn for a ribbed beanie or scarf.
Your Free Chunky Crochet Beanie, Men’s Ribbed Beanie, or Twisted Ear Warmer content can easily become part of the same Pinterest winter-gift cluster.
Common Beginner Mistakes
The most common issue is placing the convertible flap on the wrong side of the mitten. Before reserving your back loops, wear the glove and mark the true back of the hand.
Another common problem is making the thumb opening too small. Your thumb should move easily without stretching the stitches excessively.
If the flap feels too short, simply add more straight rounds before beginning the decreases.
If the flap feels too wide, check your gauge before changing the stitch count.
Make sure the chain that forms the front half of the flap isn’t twisted before joining.
Finally, don’t make the button loop too tight. It should slip over the button without pulling the flap out of shape.
Blocking
Light blocking can improve the final shape.
Arrange the cuffs straight, flatten the hand sections, shape both thumb openings, and round the mitten flaps gently.
Do not aggressively stretch the mittens because you want them to remain fitted.
Washing
Always follow the instructions for your yarn.
If using wool, avoid sudden temperature changes and excessive agitation unless the yarn is labeled machine washable.
After washing, reshape the flip-top flaps and let the mittens dry flat.
Frequently Asked Questions
Are these mittens or fingerless gloves?
They’re both. The fingerless glove stays on your hand, and the attached mitten flap flips forward to cover your fingers.
What yarn weight is used?
Category 4 worsted-weight yarn.
What hook size is used?
The pattern uses a 4 mm hook for the ribbed cuff and a 5 mm hook for the hand and flap.
How much yarn do I need?
Approximately 220–260 yards for an adult pair.
Do I need individual fingers?
No. The four fingers remain together in one fingerless opening.
Is the thumb covered?
The written version has a short open thumb for dexterity.
Is the button required?
No. It’s optional.
Can I make them without the flap?
Yes. Stop after completing the fingerless section and you have simple fingerless gloves.
Can beginners make them?
A confident beginner who already understands working in rounds and simple decreases should be able to follow the construction, but the convertible flap makes this slightly more advanced than a basic fingerless glove.
Can I make a men’s size?
Yes. Increase the hand circumference and flap width according to actual measurements. Existing convertible designs also commonly offer both women’s and men’s sizing. Ravelry
Final Thoughts
Convertible mittens solve one of the biggest problems with traditional winter gloves: keeping your hands warm without losing access to your fingers.
This convertible crochet mittens pattern starts with a stretchy ribbed cuff and a simple fingerless glove.
A reserved section across the back of the hand then becomes the anchor for a warm flip-top mitten cover.
Fold the flap backward when you need your fingertips.
Pull it forward when the temperature drops.
Make the pair in forest green and cream for a classic winter look, charcoal and camel for a neutral everyday style, or cranberry and cream for a handmade Christmas gift.
They’re practical, cozy, customizable, and just unusual enough to stand out in a crowded winter crochet feed.
Save this convertible crochet mitten pattern for your cold-weather project list!