Crochet Gift Card Holder Pattern – Mini Christmas Envelope for Beginners
A gift card may be quick to buy, but the packaging can still feel handmade.

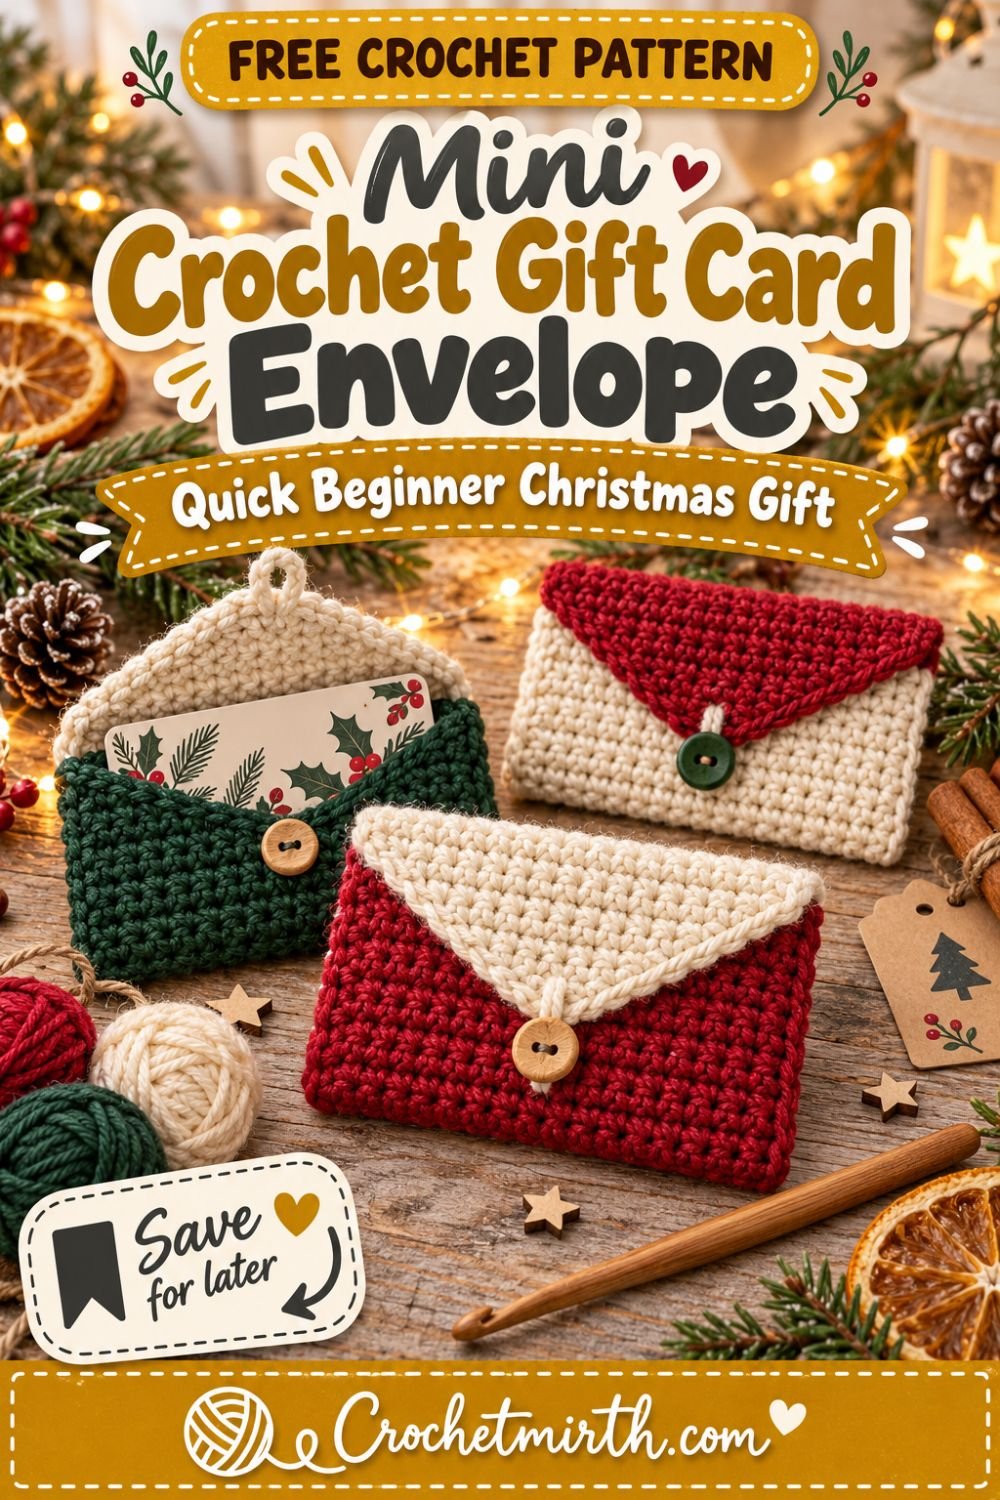
This crochet gift card holder pattern turns a small amount of leftover yarn into a tiny Christmas envelope that’s reusable, practical, and much more personal than a disposable paper sleeve.
The construction is intentionally beginner-friendly.
You’ll crochet one long rectangle, shape a triangular flap directly onto the top, fold the lower section upward to create the pocket, and seam only two short sides.
Add a tiny button and loop, slide in your gift card, and you’re finished.
It’s a perfect project for Christmas stocking stuffers, teacher gifts, Secret Santa presents, last-minute gifts, or using up small amounts of leftover yarn.
Why You’ll Love This Crochet Gift Card Holder
This pattern uses only a small amount of yarn and is quick enough to batch-make for several people.
The finished holder is approximately 4 inches wide × 3 inches tall, so it’s designed specifically around standard gift cards rather than functioning as a general-purpose pouch.
You’ll also get a true envelope appearance thanks to the triangular flap.
Skill Level
Beginner
You’ll need to know how to chain, single crochet, make a simple decrease, turn your work, sew a basic seam, and weave in ends.
The only shaping technique is sc2tog, which reduces two stitches to one.
Materials
Use approximately 35–45 yards of Category 4 worsted-weight yarn.
For the sample:
Color A: cranberry red
Color B: warm cream
You’ll also need a 4.0 mm crochet hook, yarn needle, scissors, measuring tape, and one small button approximately ½–⅝ inch / 12–16 mm.
A current worsted-weight envelope design uses about 35–36 yards, while another standard-card holder uses approximately 30–31 yards, so a 40–45-yard allowance gives comfortable room for the flap, seam, and finishing. Ravelry
Best Yarn
Smooth worsted-weight yarn works best.
Cotton produces especially crisp stitches and a firm envelope, while acrylic is lightweight, inexpensive, and available in many Christmas colors.
Avoid extremely fuzzy yarn because it can hide the triangular flap shape and make the button loop harder to use.
Crochet Abbreviations
This pattern uses US crochet terminology.
ch – chain
sc – single crochet
sc2tog – single crochet two stitches together
sl st – slip stitch
st / sts – stitch / stitches
Standard Gift Card Size
A standard credit-card-size gift card is approximately:
3.37 inches × 2.13 inches
or:
85.6 × 53.98 mm
The finished holder provides a little extra room around those measurements so the card can slide in and out easily. Ravelry
Finished Measurements
When closed, the envelope measures approximately:
4 inches wide
and:
3 inches tall
The pocket itself is approximately:
2¾ inches deep
The exact measurements may vary slightly with yarn and tension.
Gauge
Approximately:
16 sc = 4 inches
and:
16 rows = 4 inches
A perfect gauge match isn’t essential, but check the width before continuing.
Your 16-stitch panel should be close to 4 inches wide.
Construction Overview
The envelope is made in one main piece.
First you’ll crochet a long rectangular section.
The lower half becomes the front pocket.
The upper half becomes the back of the envelope.
Then you’ll decrease on both edges to form the pointed flap.
Finally, fold the pocket upward and seam both sides.
The construction is:
Rectangle → triangular flap → fold → seam → button
PART 1: CROCHET THE ENVELOPE BODY
Using cranberry-red yarn:
Ch 17.
Row 1
Sc in the second chain from the hook.
Sc across.
16 sts
Ch 1 and turn.
Row 2
Sc in each stitch across.
16 sts
Ch 1 and turn.
Rows 3–22
Repeat Row 2.
Keep:
16 sts
in every row.
At the end of Row 22, your rectangle should measure approximately:
4 inches wide × 5½ inches long
Do not fasten off yet.
Why 5½ Inches?
The rectangle will be folded approximately in half.
About:
2¾ inches
becomes the front pocket.
Another:
2¾ inches
forms the back.
The triangular flap is then added above that.
PART 2: CHANGE COLOR FOR THE CHRISTMAS FLAP
At the end of Row 22, change from cranberry to:
warm cream
Ch 1 and turn.
The cream section will become the visible triangular envelope flap.
You can also keep the entire holder one color if you prefer.
PART 3: SHAPE THE TRIANGULAR FLAP
Flap Row 1
Sc2tog.
Sc in the next:
12 sts
Sc2tog.
You now have:
14 sts
Ch 1 and turn.
Flap Row 2
Sc2tog.
Sc in the next:
10 sts
Sc2tog.
12 sts
Ch 1 and turn.
Flap Row 3
Sc2tog.
Sc in the next:
8 sts
Sc2tog.
10 sts
Ch 1 and turn.
Flap Row 4
Sc2tog.
Sc in the next:
6 sts
Sc2tog.
8 sts
Ch 1 and turn.
Flap Row 5
Sc2tog.
Sc in the next:
4 sts
Sc2tog.
6 sts
Ch 1 and turn.
Flap Row 6
Sc2tog.
Sc in the next:
2 sts
Sc2tog.
4 sts
Ch 1 and turn.
Flap Row 7
Sc2tog twice.
2 sts
Do not fasten off yet.
You now have a pointed triangular flap.
PART 4: MAKE THE BUTTON LOOP
At the end of the final flap row:
Ch 5.
Bring the chain around and sl st into the first stitch of the final 2-stitch row.
This creates a small loop at the flap point.
Fasten off.
Leave enough yarn to weave in securely.
Test the Button Loop
The loop should fit comfortably around your button.
If you’re using a larger button:
Use ch 6–7.
For a smaller button:
Use ch 4.
It’s easier to test the loop before weaving in the yarn end.
PART 5: FOLD THE ENVELOPE
Lay the completed piece flat with the right side facing upward.
Starting at the foundation-chain edge, fold the bottom upward approximately:
2¾ inches
The folded section becomes the front pocket.
The upper rectangular section remains behind it.
The triangular cream flap should fold naturally downward over the front.
Check the Gift Card Before Seaming
Slide a standard gift card inside the folded piece.
It should fit comfortably without forcing the sides outward.
There should also be enough height that the card doesn’t fall out when the flap is open.
If everything looks good, remove the card before sewing.
PART 6: SEAM THE FIRST SIDE
Thread cranberry yarn through a yarn needle.
Sew the front and back layers together along one side of the pocket.
Use:
- Whip stitch
- Mattress stitch
- Running stitch
Keep the seam neat and relatively firm.
Stop sewing where the front pocket ends.
Do not sew into the flap.
PART 7: SEAM THE SECOND SIDE
Repeat on the opposite edge.
You now have a functional crochet pocket.
Optional Crochet Side Seam
Prefer not to sew?
Join yarn at one lower corner.
Slip stitch through both layers along the side.
Fasten off.
Repeat on the other side.
This creates a slightly more visible decorative edge.
PART 8: ADD THE BUTTON
Place a standard gift card inside.
Fold the triangular flap downward.
Pull the crochet loop gently toward the front.
Use a removable stitch marker to mark where the center of the loop reaches the pocket.
Open the envelope.
Sew your button securely at that marked position.
Test the Closure
Fold the flap down.
Place the loop over the button.
The flap should lie flat without pulling or buckling.
If it pulls too tightly, enlarge the loop.
Your Mini Christmas Envelope Is Finished
You now have a gift card holder with:
- Dense crochet pocket
- Contrasting triangular flap
- Secure button closure
- Reusable construction
- True miniature envelope appearance
Slide in your gift card and it’s ready to give.
Classic Christmas Version
Use:
Cranberry body + cream flap + natural wooden button
This is the sample version.
It works beautifully with a kraft-paper gift tag.
Forest Green Version
Use:
Forest-green body + cream flap
Add a cranberry button or small wooden button.
Cream Envelope
Try:
Warm-cream body + cranberry flap
with a forest-green button loop.
This softer palette works especially well for neutral Christmas decor.
Candy Cane Version
Alternate cranberry and cream every:
2–3 rows
through the rectangular body.
Finish the flap in solid cranberry.
This creates a playful striped Christmas gift card holder.
All-Red Santa Envelope
Make the body and flap in cranberry red.
Add a cream row across the upper pocket edge before seaming.
Use a black or dark-brown button.
The result gives a subtle Santa-inspired look without needing complicated appliqués.
Christmas Tree Envelope
Make the main envelope in warm cream.
Use simple surface embroidery to add a tiny green Christmas tree to the front pocket.
Keep the design flat so the holder remains easy to close.
Snowflake Envelope
Make the holder in deep cranberry.
Use a small amount of cream yarn to embroider a simple snowflake on the front.
Avoid bulky three-dimensional decorations near the button.
Add an Initial
A small embroidered initial makes the envelope feel personalized.
Place it in one lower corner rather than directly under the flap.
Teacher Gift Card Holder
Fill the envelope with a gift card and attach a kraft tag saying:
Thank You
Because the crochet holder is reusable, the presentation feels more thoughtful than giving the card in its original paper sleeve.
Secret Santa Gift
These mini envelopes are ideal for Secret Santa exchanges because they’re:
- Small
- Quick
- Easy to personalize
- Useful with almost any gift card
Use the recipient’s favorite color instead of traditional Christmas colors.
Stocking Stuffer
Place the filled envelope directly inside a Christmas stocking.
Unlike your Mini Crochet Stocking Gift Card Holder, this design stays completely flat and envelope-shaped, so the two patterns have clearly different visual identities.
Last-Minute Christmas Gift
Gift-card envelopes are excellent last-minute projects because they require very little yarn.
A current DK gift-card holder pattern uses only about 18–24 yards and is constructed by folding a simple rectangle, while a recent worsted envelope version uses around 36 yards. Handy Little Me
Scrap-Yarn Project
You don’t need a full skein.
Small leftover balls from:
- Beanies
- Scarves
- Mittens
- Stockings
- Christmas decorations
can be enough.
Save your red, cream, green, gold, and neutral scraps for these envelopes.
Batch-Making Method
Making several gift card holders becomes much faster if you work assembly-line style.
Crochet all cranberry rectangles first.
Then shape all cream flaps.
Fold all the pieces.
Sew all side seams.
Finally, attach every button.
This also helps all your envelopes stay consistent in size.
Make Five for Christmas
Try this coordinated set:
1 cranberry + cream
1 forest green + cream
1 cream + cranberry
1 charcoal + camel
1 sage + cream
Use the same wooden buttons on all five to make the collection look intentional.
Can I Use DK Yarn?
Yes.
DK yarn creates a lighter, finer envelope.
Use approximately a:
3.5–4 mm hook
and add stitches or rows until the piece reaches the finished measurements.
A recently updated gift-card-holder project uses DK scraps with a 4 mm hook and specifically recommends dense fabric so the card doesn’t show through. Handy Little Me
Can I Use Cotton?
Yes.
Cotton may actually be one of the best yarns for this project because it creates:
- Crisp edges
- Strong seams
- Firm fabric
- Defined triangular flap
A current worsted cotton gift-card holder measures approximately 4 × 3 inches after assembly. Ravelry
Can I Use Bulky Yarn?
You can, but I don’t recommend it for this particular design.
Bulky yarn may make the envelope:
- Too thick
- Oversized
- Harder to close
Worsted or DK produces a neater gift-card-size result.
Why Single Crochet?
Single crochet creates a dense fabric with relatively small gaps.
That’s useful because you don’t want the gift card or printed design underneath showing clearly through the crochet.
It also creates firm fabric that holds the envelope shape well.
Make It Without a Button
You have several alternatives.
You can make a longer loop and wrap it around the entire envelope, add a small snap, use a short ribbon tie, or simply leave the flap unfastened.
For the easiest all-yarn version, sew a tiny crochet chain loop to the front and pass the flap point through it.
All-Yarn Closure
If you want zero hardware:
Make a short chain of approximately:
10–12 stitches
and sew both ends horizontally to the envelope front.
Slide the pointed flap underneath this loop to keep the envelope closed.
This also makes the holder easier to store flat.
Add a Hanging Loop
Want to use the holder as a Christmas ornament before the gift is opened?
Add a:
ch 15–20
loop to one upper corner.
Hang it on the tree with the gift card inside.
Current Christmas envelope designs are also positioned as both gift-card holders and small holiday ornaments. Ravelry
Christmas Tree Gift Card Hunt
Make several envelopes in different colors.
Hang them around the Christmas tree.
Place a gift card in one or more.
This turns gift giving into part of the holiday decor.
Use It After Christmas
The recipient can reuse the envelope for:
- Another gift card
- Business cards
- Small notes
- Cash
- Tiny keepsakes
The basic size is close to a credit-card holder, so it’s useful beyond one Christmas morning.
Birthday Version
Change the colors.
Try:
- Blue + cream
- Pink + beige
- Purple + white
- Bright rainbow stripes
The same envelope construction works for birthdays.
Valentine’s Version
Use:
cranberry + blush
or:
cream + deep red
Add a small embroidered heart.
Graduation Gift
Use school-inspired colors without logos.
Add a small initial or graduation year.
Wedding Gift Card Holder
Use:
cream + champagne beige
with a small pearl-style button.
This creates a more elegant version of the same beginner pattern.
Make the Envelope Slightly Larger
If you want to include both a gift card and a folded note:
Start with:
Ch 19
instead of Ch 17.
Continue until the body is approximately:
6 inches long
before shaping the flap.
Check the card and note before seaming.
Make It More Snug
If your yarn produces a very loose gauge and the holder looks oversized:
Use a smaller hook.
You want enough space for the card to slide easily, but not so much that it moves around excessively.
Common Beginner Mistakes
Envelope Too Narrow
Check your width after the first several rows.
Your panel should be close to:
4 inches
before you crochet all 22 rows.
Envelope Too Loose
Move down one hook size or tighten your tension slightly.
Uneven Side Edges
Count:
16 stitches
after every few rows.
Flap Isn’t Centered
Each flap row decreases:
one stitch at each end
This keeps the triangular point centered.
Button Is in the Wrong Place
Don’t guess.
Fold the finished flap first and use the actual loop to mark the button position.
Card Doesn’t Fit After Seaming
Always test the card before sewing both sides permanently.
Side Seams Are Bulky
Use matching yarn and avoid wrapping the seam stitches repeatedly around the same area.
Blocking
Blocking is optional but helpful.
Lightly shape the completed empty envelope so the rectangular pocket lies flat and the triangular flap points cleanly downward.
Allow it to dry completely before inserting a gift card.
Washing
Remove the gift card and any paper tags before washing.
Follow your yarn manufacturer’s care instructions.
Reshape the flap while damp and let the envelope dry flat.
Frequently Asked Questions
What size gift card does this hold?
It’s designed for a standard credit-card-size gift card, approximately 3.37 × 2.13 inches.
What yarn weight is used?
Category 4 worsted-weight yarn.
What hook size is used?
4.0 mm.
How much yarn do I need?
Approximately 35–45 yards total.
Is this beginner-friendly?
Yes. The main piece uses single crochet, with simple decreases for the flap.
Is the envelope worked in the round?
No. It’s worked flat and folded.
Is the flap separate?
No. The triangular flap is crocheted directly onto the rectangle.
Do I need a button?
No. A button is optional; an all-yarn closure also works.
Can I use scrap yarn?
Absolutely. This is an excellent scrap-yarn project.
Can it hold cash too?
Yes, folded cash or a short handwritten note can fit alongside the gift card if your envelope isn’t crocheted too tightly.
Final Thoughts
A gift card doesn’t have to feel impersonal.
This crochet gift card holder pattern adds a small handmade detail that turns an ordinary card into a more thoughtful Christmas present.
The construction stays beginner-friendly: crochet one rectangle, decrease to create the triangular flap, fold the lower portion upward, sew two short seams, and add a button.
Make it in cranberry and cream for traditional Christmas style, forest green for a cozy woodland look, or use tiny scraps to create a whole collection of colorful envelopes.
Because each holder requires only a small amount of yarn, it’s also an excellent project when you need several quick handmade gifts without buying more supplies.
Save this mini Christmas crochet envelope pattern for your holiday project list!