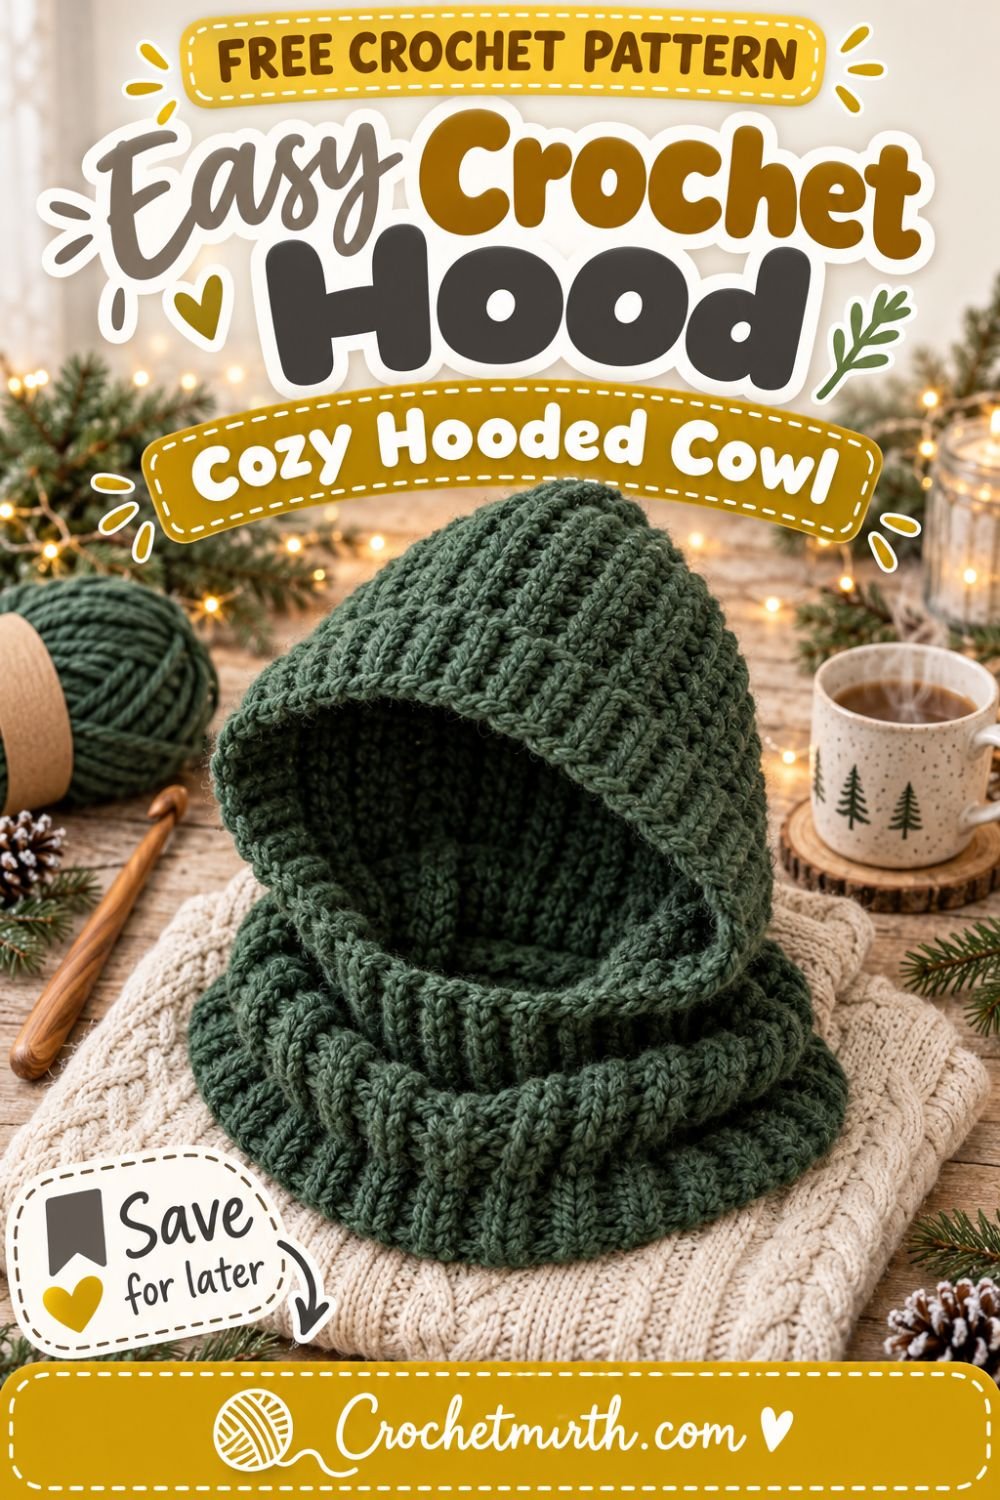
Crochet Hood Pattern – Cozy Hooded Cowl for Beginners
If you love cozy winter accessories but don’t want to tackle complicated garment construction, this crochet hood pattern is a great project to try.
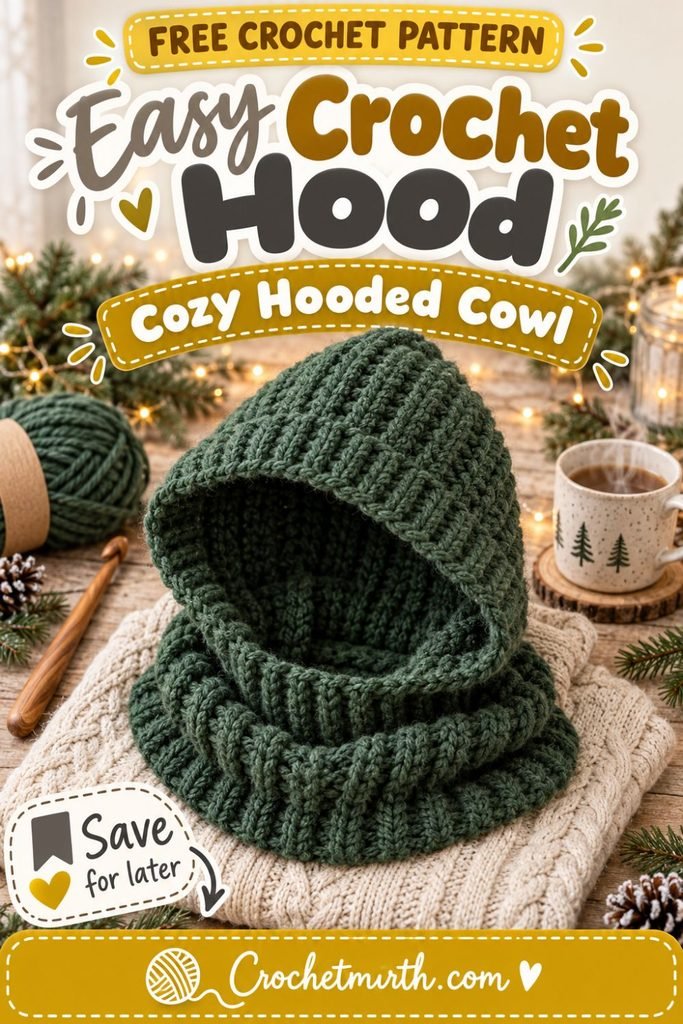
This beginner-friendly hooded cowl starts with just one large crochet rectangle.
You’ll create a warm ribbed fabric, sew a small section at the front to form the cowl, then close the top to transform the remaining fabric into a roomy hood.
There are no complicated increases, decreases, sleeves, or separate hood panels.
When it’s cold, pull the hood up over your head for extra warmth.
When you don’t need the hood, push it back and let the fabric sit around your neck like a cozy chunky cowl.
It’s simple, practical, and perfect for winter.
Why You’ll Love This Crochet Hooded Cowl
This pattern is:
- Beginner-friendly
- Made from one main rectangle
- Mostly repetitive crochet
- Warm around the head and neck
- Easy to customize
- Made with bulky yarn
- Quick compared with garments
- Great for handmade gifts
- Wearable as both a hood and cowl
- Designed with minimal seaming
If you’ve already crocheted a scarf or rectangle beanie, this is a natural next project.
Skill Level
Beginner / Easy
You should know how to:
- Make a slip knot
- Chain
- Half double crochet
- Work in the back loop only
- Turn your work
- Sew a basic seam
- Single crochet
- Fasten off
- Weave in yarn ends
Materials
Yarn
Approximately 350–425 yards of Category 5 bulky yarn
Choose a yarn that feels soft against your face and neck.
Good options include:
- Soft acrylic
- Wool blends
- Acrylic/wool blends
- Washable wool
- Soft alpaca blends
Avoid anything that feels itchy against your cheek.
Crochet Hook
6.5 mm crochet hook
Adjust your hook size if necessary to obtain comfortable fabric and gauge.
Other Supplies
- Yarn needle
- Scissors
- Measuring tape
- Stitch markers
- Optional locking stitch markers
Crochet Abbreviations
This pattern uses US crochet terminology.
ch – chain
sc – single crochet
hdc – half double crochet
sl st – slip stitch
st – stitch
sts – stitches
BLO – back loop only
Finished Size
This pattern is written as an approximate Adult Medium / One-Size Style Hood.
Before assembly, the rectangle measures approximately:
18 inches high × 26 inches wide
After assembly:
Cowl section: approximately 7 inches high
Face opening: approximately 10–11 inches high
Hood width when laid flat: approximately 13 inches
The ribbed crochet fabric has some stretch.
Gauge
Approximately:
10 hdc = 4 inches
7 rows = 4 inches
For this project, exact gauge is less critical than achieving the correct finished rectangle measurements.
If your stitch count produces a slightly different size, simply crochet until your rectangle measures approximately 18 × 26 inches.
How the Crochet Hood Is Constructed
This is one of the easiest ways to make a hooded cowl.
You’ll:
- Crochet one large ribbed rectangle.
- Bring the two side edges together.
- Seam only the lower section.
- Leave the upper section open for your face.
- Fold the hood and seam the top.
- Add a simple border around the face opening.
That’s it.
Why Use Ribbed Crochet?
The ribbing is created by working half double crochet in the back loop only.
This technique creates raised ridges across the fabric.
The finished texture:
- Looks cozy and modern
- Adds stretch
- Creates a knit-like appearance
- Helps the hood drape comfortably
- Looks beautiful in solid-colored yarn
Free Crochet Hood Pattern
Foundation Chain
Ch 46.
Row 1
Hdc in the second chain from the hook.
Hdc in every remaining chain across.
45 sts
Ch 1 and turn.
Row 2
Working in the back loop only, hdc in every stitch across.
45 sts
Ch 1 and turn.
Rows 3–46
Repeat Row 2.
Continue until the rectangle measures approximately:
18 inches tall
and
26 inches wide
Your exact number of rows may vary depending on your gauge.
Measurements are more important than the row count.
Fasten off, leaving a long yarn tail.
Check Your Rectangle
Before sewing anything, lay your rectangle flat.
The piece should look similar to a wide ribbed scarf.
Measure it.
Aim for approximately:
18 inches from top to bottom
and
26 inches from side to side
The 26-inch measurement will eventually wrap around your head and neck.
Part 2: Create the Cowl
Bring the first and final rows together so the short side edges meet.
The rectangle should now form a loose tube shape.
Starting at the bottom edge, sew the two side edges together for approximately:
7 inches
Stop sewing.
Do not continue to the top.
The unsewn section becomes the face opening.
What the Piece Should Look Like
At this stage:
- The bottom is joined into a cowl.
- The upper front remains open.
- The top edge is still open.
- The back remains continuous.
Put the piece loosely over your head to check the opening.
The lower section should sit comfortably around your neck.
Part 3: Create the Hood
Turn the piece inside out.
Arrange it so the front seam is centered.
Flatten the top of the hood.
The front opening should remain aligned at the center front.
Bring the two halves of the top edge together.
Seam the Crown
Using your yarn needle and matching yarn, sew the top edge closed.
You can use:
- Mattress stitch
- Whip stitch
- Slip stitches
Try to keep the seam flexible.
A very tight crown seam can make the hood feel stiff.
Fasten off securely.
Turn the Hood Right Side Out
Turn your project right side out.
You should now have:
- A closed crown
- A large face opening
- A deep hood
- A cowl around the neck
Try it on.
The hood should feel roomy rather than tight.
Part 4: Finish the Face Opening
A simple crochet border gives the hood a polished look.
Join yarn near the lower corner of the face opening.
Face Border Round 1
Ch 1.
Work sc evenly around the entire face opening.
Do not force an exact stitch count.
Instead, place enough stitches to keep the edge lying flat.
Join with a sl st.
Face Border Round 2
Ch 1.
Work sc BLO in each stitch around.
Join.
Face Border Round 3
Repeat Round 2 if you want a thicker ribbed-looking border.
Fasten off.
Weave in the yarn.
Make the Face Border Wider
For an extra-cozy hood, continue the border for:
4–6 rounds
You can then fold it slightly outward to create a thick frame around the face.
This works especially well with soft bulky yarn.
Optional Bottom Border
You can leave the bottom edge exactly as it is.
Or add a finishing round.
Join yarn anywhere along the bottom.
Ch 1.
Work sc evenly around.
Join.
Fasten off.
This gives the cowl a neat finished edge.
How to Wear Your Crochet Hooded Cowl
One of the best things about this design is its versatility.
Wear It as a Hood
Pull the upper section over your head.
The cowl stays around your neck for extra coverage.
Wear It as a Cowl
Push the hood backward.
Let the fabric gather naturally around your neck.
Wear It Under a Coat
Tuck the cowl section inside your coat.
Pull the hood up when you need extra warmth.
Because there are no long scarf ends, it’s easy to layer.
How to Make the Hood Bigger
Prefer a loose oversized hood?
Increase the width of your rectangle.
Instead of:
26 inches
try:
28–30 inches
This gives the hood more room around the head.
Remember that the cowl will also become slightly looser.
How to Make the Hood Smaller
For a closer fit, reduce the width to approximately:
24–25 inches
Check that the finished circumference still fits comfortably over your head before seaming.
How to Make the Hood Deeper
The foundation chain determines much of the hood height.
For a deeper hood, make your starting chain longer.
Instead of approximately 18 inches of height, aim for:
19–20 inches
This creates additional room over the crown.
How to Make the Cowl Taller
The lower seam determines the cowl height.
This pattern uses approximately:
7 inches
For more neck coverage, seam:
8–9 inches
from the bottom.
This will make the face opening slightly shorter.
How to Make the Face Opening Larger
Seam less of the front.
For example, instead of 7 inches, seam only:
5½–6 inches
This creates a larger face opening.
How to Make the Face Opening Smaller
Seam slightly farther upward.
Then add the face border.
Try the hood on before permanently securing the seam.
The opening should remain comfortable around the chin and forehead.
Add a Drawstring
A drawstring can add both style and adjustability.
After finishing the face border:
- Crochet a long chain.
- Fasten off.
- Weave the chain in and out through the lower face border.
- Leave equal lengths on both sides.
You can add small tassels to the ends.
For safety and comfort, keep the drawstring loose rather than tightening it closely around the face or neck.
Add Tassels
Tassels can give the hooded cowl a rustic handmade look.
Attach one tassel to each drawstring end.
Try using:
- Matching yarn
- Cream yarn
- Contrasting mustard yarn
Best Yarn for a Crochet Hood
Because the hood touches your face, softness is especially important.
Before choosing your yarn, rub it gently against your cheek.
If it feels scratchy there, choose another yarn.
Acrylic Yarn
Soft acrylic is a practical choice because it is:
- Affordable
- Widely available
- Easy to wash
- Available in many colors
Wool Blends
Wool blends are excellent for winter projects because they can provide:
- Warmth
- Softness
- Good stitch definition
- Comfortable stretch
Alpaca Blends
Alpaca blends can create a very soft, warm hood.
Because alpaca can drape more than some other fibers, choose a blend that still has enough structure for the ribbing.
Cozy Winter Color Ideas
The ribbed texture looks especially beautiful in solid colors.
Try:
- Forest green
- Cream
- Charcoal gray
- Burgundy
- Camel
- Rust
- Navy
- Sage
- Chocolate brown
- Mustard
Two-Tone Hooded Cowl
Use one color for the main hood and another for the borders.
Ideas include:
Forest green + cream
Charcoal + mustard
Cream + sage
Burgundy + warm gray
The contrasting face border makes the hood stand out without complicating the main pattern.
Striped Crochet Hood
Want more color?
Change yarn every:
3–5 rows
while crocheting the original rectangle.
This creates bold ribbed stripes.
Choose two colors for a simple modern look or several leftover yarn colors for a playful version.
Add a Faux-Fur Border
For an extra wintery look, you can crochet the final face-border round using faux-fur yarn.
Keep the main hood in regular bulky yarn so the stitches remain easy to work.
The faux-fur edging adds softness around the face.
Make It Longer Over the Shoulders
If you want the cowl to cover more of the upper chest, you can add rounds around the bottom edge after assembly.
Join bulky yarn around the lower opening.
Work rounds of:
hdc
until you reach the desired length.
This creates a longer neck warmer.
Turn It Into a Hooded Scarf
You can also add two scarf panels.
Crochet two long rectangles using the same ribbed stitch pattern.
Attach one to each lower front side of the hood.
Now the accessory can be worn as:
- Hood
- Cowl
- Hooded scarf
Make a Matching Winter Set
Use the same yarn for:
- Ribbed beanie
- Fingerless gloves
- Mittens
- Scarf
- Ear warmer
A hooded cowl and mittens in matching yarn make a beautiful winter gift.
Why This Is a Good Beginner Project
Traditional hood patterns can include:
- Complex shaping
- Short rows
- Multiple panels
- Increases and decreases
- Complicated assembly
This pattern avoids most of those techniques.
You simply make a rectangle.
Then:
Seam the front → seam the top → finish the opening
That makes the construction easy to understand even if this is your first hood.
Common Beginner Mistakes
Losing Stitches
You should have the same number of stitches in every row.
Count periodically.
Forgetting BLO
Rows 2 onward are worked in the back loop only.
This creates the ribbed texture.
Making the Starting Chain Too Tight
A tight starting chain can make one edge shorter than the other.
Keep your chains relaxed.
Seaming Too Much of the Front
If you sew too far upward, the face opening may become too small.
Try the project on before securing the seam permanently.
Making the Crown Seam Too Tight
A stiff seam may create an uncomfortable ridge.
Keep your sewing tension relaxed.
Adding Too Many Border Stitches
If the face border starts to ripple, you may have added too many stitches.
Remove the round and use fewer.
How Long Does a Crochet Hooded Cowl Take?
The exact time depends on your experience and crochet speed.
Bulky yarn makes the fabric grow faster than lighter-weight yarn, and the repetitive rectangle construction means you don’t need to stop constantly to check complicated shaping.
For many crocheters, this makes a hooded cowl a manageable weekend project.
Can Complete Beginners Make This Hood?
If you already know how to:
- Chain
- Half double crochet
- Turn your work
then yes.
The only additional skills are basic seaming and working a simple border around the face.
Can I Use Super Bulky Yarn?
Yes.
Super bulky yarn can make an extremely cozy hood and may work up faster.
However, you will need:
- Fewer starting chains
- Fewer rows
- A larger crochet hook
Work toward the finished measurements instead of following the exact stitch counts.
Can I Use Worsted Weight Yarn?
Yes.
You’ll need more stitches and rows.
Use a hook appropriate for your yarn and crochet your rectangle until it reaches approximately:
18 × 26 inches
The construction remains the same.
Is a Hooded Cowl the Same as a Balaclava?
They are similar winter accessories, but the fit is usually different.
A hooded cowl generally has:
- A larger face opening
- More relaxed hood shaping
- A loose cowl around the neck
A balaclava tends to fit more closely around the head and face.
This pattern is designed to have the relaxed look of a hooded cowl.
How to Wash Your Crochet Hood
Always follow the care instructions for your yarn.
In general:
- Wash gently.
- Avoid excessive heat.
- Reshape the hood while damp.
- Lay flat to dry when recommended.
- Make sure it is completely dry before storing.
If you use wool, hand washing may be required.
Frequently Asked Questions
Is the hood made in one piece?
Yes. The main hood and cowl start as one large crochet rectangle.
Is this hood worked in the round?
No. The main fabric is worked flat in rows.
Do I need increases or decreases?
No. The basic version uses the same stitch count for every row.
How does the hood get its shape?
The lower front is partially seamed to create the cowl, and the top edge is closed to create the crown.
Can I make the hood larger?
Yes. Increase the finished rectangle width before assembly.
Can I make the neck section longer?
Yes. Seam more of the front or add additional crochet rounds around the bottom after assembly.
Can I wear it without the hood up?
Yes. Push the hood backward and wear the fabric around your neck like a cowl.
Final Thoughts
You don’t need complicated garment shaping to crochet a warm hood for winter.
This crochet hood pattern for beginners starts with the same basic idea as a scarf: crochet one simple rectangle.
Then a few easy seams transform that rectangle into a cozy hood with an integrated cowl.
Wear it up on freezing days or push the hood back and wear it around your neck when you only need a little extra warmth.
Make it in classic forest green, cream, charcoal, burgundy, sage, or any color that fits your winter wardrobe.
Once you’ve made the basic version, it’s easy to experiment with wider borders, longer cowls, stripes, drawstrings, or contrasting colors.
Save this cozy hooded cowl pattern for your next beginner-friendly winter crochet project!
SEO
Primary keyword: crochet hood pattern
Secondary keywords: crochet hooded cowl, easy crochet hood, beginner crochet hood pattern, free crochet hood pattern, cozy hooded cowl, ribbed crochet hood, winter crochet hood, crochet cowl pattern
Slug: easy-crochet-hood-pattern
Meta description: Make a cozy crochet hooded cowl with this easy beginner pattern using bulky yarn, simple ribbed stitches, and one rectangle with minimal seaming.