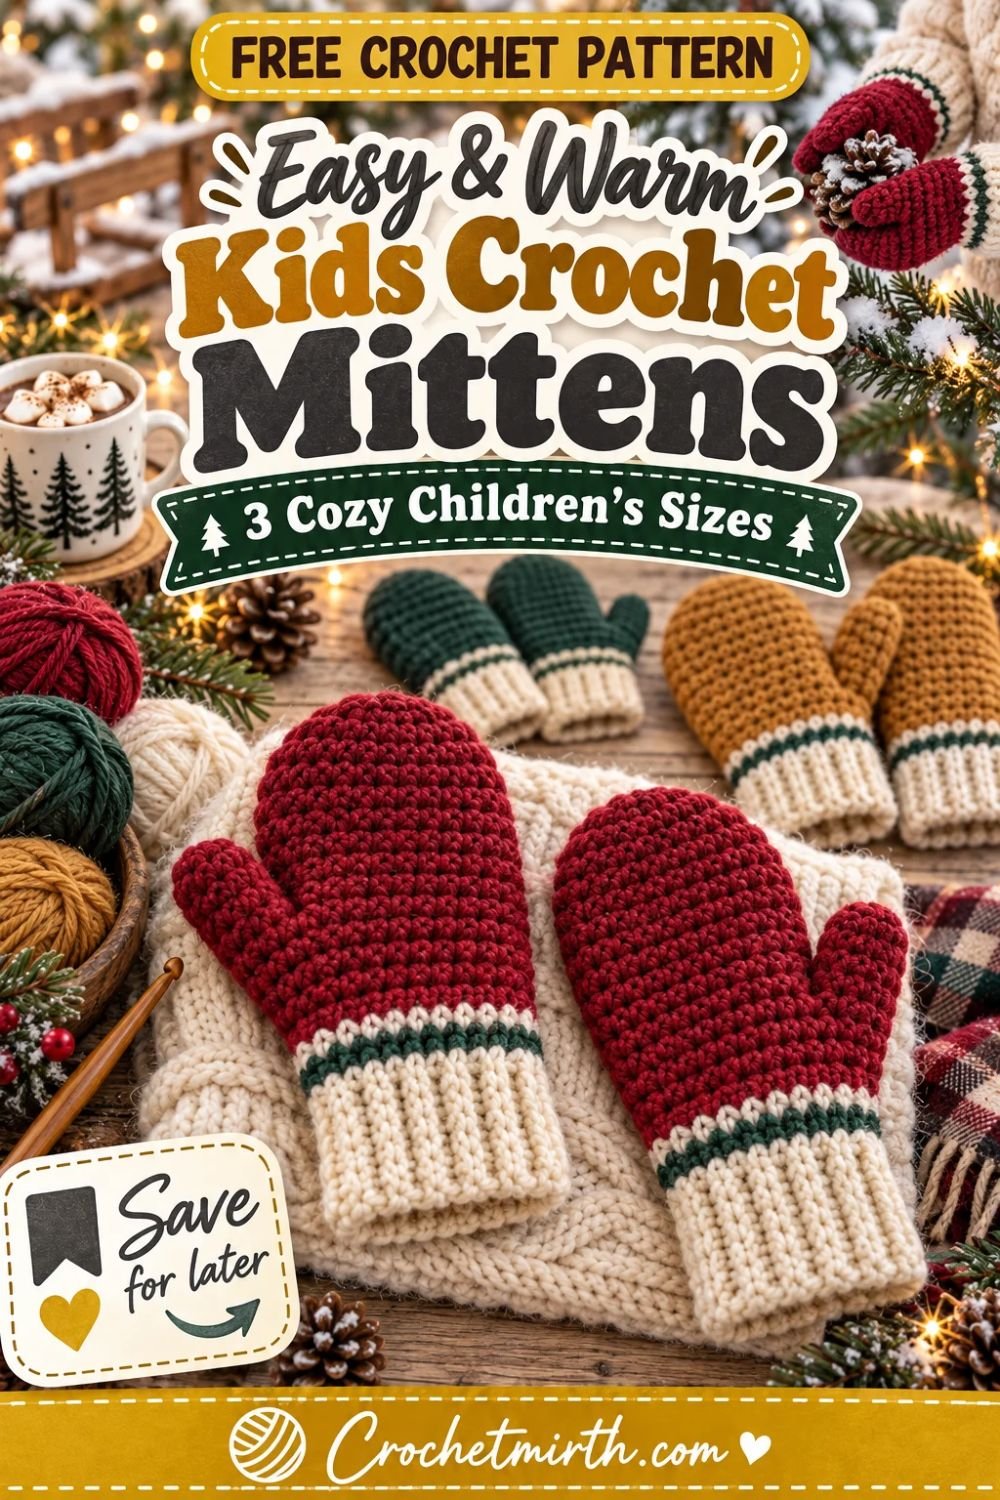
Crochet Kids Mittens Pattern – Easy Warm Mittens for Children
Cold hands can turn a fun winter day into a short one very quickly.
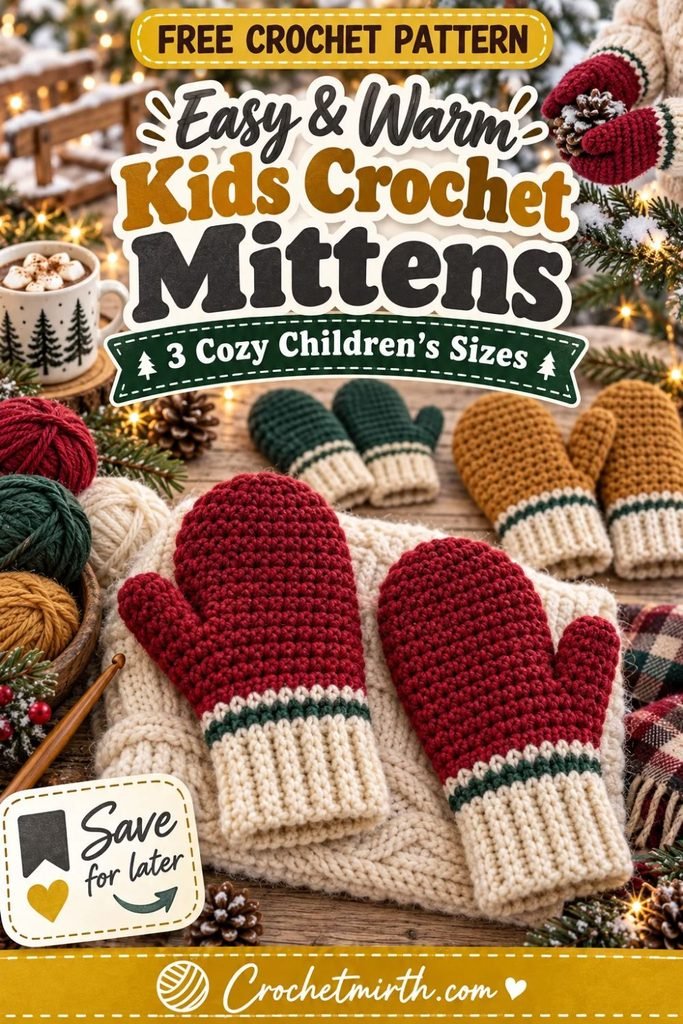
This crochet kids mittens pattern creates warm, comfortable mittens designed specifically for children’s smaller hands.
Instead of simply shrinking an adult mitten, this pattern includes three child sizes, shorter hand proportions, appropriately sized thumb openings, and stretchy ribbed cuffs that fit comfortably underneath winter-coat sleeves.
The mittens are worked from the wrist upward.
You’ll begin with a soft ribbed cuff, crochet the hand directly onto it, leave an opening for the thumb, shape a rounded fingertip, and finally return to complete the thumb.
The construction is simple enough for an advanced beginner while still creating a polished pair of winter mittens.
Sizes
The pattern includes:
Small: approximately 2–4 years
Medium: approximately 5–7 years
Large: approximately 8–12 years
Because children’s hands vary considerably, measuring the child’s actual hand is always better than relying only on age.
Finished Hand Circumference
Approximate unstretched circumference:
Small: 5 inches
Medium: 5¾–6 inches
Large: 6½–6¾ inches
Approximate Total Length
Including the ribbed cuff:
Small: 6½ inches
Medium: 7¼ inches
Large: 8–8½ inches
The Craft Yarn Council’s sizing guide places children’s hand circumferences around 5 inches at ages 2–4, 6 inches at ages 4–6, and 6½ inches at ages 6–8, making these useful starting points for children’s mitten sizing.
Why You’ll Love These Kids Mittens
These children’s mittens feature:
- Three practical sizes
- Warm worsted-weight yarn
- Dense crochet fabric
- Stretchy ribbed cuffs
- Rounded fingertips
- Separate fitted thumbs
- No buttons
- No long ties
- Simple color customization
- Easy length adjustments
- Mirrored left and right mittens
- Quick handmade-gift potential
The basic construction is also gender-neutral, so the same pattern works beautifully in cranberry, green, navy, mustard, camel, purple, pink, or neutrals.
Skill Level
Easy / Advanced Beginner
You should know how to:
- Chain
- Single crochet
- Single crochet in the back loop
- Half double crochet
- Half double crochet two together
- Single crochet two together
- Slip stitch
- Work in joined rounds
- Pick up stitches
- Make simple increases and decreases
Materials
Use Category 4 worsted-weight yarn.
Approximate yarn requirements for one pair:
Small — 2–4 Years
90–110 yards
Medium — 5–7 Years
110–135 yards
Large — 8–12 Years
135–160 yards
For the Crochetmirth sample:
Main Color: cranberry red
Cuff: warm cream
Optional Accent: forest green
You’ll also need:
- 4.0 mm crochet hook
- Yarn needle
- Scissors
- Flexible measuring tape
- Stitch markers
Worsted #4 is a very common choice for children’s mittens. Lion Brand’s current Winter Essential pattern, for example, uses medium/worsted yarn and includes dedicated child sizes, while other children’s patterns commonly use approximately 90–150 yards depending on size and construction.
Gauge
Using the 4 mm hook in half double crochet:
19 hdc = approximately 4 inches
Keep the fabric relatively dense.
A tighter mitten fabric generally provides better coverage against cold air than loose, open crochet.
If your gauge is much looser, use a smaller hook.
Abbreviations
This pattern uses US crochet terminology.
ch – chain
sc – single crochet
sc BLO – single crochet through back loop only
hdc – half double crochet
hdc2tog – half double crochet two together
sc2tog – single crochet two together
sl st – slip stitch
st / sts – stitch / stitches
rnd – round
Size Key
Throughout the pattern, numbers are written:
Small (Medium, Large)
For example:
24 (28, 32) sts
means:
Small = 24
Medium = 28
Large = 32
Before You Start: Measure the Child’s Hand
Measure around the widest part of the hand:
around the knuckles, excluding the thumb.
Then measure from:
wrist crease to tip of middle finger.
A current 2026 mitten guide similarly recommends measuring hand circumference, fingertip-to-wrist length, thumb circumference, and thumb length rather than choosing a size only by age.
PART 1: Crochet the Ribbed Cuff
Using warm-cream yarn:
Ch 9.
Row 1
Sc in the second chain from the hook and across.
8 sts
Ch 1 and turn.
Row 2
Working in the:
back loop only
Sc across.
8 sts
Ch 1 and turn.
Continue the Ribbing
Repeat Row 2 until the strip measures approximately:
Small: 4½ inches
Medium: 5¼ inches
Large: 6 inches
without stretching.
Wrap the strip around the child’s wrist if possible.
It should stretch comfortably without feeling loose.
Join the Cuff
Bring the two short ends together.
Make sure the strip isn’t twisted.
Slip stitch or sew the ends together.
You now have one stretchy ribbed cuff ring.
Do not make the cuff tight enough to restrict circulation.
PART 2: Crochet Around the Cuff
Turn the ribbed cuff so the seam will eventually sit at the inside of the wrist.
Join cranberry yarn to the upper edge.
Work evenly around the ribbing.
You need:
24 (28, 32) sc
around.
Join with a sl st.
This becomes the foundation for the mitten hand.
Optional Forest-Green Accent Stripe
For the sample version, work one additional round in forest green:
Sc around.
24 (28, 32) sts
Join.
Switch back to cranberry.
This thin stripe is optional.
Skip it for a completely solid mitten.
PART 3: Begin the Hand
Using cranberry:
Hand Round 1
Ch 1.
Hdc in every stitch around.
24 (28, 32) sts
Join.
Continue Even
Work plain hdc rounds for approximately:
Small: 2 rounds
Medium: 3 rounds
Large: 4 rounds
before creating the thumb opening.
The goal is to position the opening at the natural base of the child’s thumb.
Try the mitten on if possible.
PART 4: Right Mitten Thumb Opening
The thumb opening changes with size.
Small
Hdc in first:
4 sts
Ch:
5
Skip:
5 sts
Hdc in remaining:
15 sts
Medium
Hdc in first:
5 sts
Ch:
6
Skip:
6 sts
Hdc in remaining:
17 sts
Large
Hdc in first:
6 sts
Ch:
7
Skip:
7 sts
Hdc in remaining:
19 sts
Join.
The total stitch count remains:
24 (28, 32) stitch positions.
PART 5: Left Mitten Thumb Opening
Mirror the position.
Small
Hdc:
15 sts
Ch 5.
Skip 5.
Hdc final:
4 sts
Medium
Hdc:
17 sts
Ch 6.
Skip 6.
Hdc final:
5 sts
Large
Hdc:
19 sts
Ch 7.
Skip 7.
Hdc final:
6 sts
Join.
Now the left and right mitten thumbs will sit on opposite sides.
PART 6: Work Across the Thumb Opening
On the following round:
Hdc into every regular stitch.
Work one hdc into each chain of the thumb opening.
You should again have:
24 (28, 32) sts.
Join.
PART 7: Continue the Hand
Work hdc evenly around until the mitten measures approximately the following distance from the upper edge of the ribbed cuff:
Small: 3¼ inches
Medium: 4 inches
Large: 4¾ inches
Don’t include the cuff in this measurement.
The remaining decrease rounds will create the rounded fingertip.
If the child’s fingers are longer or shorter than average, adjust here.
PART 8: Shape the Fingertips
We’ll decrease four times per round.
SMALL — 24 Stitches
Decrease Round 1
Repeat:
hdc 4, hdc2tog
4 times.
20 sts
Round 2
Repeat:
hdc 3, hdc2tog
4 times.
16 sts
Round 3
Repeat:
hdc 2, hdc2tog
4 times.
12 sts
Round 4
Repeat:
hdc 1, hdc2tog
4 times.
8 sts
Round 5
Hdc2tog around.
4 sts
Fasten off.
MEDIUM — 28 Stitches
Decrease Round 1
Repeat:
hdc 5, hdc2tog
4 times.
24 sts
Round 2
Repeat:
hdc 4, hdc2tog
4 times.
20 sts
Round 3
Repeat:
hdc 3, hdc2tog
4 times.
16 sts
Round 4
Repeat:
hdc 2, hdc2tog
4 times.
12 sts
Round 5
Repeat:
hdc 1, hdc2tog
4 times.
8 sts
Round 6
Hdc2tog around.
4 sts
Fasten off.
LARGE — 32 Stitches
Decrease Round 1
Repeat:
hdc 6, hdc2tog
4 times.
28 sts
Round 2
Repeat:
hdc 5, hdc2tog
4 times.
24 sts
Round 3
Repeat:
hdc 4, hdc2tog
4 times.
20 sts
Round 4
Repeat:
hdc 3, hdc2tog
4 times.
16 sts
Round 5
Repeat:
hdc 2, hdc2tog
4 times.
12 sts
Round 6
Repeat:
hdc 1, hdc2tog
4 times.
8 sts
Round 7
Hdc2tog around.
4 sts
Fasten off.
PART 9: Close the Fingertip
Leave approximately:
8 inches of yarn tail.
Thread the tail through a yarn needle.
Pass it through the remaining four stitches.
Pull firmly closed.
Take one or two small securing stitches across the top.
Weave in the end on the inside.
The fingertip should now be smoothly rounded.
PART 10: Crochet the Small Thumb
Join cranberry yarn at one corner of the thumb opening.
Pick up:
12 sc evenly around.
Make sure you include one stitch near each corner to prevent gaps.
Thumb Rounds
Sc around until the thumb measures approximately:
1½ inches from its base
or until it reaches about:
½ inch below the child’s thumb tip.
Thumb Decrease
Sc2tog around.
6 sts
Fasten off.
Thread the yarn through the remaining six stitches.
Pull closed and secure.
PART 11: Crochet the Medium Thumb
Pick up:
14 sc
around the opening.
Work even until approximately:
½ inch below the thumb tip.
Then:
Repeat:
sc 5, sc2tog
twice.
12 sts
Next round:
Sc2tog around.
6 sts
Close the remaining stitches.
PART 12: Crochet the Large Thumb
Pick up:
16 sc
around the opening.
Work even until approximately:
½ inch below the thumb tip.
Decrease:
Repeat:
sc 2, sc2tog
4 times.
12 sts
Next round:
Sc2tog around.
6 sts
Close securely.
Close Any Thumb Gaps
A tiny gap sometimes appears at the base of a crochet thumb.
Use the beginning yarn tail to sew one or two small stitches across the corner.
Do not over-tighten.
The thumb still needs room to move comfortably.
Make the Second Mitten
Repeat the pattern using the opposite thumb placement.
Before finishing, compare both mittens side by side.
Check:
- Overall length
- Thumb height
- Thumb length
- Cuff depth
- Fingertip shape
Children notice quickly if one mitten fits differently from the other.
Cranberry + Cream Version
The main Crochetmirth sample uses:
Cranberry hand
Warm-cream cuff
and one:
forest-green accent round.
This creates a cheerful winter look without adding loose decorative pieces.
Forest Green Version
Use forest green for the hand.
Add:
cream cuff
and optionally a:
cranberry stripe.
Navy Kids Mittens
Navy is practical for everyday school wear and hides dirt better than very pale colors.
Pair it with:
camel or cream cuffs.
Mustard Version
Muted mustard works beautifully for children and photographs very well.
Pair with:
warm cream.
Lavender Version
For a softer winter palette, use:
dusty lavender
with:
oatmeal cuff.
Rainbow Stripe Version
Keep the body one solid color.
Use leftover yarn to add:
2–3 narrow stripes
above the cuff.
Avoid making the whole mitten heavily striped if you want the thumb construction to remain easy to follow.
Add the Child’s Initial
Instead of using buttons or detachable decorations, embroider one simple initial on the back of each mitten.
Use contrasting yarn.
For example:
M
or:
A
This can also help children identify their own mittens at school.
Left and Right Markers
Another practical idea is to embroider:
L
inside the left cuff and:
R
inside the right cuff.
Keep the letters small and soft.
Avoid Loose Decorations
For children’s winter accessories, simple sewn or embroidered details are more practical than loosely attached embellishments.
The written sample therefore uses:
- No buttons
- No beads
- No pom-poms
- No long cords
The crochet itself remains the focus.
Why Use Ribbed Cuffs?
The SC BLO cuff stretches over the hand and then returns closer to the wrist.
That helps:
- Keep snow out
- Reduce cold-air gaps
- Hold the mitten in place
- Fit underneath coat sleeves
Tuck the Cuff Under the Coat
For the warmest fit:
Put the mitten on first.
Pull the jacket sleeve over the ribbed cuff.
This reduces the gap between coat and mitten.
Make a Longer Cuff
For extra winter coverage:
Start with:
Ch 11
instead of Ch 9.
Work:
10 sc BLO
per row.
This creates a cuff roughly:
2½ inches deep.
Make a Shorter Cuff
For lighter everyday mittens:
Start with:
Ch 7
and work:
6 sc BLO.
The cuff will be closer to:
1½ inches deep.
Choosing the Correct Size
Age is only a starting point.
If a 6-year-old has a 5-inch hand circumference, use the Small size.
If a 7-year-old already measures close to 6½ inches around the knuckles, use the Large or adjust the Medium upward.
Measure whenever possible.
Size Reference
A useful starting point is:
| Size | Approx. age | Finished hand circumference | Approx. hand section |
|---|---|---|---|
| Small | 2–4 | ~5″ | ~4½” cuff-to-tip |
| Medium | 5–7 | ~5¾–6″ | ~5¼” cuff-to-tip |
| Large | 8–12 | ~6½–6¾” | ~6¼” cuff-to-tip |
Existing children’s mitten patterns also commonly separate young children into multiple sizes rather than using one universal child size; for example, Lion Brand offers dedicated 3–6 year and 7–10 year sizes in its current easy mitten pattern.
Make the Hand Longer
If the circumference fits but the fingers are too long:
Simply add plain hdc rounds before the fingertip decreases.
About:
1–2 extra rounds
may be enough.
Make the Hand Shorter
Begin the decrease rounds earlier.
Don’t reduce the circumference if only the fingers are short.
Make the Thumb Longer
Add plain sc rounds before the thumb decreases.
This is one of the easiest fit adjustments in the entire pattern.
Why Work Cuff-Up?
Cuff-up construction makes it easy to:
- Adjust hand length
- Place the thumb accurately
- Check the fit during construction
- Keep the cuff stretchy and separate from the hand fabric
It also makes these kids mittens technically different from the men’s top-down pair.
Best Yarn for Kids Mittens
Soft Acrylic
Acrylic is practical because it is:
- Affordable
- Washable
- Available in many colors
- Easy to replace if a mitten gets lost
Wool Blend
A wool/acrylic blend adds extra warmth while often remaining easy to care for.
Superwash Wool
A good option when natural fibers are preferred but easy washing is still important.
Choose a yarn that feels comfortable directly against sensitive skin.
Avoid Extremely Bulky Yarn
Very thick yarn can reduce finger and thumb movement on small hands.
Worsted #4 provides warmth while keeping the mittens flexible enough for normal play.
Optional Thin Fleece Lining
For very cold climates, a thin fleece lining can be added.
Keep the lining lightweight.
Too much bulk inside a child’s mitten reduces finger movement and may make the fit uncomfortable.
Snow-Day Version
Use:
wool-blend yarn
at a firm gauge.
Add the longer cuff variation.
These adjustments give additional coverage for outdoor play.
Everyday School Version
Use machine-washable acrylic.
Choose a darker main color such as:
- Navy
- Charcoal
- Forest green
- Cranberry
This makes everyday care easier.
Make Two Pairs at Once
Kids’ mittens are small enough that making a backup pair can be worthwhile.
Crochet:
Pair 1 for school
and:
Pair 2 for home or the car.
Use different colors if you want to tell them apart easily.
Matching Winter Set
Use the same yarn to make:
- Child beanie
- Scarf
- Cowl
- Ear warmer
A matching hat-and-mittens set makes a practical handmade winter gift.
Common Beginner Problems
Mitten Is Too Tight
Check the hand circumference rather than the child’s age.
Move up one size if necessary.
Cuff Is Too Tight
Add several SC BLO rows before joining the ribbing.
Cuff Is Too Loose
Remove ribbing rows.
The cuff should stretch gently around the wrist.
Thumb Opening Sits Too High
Make fewer plain hand rounds before creating it.
Thumb Opening Sits Too Low
Add another plain hand round first.
Small Holes Around the Thumb
Pick up one extra stitch at each corner and decrease them on the next round.
Fingertip Is Too Long
Begin decreases earlier.
Fingertip Looks Pointed
Don’t add plain rounds between the decrease rounds.
One Mitten Is Larger
Count the rows and record all fit adjustments from Mitten 1 before starting Mitten 2.
Blocking
These mittens require very little blocking.
If necessary:
Lightly dampen them.
Shape the fingertips.
Straighten the cuffs.
Arrange the thumbs naturally.
Allow them to dry flat.
Don’t stretch them larger.
Washing
Always follow the yarn manufacturer’s instructions.
For children’s mittens, machine-washable yarn can be especially convenient.
Dry thoroughly before storing.
Frequently Asked Questions
What sizes are included?
Approximately 2–4, 5–7, and 8–12 years.
What yarn weight is used?
Category 4 worsted yarn.
What hook size is used?
4 mm.
How much yarn do I need?
Approximately 90–160 yards per pair depending on size.
Are the cuffs ribbed?
Yes, using single crochet in the back loop.
Are the mittens worked top down?
No. These children’s mittens are worked cuff up.
Is the thumb added afterward?
Yes.
Are the left and right mittens different?
The thumb opening is mirrored.
Can I make the hand longer without making it wider?
Yes. Add plain rounds before the fingertip decreases.
Can beginners make these?
A confident beginner should be able to complete them.
Final Thoughts
Children’s mittens need more than a smaller adult stitch count.
Their hands are shorter, their thumbs need proportionally smaller openings, and their cuffs need enough stretch to go on easily while still staying underneath a winter coat.
This crochet kids mittens pattern addresses those differences with three child sizes, a simple cuff-up construction, warm dense hand fabric, separate thumbs, and rounded fingertips.
Make cranberry and cream for a cheerful winter pair.
Use navy for school.
Try forest green for an outdoorsy look.
Or crochet several colors as practical handmade Christmas gifts.
Save this easy children’s crochet mitten pattern for your winter project list!