Crochet Christmas Tree Pillow Pattern – Easy Bobble Tree Cushion
Christmas decor feels especially cozy when texture does most of the decorating.
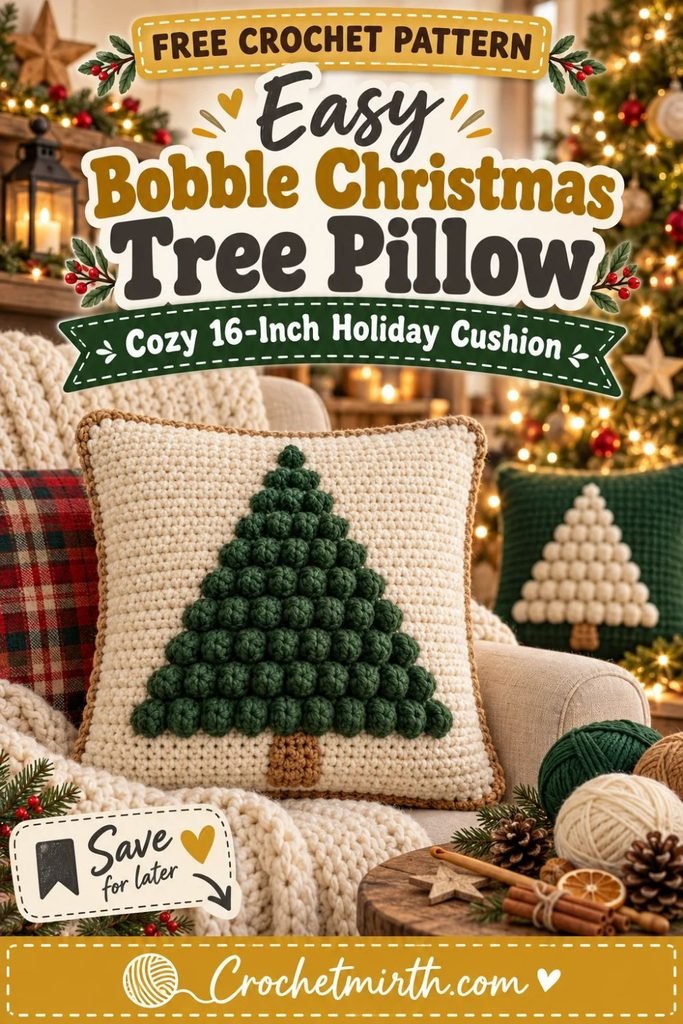
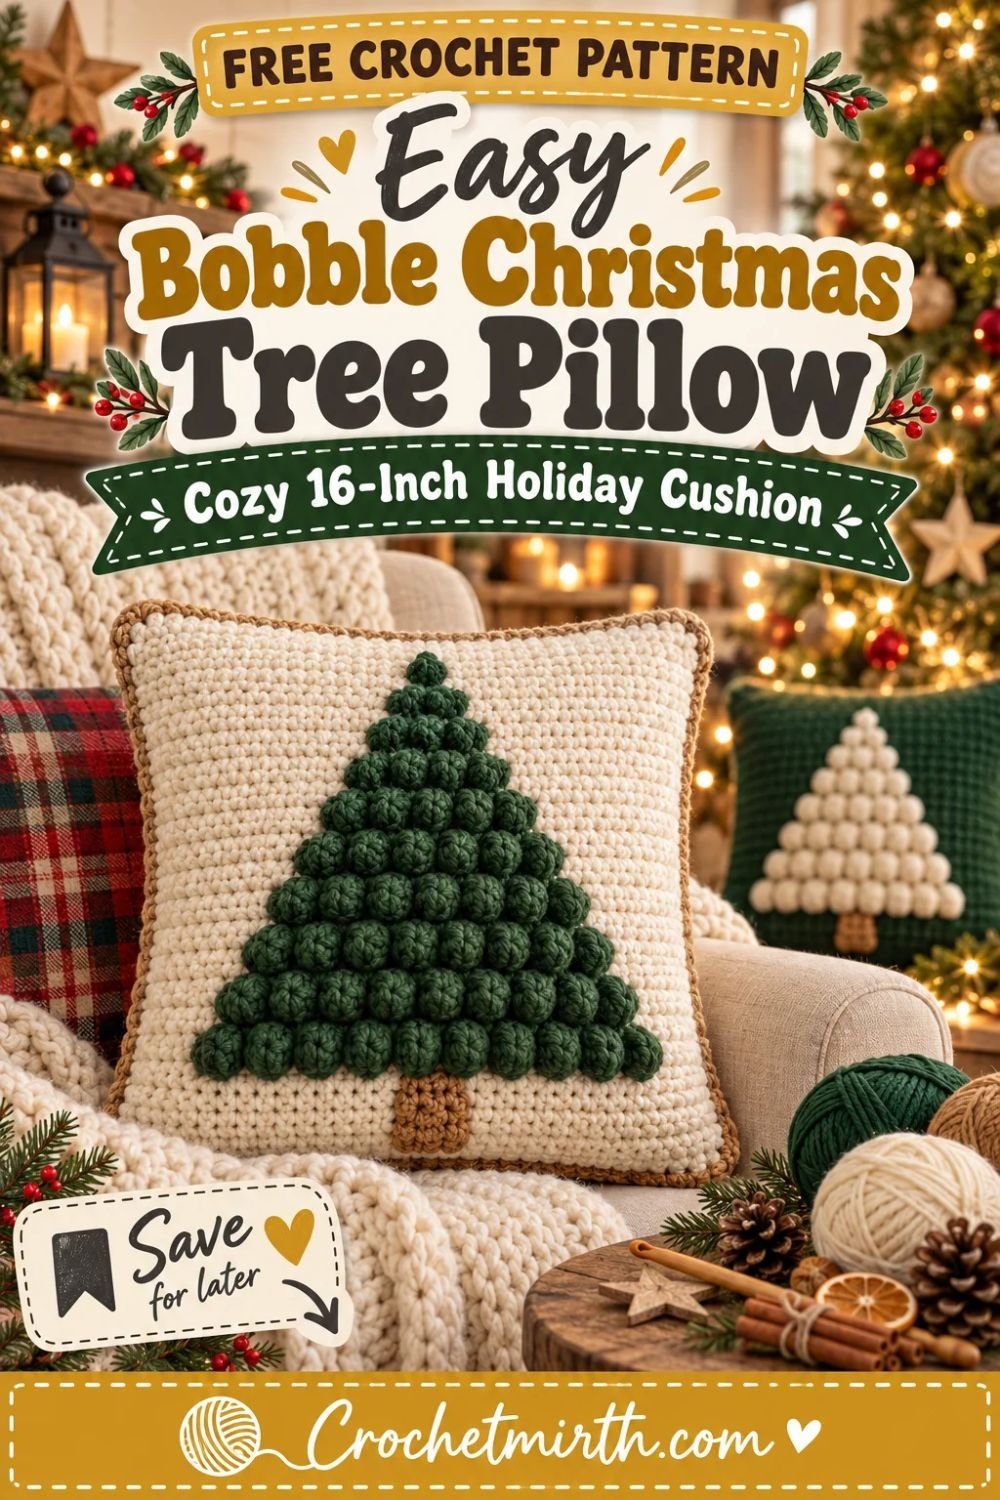
This crochet Christmas tree pillow pattern uses raised forest-green bobble stitches to create a large evergreen tree directly on a warm-cream crochet panel.
There are no appliqué pieces to sew onto the front.
No complicated tree shaping.
And no separate branches to crochet.
Instead, the tree appears row by row as the number of bobbles gradually decreases from a wide base to a single bobble at the top.
The result is a modern 16 × 16 inch Christmas cushion that works beautifully with farmhouse, rustic, woodland, and neutral holiday decor.
The back uses two overlapping crochet panels, creating a simple envelope opening so the pillow insert can be removed after Christmas.
Why You’ll Love This Bobble Tree Pillow
This pillow combines a dramatic finished look with a relatively simple construction.
The front uses mostly single crochet.
Only the Christmas tree uses bobble stitches.
You’ll also get:
- A removable 16-inch pillow cover
- No zipper
- No buttons
- No complicated tapestry image
- Simple color changes
- A symmetrical tree design
- Easy-to-adjust sizing
- A washable reusable Christmas decoration
The raised bobbles give the tree enough dimension that it remains visible even when the entire room uses a subtle neutral Christmas palette.
Skill Level
Advanced Beginner
You should know how to:
- Chain
- Single crochet
- Double crochet
- Change colors
- Work a bobble stitch
- Work flat in rows
- Join crochet panels
- Weave in yarn ends
You don’t need previous pillow-making experience.
Finished Size
The completed cover is designed for a:
16 × 16 inch pillow insert
The finished crochet cover should measure approximately:
15½–16 inches square before inserting the pillow form.
A slightly smaller cover usually creates a fuller finished cushion.
Materials
Use Category 4 worsted/Aran-weight yarn.
Plan on approximately:
850–1,000 yards total
depending on gauge and whether you make both back panels in the same dense single-crochet fabric.
Suggested colors:
Color A – Warm Cream: approximately 700–800 yards
Color B – Forest Green: approximately 100–140 yards
Color C – Warm Camel: approximately 20–30 yards
You’ll also need:
- 5.0 mm crochet hook
- 16 × 16 inch pillow insert
- Yarn needle
- Scissors
- Measuring tape
- Stitch markers
Gauge
Approximately:
14 sc = 4 inches
and:
13 rows = 4 inches
Measure your swatch before beginning.
If 57 stitches are significantly wider than 16 inches, move down a hook size.
If they’re too narrow, move up slightly.
Crochet Abbreviations
This pattern uses US terminology.
ch – chain
sc – single crochet
dc – double crochet
BO – bobble
sl st – slip stitch
st / sts – stitch / stitches
RS – right side
WS – wrong side
Special Stitch: 5-DC Bobble
The bobble is worked into one stitch.
With forest-green yarn:
Yarn over, insert the hook into the indicated stitch, yarn over and pull up a loop.
Yarn over and pull through 2 loops.
Repeat that partial double crochet 5 times total in the same stitch.
You should have 6 loops on your hook.
Using the cream background yarn, yarn over and pull through all 6 loops.
Continue with the next cream single crochet.
The green cluster will puff outward toward the front.
Gently push the bobble toward the RS if necessary.
Color-Change Tip
Don’t carry green yarn all the way across the large cream side margins.
At the beginning of each bobble section, join or pick up green.
Carry it loosely behind only across the three cream stitches between neighboring bobbles.
After the final bobble of that row, cut the green yarn with enough tail to weave in.
This prevents very long floats across the back of the front panel.
Pillow Construction
You’ll make:
- One square front panel
- One lower back panel
- One upper back panel
The two back pieces overlap to form an envelope opening.
This lets you remove the pillow insert without installing a zipper.
PART 1: Crochet the Front Panel
Using warm cream:
Ch 58.
Row 1 – WS
Sc in the second chain from the hook and across.
57 sts
Ch 1 and turn.
Row 2
Sc across.
57 sts
Ch 1 and turn.
The even-numbered rows are the RS in this pattern.
PART 2: Crochet the Trunk
Switch briefly to warm camel only for the center five stitches.
Row 3
Sc across in cream.
57 sts
Row 4 – Trunk Row
With cream:
Sc in first:
26 sts
Change to camel.
Sc in next:
5 sts
Change back to cream.
Sc in final:
26 sts
57 sts
Rows 5–6
Repeat Row 4.
Row 7
Sc across entirely in cream.
57 sts
The small 5-stitch-wide camel section now forms the tree trunk.
PART 3: Begin the Bobble Christmas Tree
The tree contains 11 bobble rows.
The lowest row contains:
11 bobbles
Each new bobble row contains one fewer bobble until the final row contains:
1 bobble.
Three plain cream rows separate each bobble row.
This spacing makes the raised texture visible without making the tree overly dense.
Bobble Row Formula
For every bobble row:
Work the indicated number of cream stitches at the beginning.
Then work:
BO, 3 sc
repeated between bobbles.
After the final bobble, work the same number of cream stitches as you used at the beginning.
The three single crochets between bobbles remain cream.
Bobble Tree Chart
| Front Row | Bobbles | Cream stitches before first bobble | Pattern across center | Cream stitches after final bobble |
|---|---|---|---|---|
| 8 | 11 | 8 | BO, 3 sc, BO ×10 | 8 |
| 12 | 10 | 10 | BO, 3 sc, BO ×9 | 10 |
| 16 | 9 | 12 | BO, 3 sc, BO ×8 | 12 |
| 20 | 8 | 14 | BO, 3 sc, BO ×7 | 14 |
| 24 | 7 | 16 | BO, 3 sc, BO ×6 | 16 |
| 28 | 6 | 18 | BO, 3 sc, BO ×5 | 18 |
| 32 | 5 | 20 | BO, 3 sc, BO ×4 | 20 |
| 36 | 4 | 22 | BO, 3 sc, BO ×3 | 22 |
| 40 | 3 | 24 | BO, 3 sc, BO, 3 sc, BO | 24 |
| 44 | 2 | 26 | BO, 3 sc, BO | 26 |
| 48 | 1 | 28 | BO | 28 |
Every row still contains the equivalent of:
57 stitch positions
so the sides stay straight.
Row 8 – 11 Bobbles
Sc 8 in cream.
Work the first green bobble.
Then repeat:
3 sc cream, 1 green bobble
until you have 11 bobbles.
Finish with:
8 sc cream.
Ch 1 and turn.
Rows 9–11
Sc across entirely in cream.
57 sts
These plain rows create space before the next line of bobbles.
Row 12 – 10 Bobbles
Sc 10.
Work 10 green bobbles with 3 cream sc between each.
Finish with 10 cream sc.
Rows 13–15
Sc across in cream.
Continue following the bobble-tree chart through Row 48.
PART 4: Finish Above the Tree
After completing the single top bobble on Row 48:
Rows 49–52
Sc across in cream.
57 sts
Fasten off.
Your front panel should now measure close to:
16 × 16 inches.
Check the Tree
Lay the front panel flat.
You should see:
- Small camel trunk
- Wide row of 11 green bobbles
- Gradually narrowing triangular tree
- Single bobble at the top
- Balanced cream border around the motif
Gently push every bobble toward the front.
PART 5: Make the Lower Back Panel
Using warm cream:
Ch 58.
Row 1
Sc in second chain from hook and across.
57 sts
Ch 1 and turn.
Rows 2–32
Sc across.
57 sts
Fasten off.
This panel should measure approximately:
16 inches wide × 9½–10 inches tall.
PART 6: Make the Upper Back Panel
Repeat the lower back panel exactly:
57 sc × 32 rows
Fasten off.
You now have two matching rectangles.
Why Are Both Back Panels So Tall?
The finished pillow is only about 16 inches tall, but the two back pieces intentionally overlap.
That overlap keeps the pillow insert hidden without needing:
- Zipper
- Buttons
- Ties
Aim for around:
3–4 inches of overlap.
Optional Neater Envelope Edges
Before assembly, add one additional row of single crochet along the inner opening edge of each back piece.
You can work this row in:
warm camel
for a subtle contrast.
This step is optional.
PART 7: Arrange the Pillow Cover
Place the front panel on a flat surface with the:
RS facing down.
Place the upper back panel on top with its RS facing upward.
Align its:
- Top edge
- Left edge
- Right edge
with the front panel.
Next place the lower back panel over it.
Align its:
- Bottom edge
- Left edge
- Right edge
with the front panel.
The two back panels should overlap in the middle.
Pin or stitch-mark around the perimeter.
PART 8: Join the Pillow Cover
Using warm camel for contrast or cream for an invisible-looking finish:
Join yarn in one corner.
Work:
1 sc through all appropriate layers
around the entire outer edge.
At each corner, work:
3 sc
to turn neatly.
Where all three layers overlap along the sides, make sure your hook passes securely through every layer.
Continue around all four sides.
Join with a sl st.
Fasten off.
Optional Decorative Border
For a stronger framed appearance, work a second border round.
Use camel and work:
1 sc in every stitch
with:
3 sc in each corner stitch.
This creates a clean picture-frame effect around the bobble tree.
PART 9: Insert the Pillow Form
Open the overlapping back panels.
Fold the 16-inch pillow insert slightly.
Slide it inside.
Push each corner of the insert fully into the crochet cover.
Smooth the front.
Adjust the back overlap.
Your bobble Christmas tree cushion is finished.
Forest Green Tree Version
The sample uses:
Warm-cream background
Forest-green bobbles
Camel trunk and border
This produces the strongest modern farmhouse contrast.
Cream-on-Green Version
Reverse the colors:
Forest-green panel
Warm-cream bobbles
Camel trunk
This creates a richer, darker holiday pillow.
All-Neutral Christmas Pillow
Try:
Oatmeal background
Warm-cream bobbles
Camel trunk
This works particularly well in neutral Scandinavian interiors.
Cranberry Tree Pillow
Use:
Cream background + cranberry bobbles
for a less literal but highly festive Christmas cushion.
Sage Christmas Tree
Muted sage instead of deep forest green produces a softer farmhouse look.
Pair it with oatmeal and cream.
Add a Mustard Star
Want a small accent at the top?
Instead of making Row 48’s bobble green, use:
muted mustard-gold
for the final bobble.
That single color change suggests a tiny tree topper without adding a separate appliqué.
Add Bobble Ornaments
For a more decorated tree, replace a few green bobbles within the wider lower rows with:
- Cranberry
- Mustard
- Cream
Use only a handful so the overall tree silhouette remains clear.
Minimalist Version
Work the entire cushion in one color.
Use:
warm cream
for both the background and bobbles.
The Christmas tree will appear entirely through texture and shadow.
This gives a sophisticated neutral look.
Rustic Version
Use a slightly heathered oatmeal yarn for the panel.
Make the bobbles deep forest green.
Add a camel border.
The natural-looking yarn variation enhances the farmhouse effect.
Make Matching Pillows
One sofa set could include:
1 Bobble Christmas Tree Pillow
1 plain forest-green crochet pillow
1 cream striped pillow
Using the same yarn colors ties all three together without repeating the exact motif.
Make a Christmas Pillow Pair
Make one:
Cream + green tree
and one:
Green + cream tree.
Place them on opposite ends of a sofa.
Pillow Size Options
The written pattern is designed for:
16 × 16 inches
But you can resize it.
For a 14-inch cushion, reduce the cream margins around the tree and use fewer plain border rows.
For an 18-inch cushion, increase the panel width and height while keeping the 11-row bobble tree centered.
The tree motif itself can stay the same size.
Make the Tree Smaller
Start with fewer bobbles.
For example:
9 → 8 → 7 → … → 1
This works well for a smaller cushion.
Make the Tree Larger
Begin with:
13 bobbles
and gradually decrease to one.
Make sure the panel is wide enough to leave a comfortable cream margin around the motif.
Why Use Bobbles?
The bobble stitch creates real three-dimensional texture.
That makes a simple geometric tree visible through both:
- Color contrast
- Light and shadow
A flat colorwork tree can disappear slightly from across a room.
Raised bobbles remain much more noticeable.
Why Single Crochet for the Background?
Single crochet creates a dense stable panel that contrasts nicely with the raised bobbles.
It also helps a cushion maintain its square shape.
Looser open stitches can stretch more when the pillow insert is added.
Keep Your Bobbles on the Front
Sometimes a bobble wants to pop toward the back while you’re working.
Before moving on:
Push it gently toward the RS with your finger.
Once the pillow is assembled, every bobble should face outward.
Managing Multiple Yarn Colors
Because only the bobbles are green, there is no need to carry green across the entire row.
Join it near the first bobble.
Carry it behind the short 3-stitch gaps.
Cut after the final bobble.
You’ll have more ends to weave in, but the back of the front panel will stay much cleaner.
Weaving in Ends
The inside of the pillow will hide the back of the front panel, but yarn ends should still be secured carefully.
Weave green tails through several nearby stitches.
Change direction at least once.
Trim only after checking that the yarn won’t pull free.
Common Beginner Problems
Bobbles Don’t Pop
Make sure you’re completing all five partial double crochets before closing the cluster.
Push the bobble toward the RS.
Tree Isn’t Centered
Count the cream stitches before and after every bobble section.
They must match.
Pillow Front Narrows
Count:
57 stitches
regularly.
It’s easy to accidentally skip the first or last stitch of a row.
Green Yarn Shows Through Cream Stitches
Don’t pull carried green yarn too tightly behind the three-stitch gaps.
Long Floats Across the Back
Don’t carry green across the large side margins.
Cut it after each motif row.
Pillow Cover Looks Too Large
A crochet cover should generally fit fairly close to the pillow form.
Check your gauge before finishing both back panels.
Envelope Back Gapes
Increase the overlap by adding a few extra rows to each back panel.
Blocking
Block the three panels before assembly.
Shape the front into a true square.
Measure:
- Top
- Bottom
- Both sides
Make sure they’re approximately equal.
Don’t aggressively flatten the bobbles.
Arrange them with your fingers so they remain raised while the panel dries.
Care
Remove the pillow insert before washing.
Follow your yarn manufacturer’s washing instructions.
Lay the cover flat or reshape carefully while damp.
Make sure the bobbles are facing outward before drying completely.
Storage After Christmas
Remove the insert if you use the same cushion form for other seasonal covers.
Fold the crochet cover loosely.
Don’t place heavy items directly on the bobble tree for long periods.
This allows the raised texture to return easily the following Christmas.
Frequently Asked Questions
What size pillow insert do I need?
A 16 × 16 inch insert.
What yarn weight is used?
Category 4 worsted/Aran yarn.
What hook size is used?
5.0 mm.
What stitches do I need to know?
Mostly single crochet plus a 5-dc bobble.
Is the Christmas tree an appliqué?
No. The tree is worked directly into the front panel using green bobbles.
Does the cover have a zipper?
No. The two back panels overlap to create an envelope opening.
Can I remove the pillow insert?
Yes.
Can beginners make it?
A confident beginner comfortable changing colors and making bobbles should be able to complete it.
Can I make the tree one color with the background?
Yes. A monochrome cream version looks especially elegant.
Can I use bulky yarn?
Yes, but you’ll need fewer stitches and rows to reach 16 inches.
Final Thoughts
Christmas pillows are an easy way to make a room feel festive without changing the entire decor.
This crochet Christmas tree pillow pattern uses one of the simplest combinations possible—single crochet and bobble stitch—to turn a plain cream square into a textured evergreen Christmas tree.
The 11 raised bobble rows create the tree.
A small camel section forms the trunk.
And the overlapping back lets you remove the pillow insert when the season is over.
Make the classic forest-green version for farmhouse Christmas decor, reverse the colors for a darker cushion, or keep everything cream for a minimalist textured tree.
Save this easy bobble Christmas tree cushion pattern for your handmade holiday home decor collection!