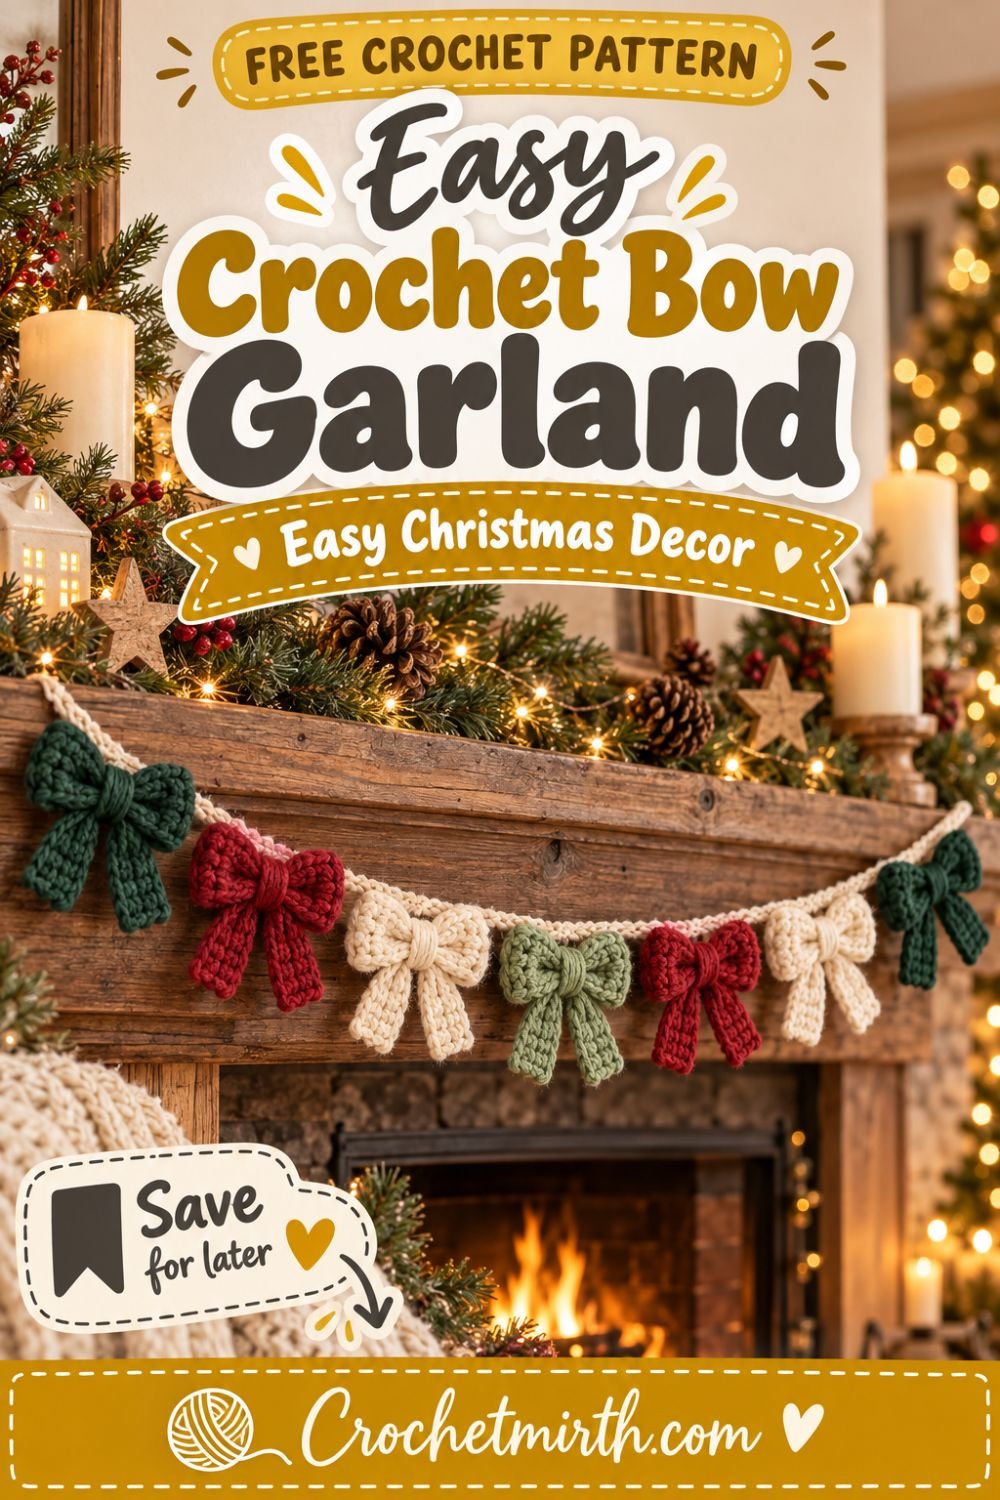
Crochet Bow Garland Pattern – Easy Christmas Bow Garland for Your Mantel
Handmade Christmas decorations don’t need to be complicated to make a big impact.
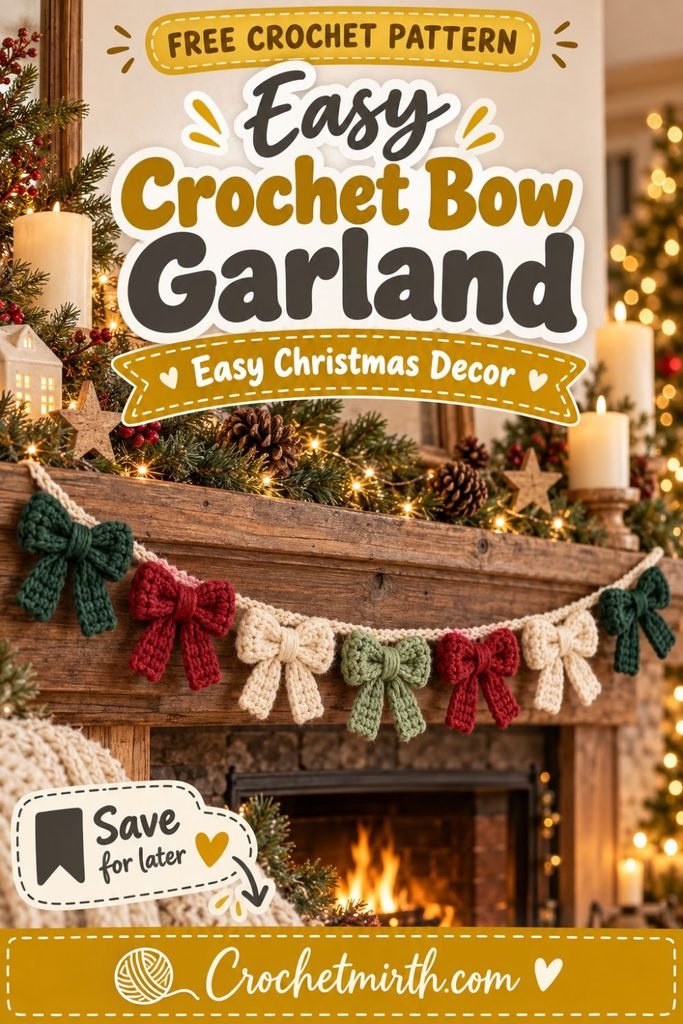
This crochet bow garland pattern turns a handful of simple crochet rectangles into adorable little bows that you can string across your mantel, Christmas tree, shelves, staircase, doorway, or holiday table.
Each bow is quick to make, uses only a small amount of yarn, and is easy enough for confident beginners.
Make every bow in classic Christmas red, mix forest green and cream, use soft vintage holiday colors, or raid your leftover yarn basket and create a completely unique garland.
Once you understand the first bow, the rest become an easy repetitive project that’s perfect for a cozy evening of Christmas crochet.
Why You’ll Love This Crochet Bow Garland
This project is:
- Beginner-friendly
- Quick to crochet
- Great for leftover yarn
- Easy to customize
- Adjustable to any garland length
- Made with basic crochet stitches
- Perfect for Christmas decorating
- Easy to turn into individual ornaments
- Beautiful for handmade gifts
- Simple enough to batch-make
You can make just three bows for a small shelf or crochet a dozen for a long fireplace garland.
Skill Level
Beginner / Easy
You should know how to:
- Chain
- Single crochet
- Half double crochet
- Turn your work
- Slip stitch
- Sew a simple seam
- Fasten off
- Weave in yarn ends
No complicated shaping is required.
Materials
Yarn
Use Category 4 worsted-weight yarn.
For a seven-bow garland, approximately:
120–160 yards total
should be plenty, depending on your tension and garland length.
This is also a perfect scrap-yarn project.
Suggested Christmas Colors
Try:
- Forest green
- Cranberry red
- Cream
- Sage green
- Burgundy
- Soft gold
- Dusty rose
- Warm beige
You can use one color or several.
Crochet Hook
4.5 mm crochet hook
You can move up or down a hook size depending on your yarn.
A slightly firm fabric helps the bows hold their shape.
Other Supplies
- Yarn needle
- Scissors
- Measuring tape
- Stitch markers, optional
Crochet Abbreviations
This pattern uses US crochet terminology.
ch – chain
sc – single crochet
hdc – half double crochet
sl st – slip stitch
st – stitch
sts – stitches
Finished Measurements
Each finished bow measures approximately:
4–4½ inches wide
and
3–3½ inches tall, including the small tails.
A seven-bow garland will measure approximately:
45–55 inches
depending on the spacing you choose.
You can easily make it longer.
How the Crochet Bow Is Constructed
Each bow is made from three simple pieces:
- Main bow strip
- Small center band
- Tail strip
The main strip is folded so both ends meet at the center.
Then you’ll pinch the middle to create the bow shape.
The center band wraps around the pinched section.
Finally, the tail piece is folded behind the bow.
It’s simple once you’ve made the first one.
PART 1: Crochet the Main Bow Strip
Ch 25.
Row 1
Hdc in the second chain from the hook.
Hdc in every chain across.
24 sts
Ch 1 and turn.
Row 2
Hdc across.
24 sts
Ch 1 and turn.
Rows 3–5
Repeat Row 2.
Fasten off.
Leave a yarn tail approximately:
10 inches long
for assembly.
You now have a simple crochet rectangle.
Shape the Bow Loops
Lay the rectangle horizontally.
Bring the left short edge toward the center.
Bring the right short edge toward the center.
Allow the two ends to overlap very slightly.
Using your yarn needle, sew the ends together at the center.
Don’t worry about making this seam beautiful.
It will be hidden by the center band.
Pinch the Bow
Turn the seam toward the back.
Pinch the center vertically so the fabric creates:
- One upper fold
- One center valley
- One lower fold
This gives the rectangle its classic bow shape.
Use a strand of yarn to wrap tightly around the center several times.
Tie securely at the back.
Now your crochet rectangle should clearly look like two bow loops.
PART 2: Crochet the Bow Center Band
Ch 5.
Row 1
Sc in second chain from hook.
Sc across.
4 sts
Ch 1 and turn.
Rows 2–6
Sc across.
Ch 1 and turn.
After the final row, fasten off and leave a long sewing tail.
Attach the Center Band
Wrap the small rectangle around the pinched center of the bow.
Bring both ends together at the back.
Sew securely.
The band should fit snugly without crushing the bow completely.
Fasten off.
Weave in the yarn ends.
PART 3: Crochet the Bow Tails
Ch 17.
Row 1
Hdc in second chain from hook.
Hdc across.
16 sts
Ch 1 and turn.
Row 2
Hdc across.
Fasten off.
Shape the Tails
Place the tail strip horizontally.
Fold it gently into a shallow upside-down V.
The center of the strip should point upward behind the bow.
The two ends should angle slightly downward.
Place the completed bow on top.
Sew through the center band and tail strip several times to hold everything together.
Keep the stitches hidden at the back.
Your First Crochet Bow Is Finished
Gently shape the loops with your fingers.
You should now have:
- Two rounded loops
- A wrapped center
- Two short hanging tails
Don’t worry if the loops aren’t perfectly identical.
A little variation makes handmade Christmas decorations feel charming.
Make the Remaining Bows
For the sample garland, make:
7 bows
Try this color combination:
2 forest green
2 cranberry red
2 cream
1 sage green
Or choose any colors you love.
Simple One-Color Garland
For a classic Christmas look, make every bow:
Deep red
Then use a cream chain to connect them.
Neutral Christmas Garland
For Scandinavian-inspired decor, use:
- Cream
- Warm beige
- Taupe
- Soft sage
This looks beautiful with natural wood, evergreen branches, and white candles.
Traditional Christmas Colors
Use:
- Red
- Forest green
- Cream
Alternate the colors across the garland.
Vintage Christmas Palette
Try:
- Dusty rose
- Muted cranberry
- Sage
- Cream
- Soft gold
This gives the garland a softer cottage-style look.
PART 4: Crochet the Garland Chain
Using your chosen garland color:
Ch 25.
This creates the first hanging section.
Attach the First Bow
Place your hook through the top back section of the first bow’s center band.
Work a slip stitch through the bow.
This attaches it directly to your chain.
Space Between Bows
Ch approximately:
20–25
between each bow.
Then attach the next bow with another slip stitch.
Repeat until all seven bows are attached.
Finish the Garland
After attaching the final bow:
Ch 25
to create the opposite hanging section.
Fasten off.
Weave in the ends.
Adjust the Spacing
Want the bows closer together?
Use fewer chains.
Try:
12–15 chains
between each bow.
Want a lighter, longer garland?
Try:
25–30 chains
between bows.
There is no exact rule.
Lay your bows out first and decide what looks best in your space.
Make a Mantel Garland
For an average fireplace mantel, aim for a finished garland approximately:
50–65 inches
long.
If your mantel is longer, simply:
- Add more bows
- Increase the spacing
- Add longer end chains
Make a Christmas Tree Garland
For a tree, make the garland much longer.
Instead of seven bows, try:
12–20 bows
Make several shorter garlands rather than one extremely long piece if that’s easier to arrange.
Make a Staircase Garland
Crochet:
10–15 bows
and increase the chain sections between them.
Attach the finished garland along your staircase greenery.
Make a Shelf Garland
For a short shelf or kitchen hutch:
Make just:
3–5 bows
A short bow garland can be just as effective as a long one.
Mini Bow Version
Want smaller bows?
Use:
- DK yarn
- 3.5 mm hook
Or reduce the main bow foundation chain.
Try:
Ch 19
instead of 25.
Then make the center band and tails proportionally smaller.
Oversized Bow Garland
For bold holiday decor, use:
Category 5 bulky yarn
with approximately a:
6–7 mm hook
The same construction can be used.
Your bows will simply become larger.
Oversized bows look especially good on:
- Fireplace mantels
- Staircases
- Large Christmas trees
- Doorways
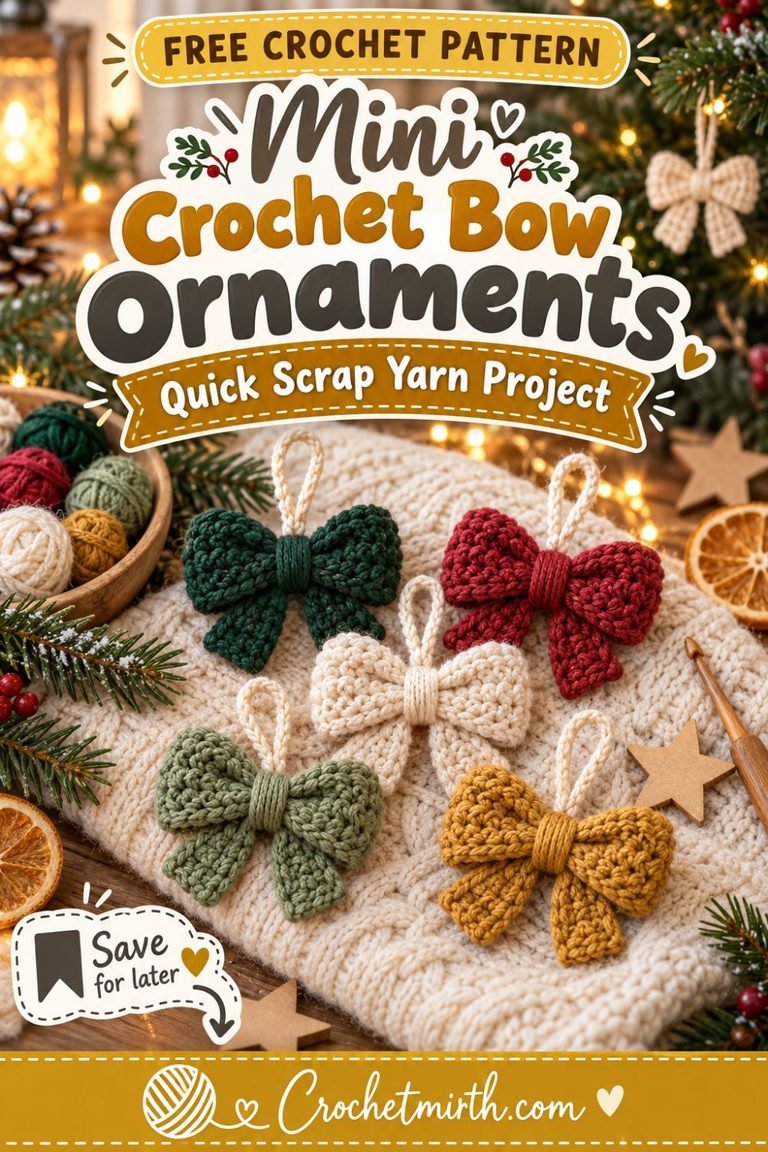
Turn Individual Bows Into Ornaments
You don’t have to make a garland.
Add a small hanging loop to one bow.
Now it becomes a:
Crochet Christmas bow ornament
Hang it from:
- Christmas tree
- Gift bag
- Door handle
- Wreath
Use Crochet Bows as Gift Toppers
Instead of disposable ribbon bows, attach one crochet bow to a wrapped present.
After Christmas, the recipient can reuse it as:
- Ornament
- Garland decoration
- Bag decoration
This makes the gift wrapping part of the handmade gift.
Add Crochet Bows to a Wreath
Make:
3 bows
in different sizes.
Attach them to a simple evergreen wreath.
Try:
- One large center bow
- Two smaller side bows
Add Bows to Christmas Stockings
A miniature bow can be sewn onto:
- Crochet stockings
- Fabric stockings
- Gift sacks
Keep embellishments securely attached and use decorative items only where appropriate.
Best Yarn for Crochet Bows
The bow needs enough structure to maintain its shape.
A standard worsted acrylic yarn works well because it is:
- Affordable
- Easy to crochet
- Available in many colors
- Structured enough for decor
- Great for leftovers
Cotton Yarn
Cotton can produce especially crisp bows.
It works well when you want:
- Clean stitch definition
- Minimal fuzz
- Firmer shapes
Acrylic Yarn
Acrylic creates a slightly softer bow.
It’s often a great choice for large garlands because it is inexpensive and widely available.
Can I Use Velvet Yarn?
Yes, especially for larger bows.
Velvet yarn can create a luxurious Christmas look.
However, stitches can be harder to see, so I wouldn’t recommend it for your very first bow.
Add a Little Sparkle
For festive detail, use yarn containing a subtle metallic strand.
Good options include:
- Cream + gold
- Red + gold
- Forest green + gold
Avoid overdoing the sparkle so the crochet texture remains visible.
Scrap Yarn Project
One reason this garland is so useful is that each bow requires only a small amount of yarn.
Collect your leftover Christmas colors.
Make each bow different.
Then connect everything with one neutral chain.
It’s an easy way to use yarn scraps without the finished decor looking random.
How Many Bows Do I Need?
A rough guide:
Small Shelf
3–5 bows
Fireplace Mantel
5–9 bows
Doorway
8–12 bows
Staircase
10–15 bows
Christmas Tree
12–20+ bows
The exact number depends on bow size and spacing.
How to Keep the Bows Looking Neat
After assembly:
- Flatten each bow gently.
- Pull the loops outward.
- Adjust the tail angle.
- Make sure the center band sits straight.
If needed, lightly block each bow before attaching it to the garland.
Blocking the Crochet Bows
Blocking is optional.
But it can help especially with cotton yarn.
Use the method recommended for your yarn.
Shape the loops and tails while slightly damp.
Allow them to dry completely before assembling the garland.
Can I Stiffen the Bows?
Usually, worsted yarn creates enough structure on its own.
If you want extremely crisp decorative bows, choose:
- Cotton yarn
- Smaller hook
- Tighter gauge
This is generally preferable to making the crochet fabric overly rigid.
Common Beginner Mistakes
Making Every Bow a Different Size
If you want a uniform garland, count your stitches and rows carefully.
Making the Center Too Loose
The center wrap creates most of the bow shape.
Wrap it snugly before adding the center band.
Pulling the Garland Chain Too Tight
Keep your chains relaxed.
Otherwise, the garland may curl between the bows.
Attaching Bows at Different Heights
Attach each bow through approximately the same spot on the center band.
This helps the garland hang evenly.
Making the Tail Strip Too Heavy
The tails should remain relatively small.
Very large tails can cause the bow to tilt forward.
Make It Faster
For an even quicker version:
Skip the separate crochet tail piece.
Make:
- Main rectangle
- Center band
Then attach the simple loop-style bows directly to the garland.
You’ll get a clean minimalist bow garland with fewer pieces.
Batch Crochet Method
If you’re making many bows, don’t complete them one at a time.
Instead:
- Crochet all main bow strips.
- Crochet all center bands.
- Crochet all tail strips.
- Shape every bow.
- Attach all bands.
- Assemble the garland.
Batching the pieces can make the project feel much faster.
Handmade Christmas Gift Idea
A crochet bow garland can also make a beautiful handmade holiday gift.
Fold it carefully into a kraft gift box.
Add tissue paper.
Include a small label explaining that it can be used on:
- Mantel
- Tree
- Shelves
- Staircase
It’s especially nice as a housewarming or hostess gift during the Christmas season.
Storage After Christmas
Don’t crush your garland into a small box.
Instead:
- Lay the bows flat.
- Fold the chain gently between them.
- Place the garland inside a shallow storage box.
- Keep heavy decorations off the top.
This helps the bows retain their shape for next year.
Frequently Asked Questions
Is this crochet bow garland beginner-friendly?
Yes. The pattern uses mostly chains, half double crochet, single crochet, and simple sewing.
Can I use leftover yarn?
Absolutely. This is an excellent scrap-yarn Christmas project.
How many bows are in the sample garland?
Seven.
Can I make fewer bows?
Yes. Make as many or as few as your decorating space requires.
Can I change the garland length?
Yes. Add or remove chains between bows and at both ends.
Can I make the bows larger?
Yes. Use thicker yarn or increase the main rectangle dimensions.
Can I use the bows individually?
Yes. They can become ornaments, gift toppers, wreath decorations, or stocking embellishments.
Do all the bows need to be the same color?
No. Mixing several coordinated colors creates a beautiful Christmas garland.
Final Thoughts
Sometimes the simplest handmade Christmas decorations are the most charming.
This crochet bow garland pattern uses basic stitches and small amounts of yarn to create festive bows that can completely transform a fireplace mantel, tree, staircase, shelf, or doorway.
Make seven matching red bows for a traditional look.
Combine forest green, cream, and cranberry for classic Christmas decor.
Or choose sage, dusty rose, and beige for a softer vintage-inspired palette.
Once you’ve made one bow, the rest are simple to repeat—and because the garland length is completely adjustable, you can customize it for almost any space.
Save this easy Christmas crochet bow garland pattern and start making your handmade holiday decorations before the Christmas rush begins!